Automate visual testing
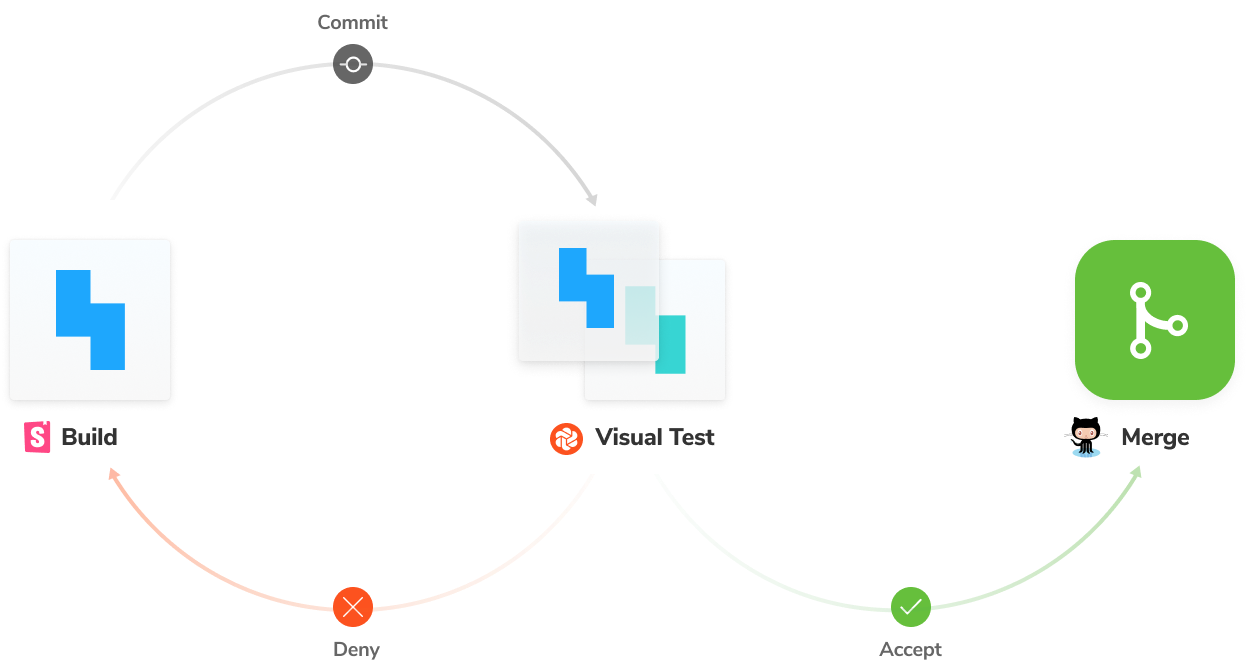
Over the natural course of development, bugs are inevitable. Visual test automation uses machines to detect changes in UI appearance for a human to review.
In a nutshell, an image snapshot is taken of every component variation. This serves as the visual test "baseline". With each commit, new snapshots are captured then compared pixel-by-pixel to the baselines. If there are UI changes, you get notified to review whether they're bugs or intentional updates.
Set up a repository in GitHub
Before we start, our local CommentList code needs to sync with a remote version control service.
Go to GitHub and create a new repository for the project here. Name the repo "commentlist", same as our local project.
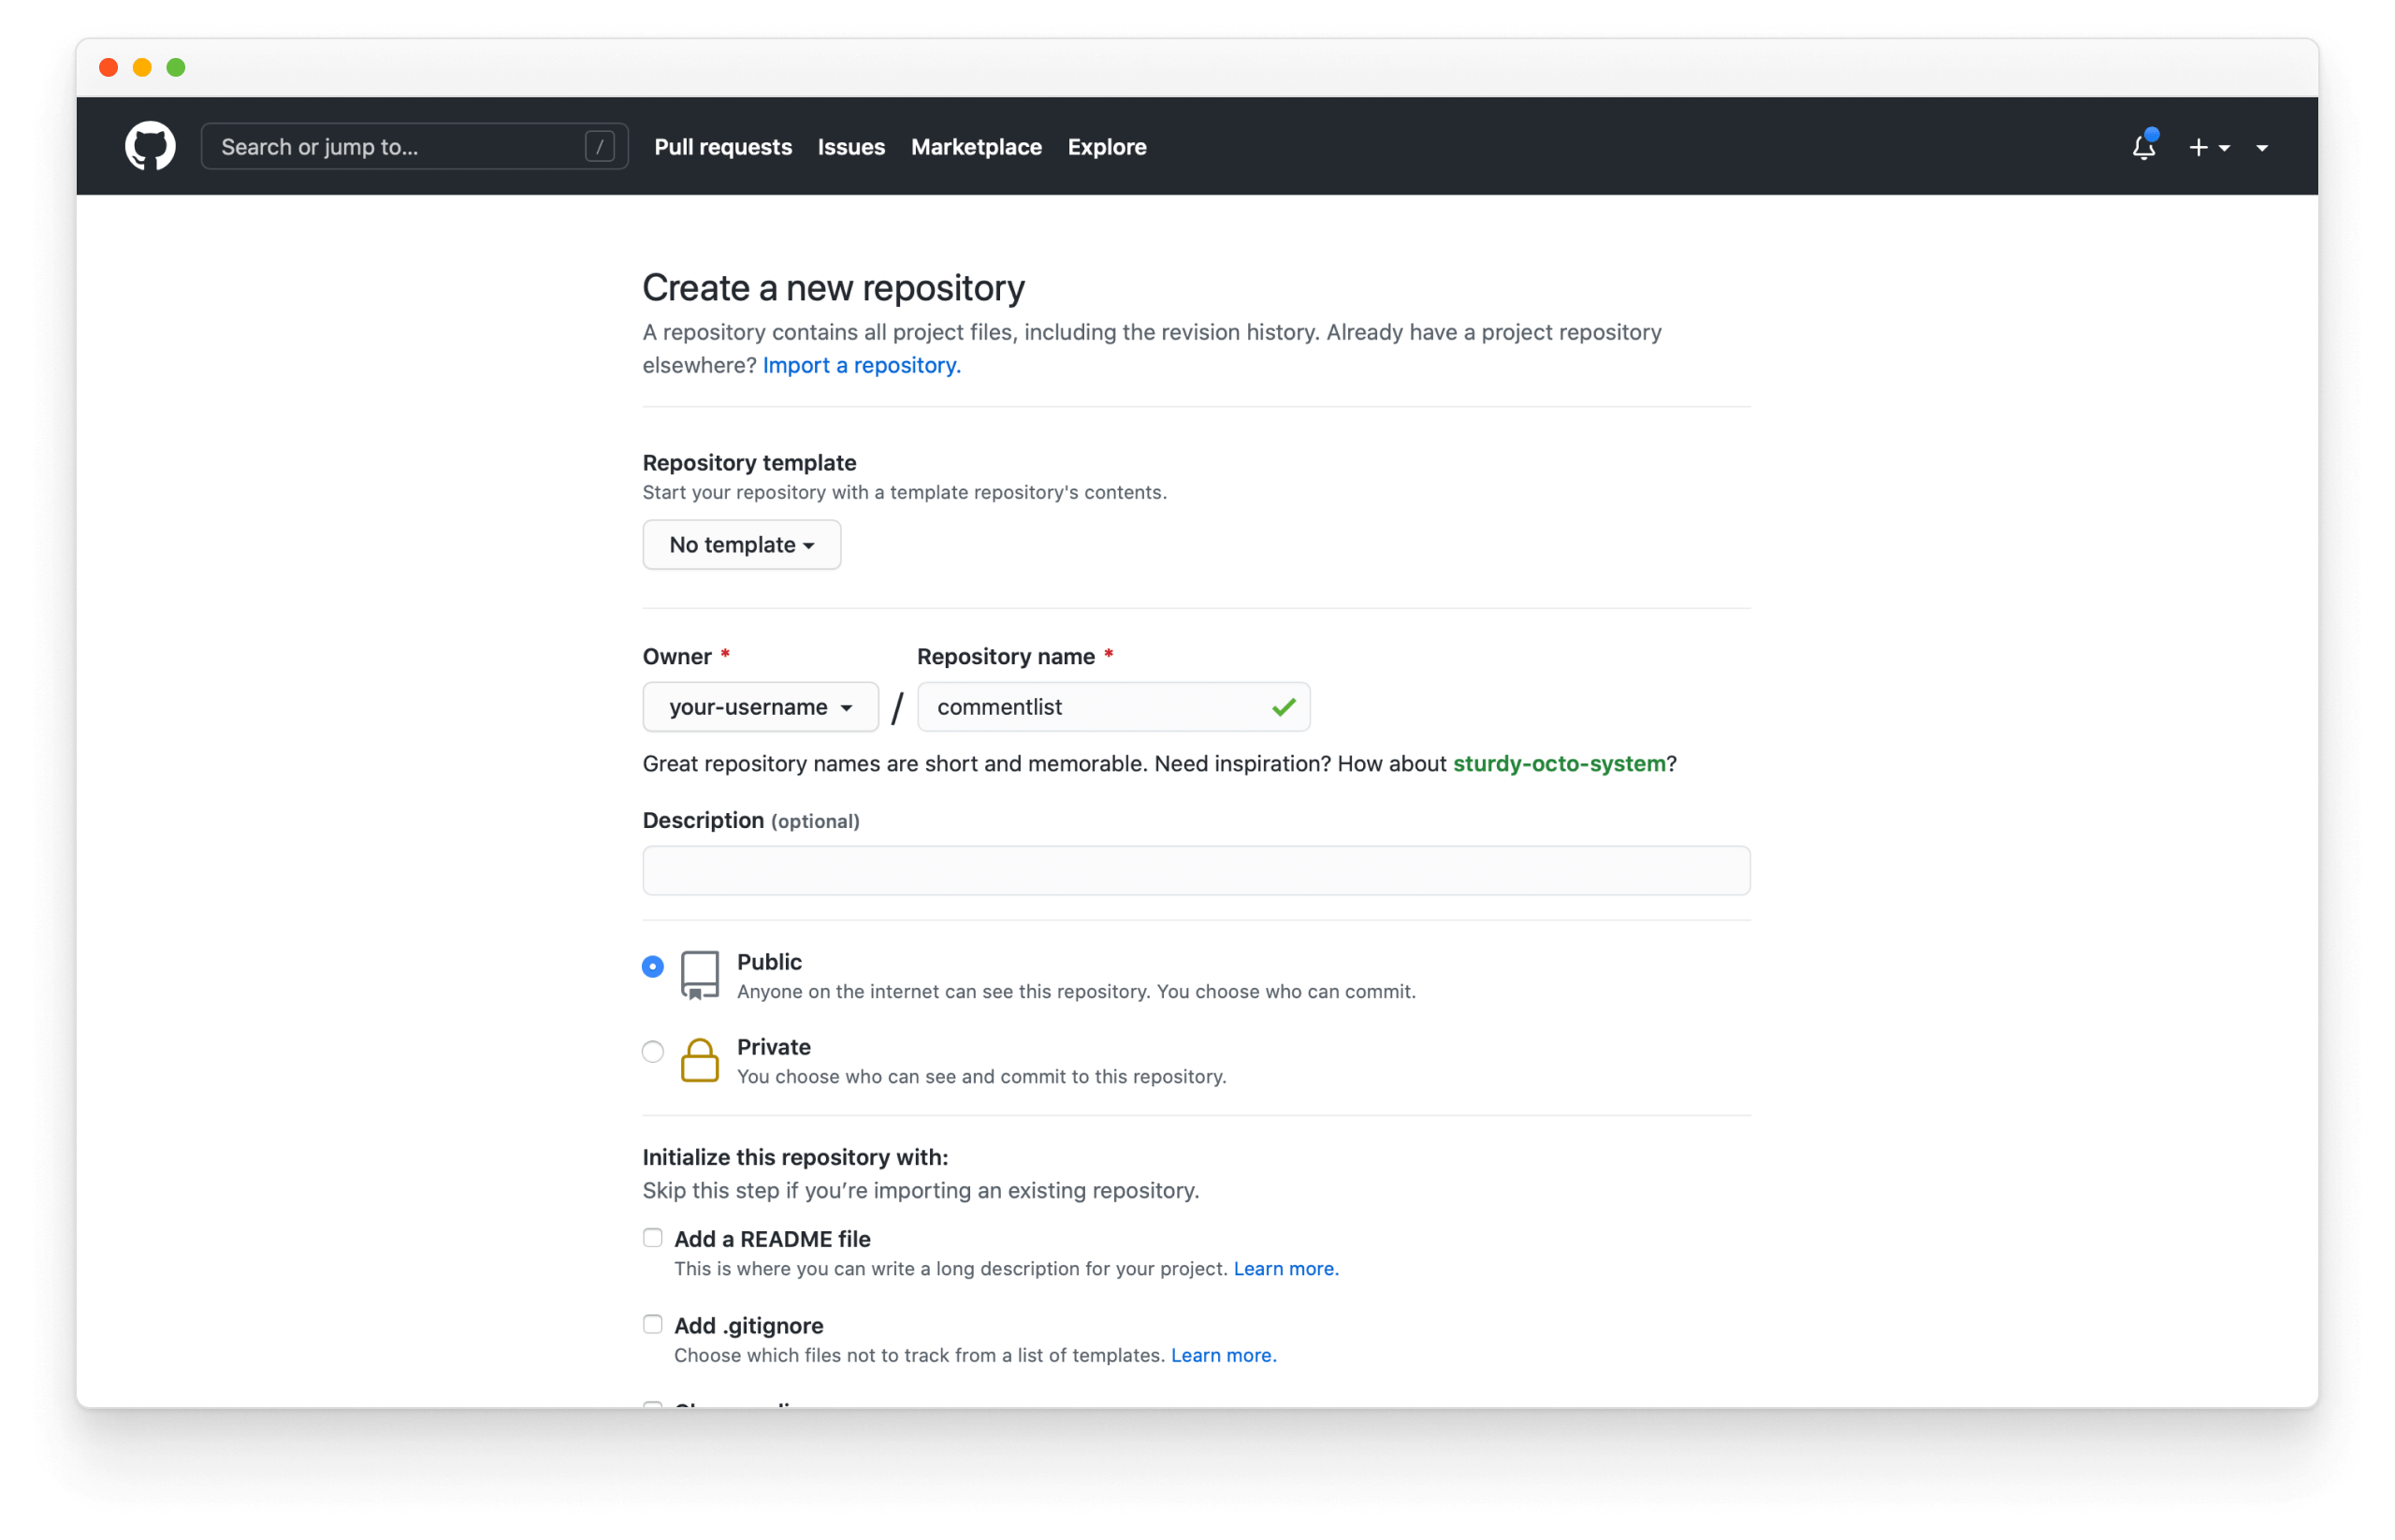
Then follow the instructions to set up the repository. Replace your-username with your GitHub account name.
git init
git add .
git commit -m "first commit"
git branch -M main
git remote add origin https://github.com/your-username/commentlist.git
git push -u origin main
Set up Chromatic
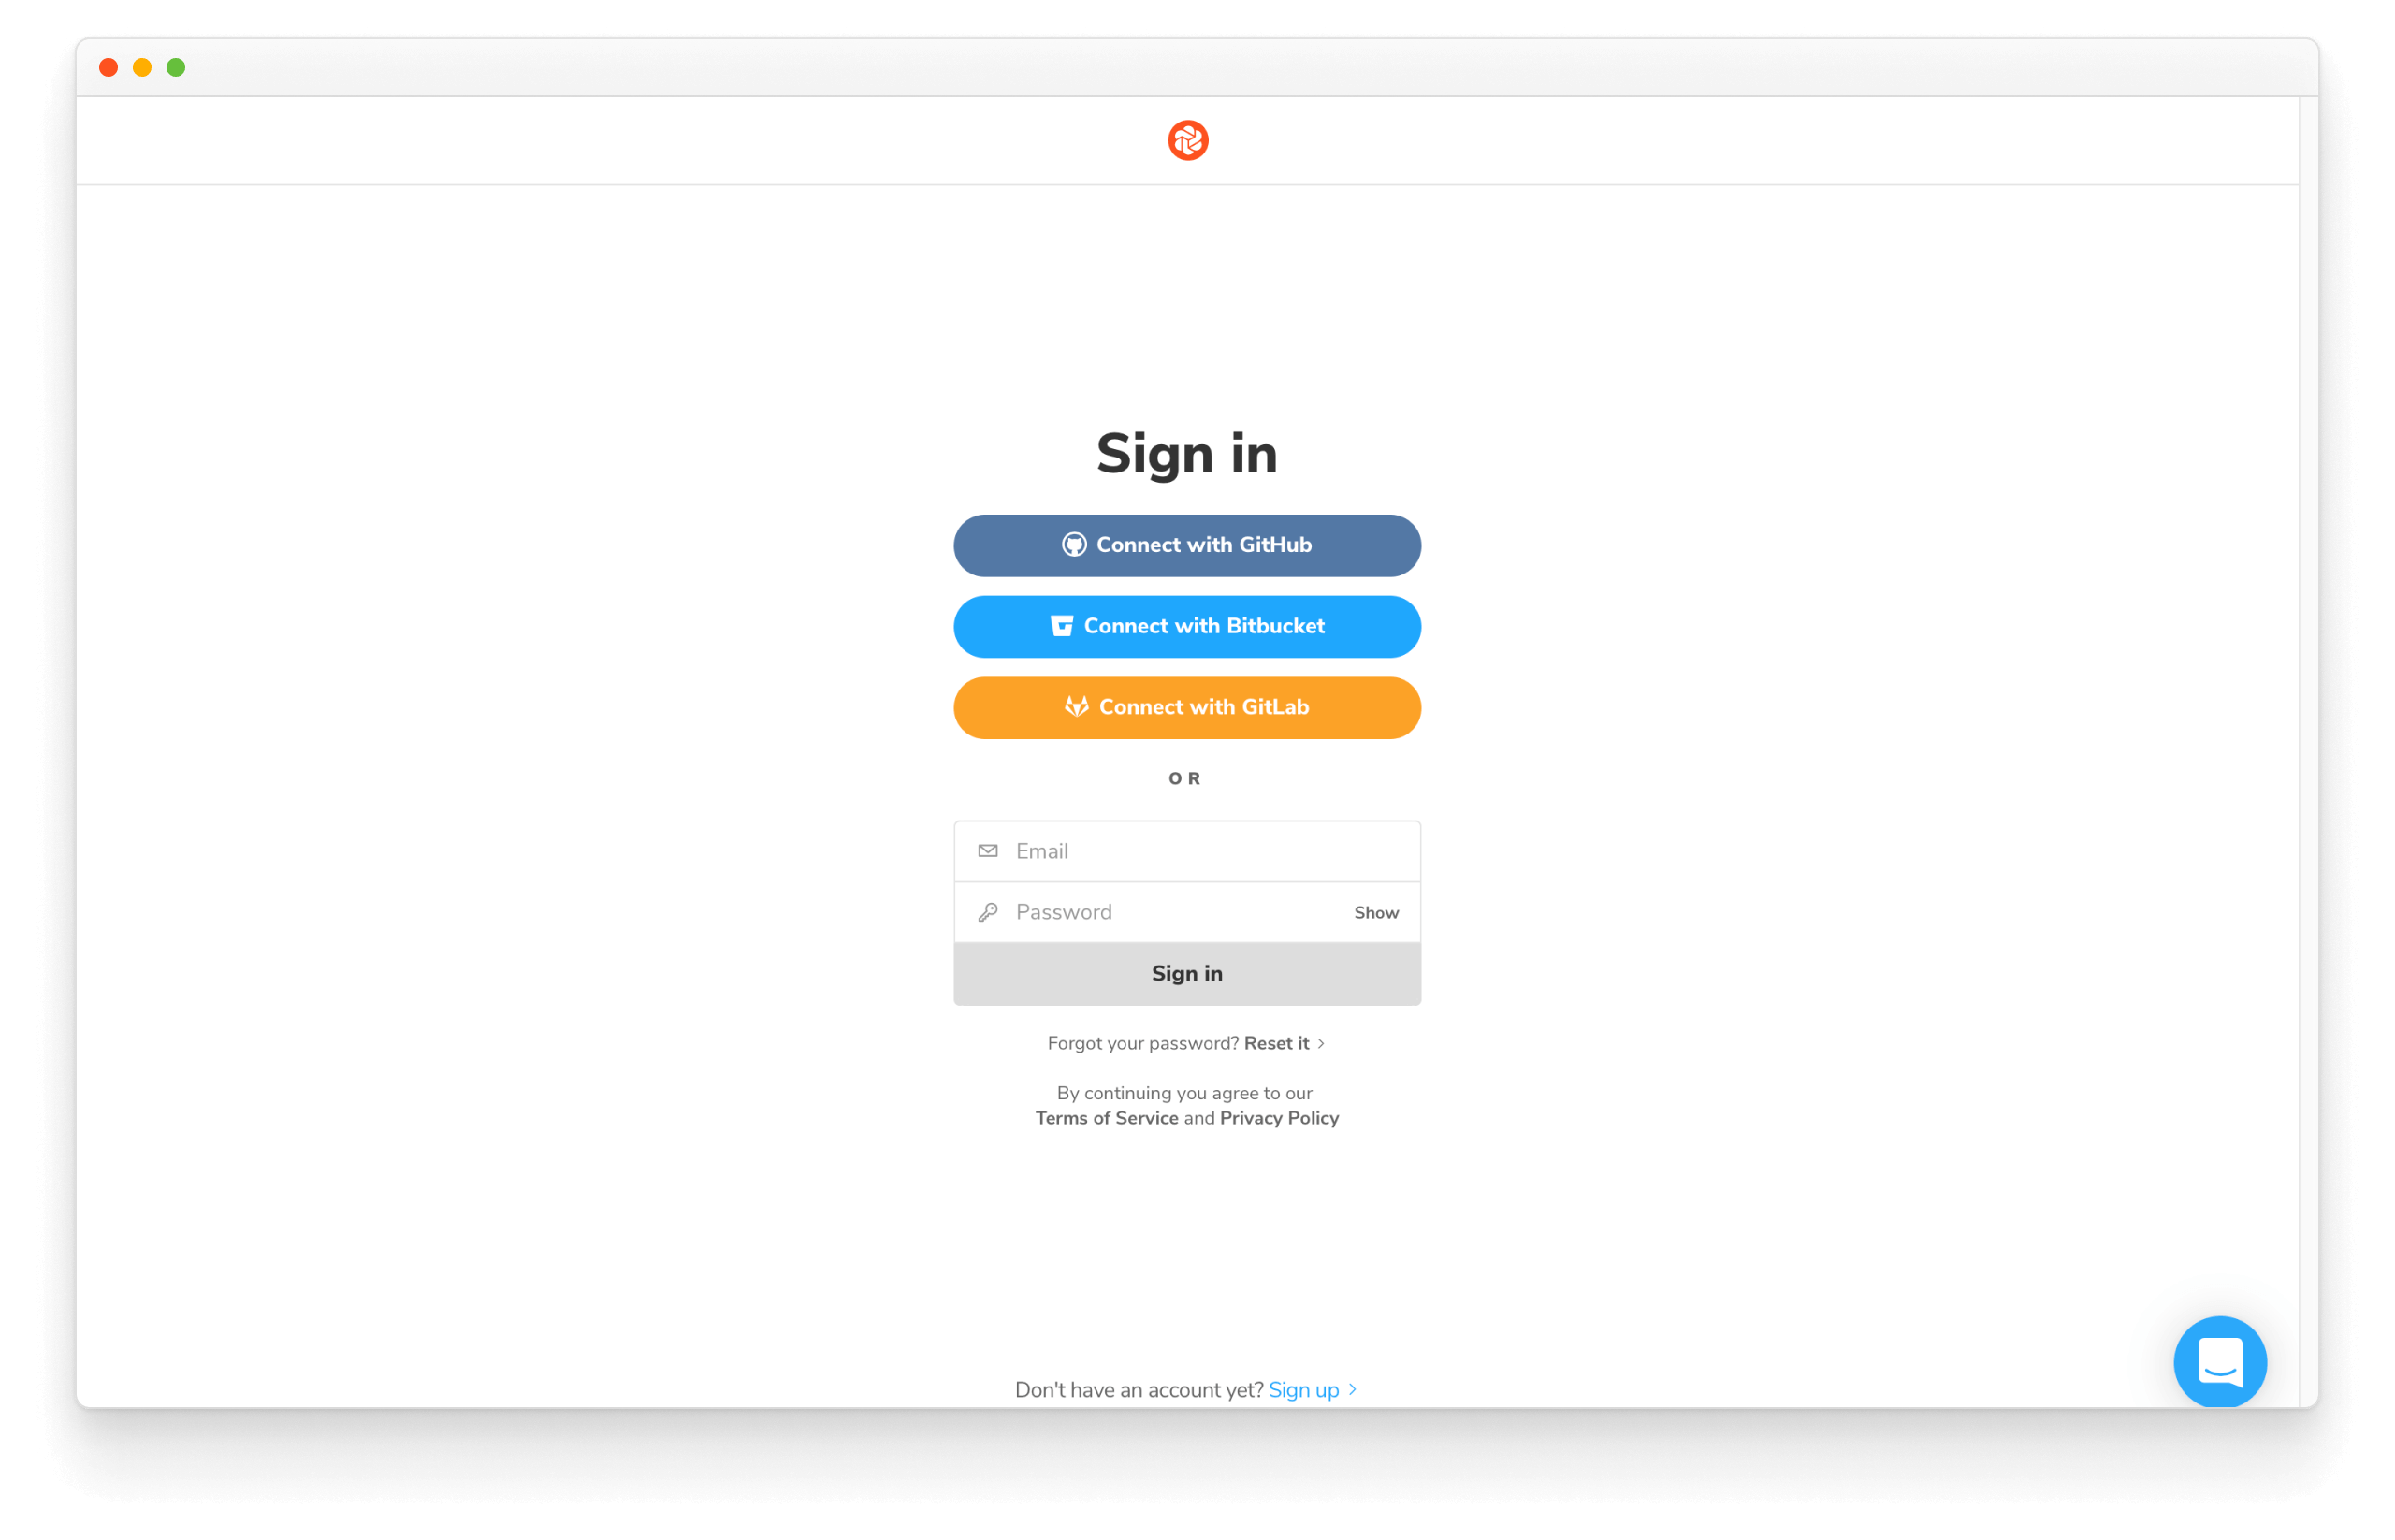
We'll use Chromatic by Storybook maintainers to demonstrate the image snapshotting process. Go to chromatic.com and signup with your GitHub account.
From there, choose the repository you've just created.
UI tests capture an image snapshot of every story in a cloud browser environment. Whenever you push code, Chromatic generates a new set of snapshots and compares them against baselines. If there are visual changes, you verify if they’re intentional.
Establish baselines
Add Chromatic as a development package to your project:
yarn add -D chromatic
Once it’s finished installing, we have all that we need. Now is an excellent time to commit and push the changes to the remote repository.
git add .
git commit -m "Added Chromatic"
git push
Build and publish our Storybook with the chromatic command. Don't forget to replace the project-token with one Chromatic supplies on the website.
yarn chromatic --project-token=<project-token>
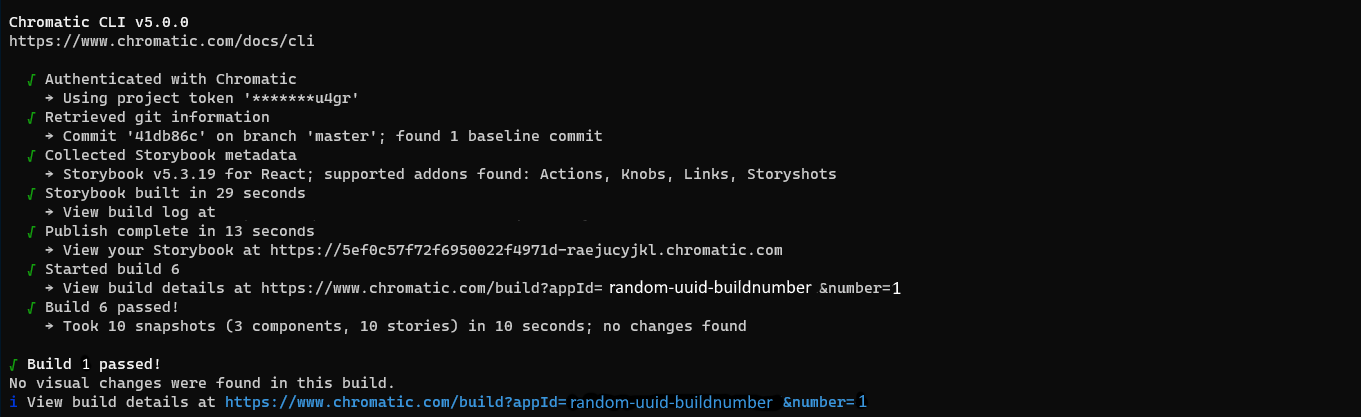
With this one command, you published your Storybook, triggered Chromatic to capture an image snapshot of each story (in a standardized cloud browser), and set the snapshot as the baseline.
Subsequent builds will generate new snapshots that are compared against existing baselines to detect UI changes.
Run tests
Every time a pull request contains UI changes, big or small, it's helpful to run the visual tests. Chromatic compares new snapshots to existing baselines from previous builds.
Let's make a small UI change to demonstrate this concept.
git checkout -b change-commentlist-outline
Tweak the CommentList component
import React from 'react';

import PropTypes from 'prop-types';
import styled, { createGlobalStyle } from 'styled-components';

const CommentListDiv = styled.div`
  font-family: "Nunito Sans", "Helvetica Neue", Helvetica, Arial, sans-serif;
  color: #333;
  display: inline-block;
  vertical-align: top;
  width: 265px;
`;

const CommentItemDiv = styled.div`
  font-size: 12px;
  line-height: 14px;
  clear: both;
  height: 48px;
  margin-bottom: 10px;
  box-shadow: rgba(0, 0, 0, 0.2) 0 0 10px 0;
  background: linear-gradient(
    120deg,
    rgba(248, 248, 254, 0.95),
    rgba(250, 250, 250, 0.95)
  );
  border-radius: 48px;
+ border: 4px solid red;
+ font-weight: bold;
`;

const AvatarDiv = styled.div`
  float: left;
  position: relative;
  overflow: hidden;
  height: 48px;
  width: 48px;
  margin-right: 14px;
  background: #dfecf2;
  border-radius: 48px;
`;

const AvatarImg = styled.img`
  position: absolute;
  height: 100%;
  width: 100%;
  left: 0;
  top: 0;
  z-index: 1;
  background: #999;
`;

const MessageDiv = styled.div`
  overflow: hidden;
  padding-top: 10px;
  padding-right: 20px;
`;

const AuthorSpan = styled.span`
  font-weight: bold;
`;
const TextSpan = styled.span``;

const GlobalStyle = createGlobalStyle`
@import url('https://fonts.googleapis.com/css?family=Nunito+Sans:400,400i,800');
`;

export default function CommentList({ loading, comments, totalCount }) {
  if (loading) {
    return <div>loading</div>;
  }
  if (comments.length === 0) {
    return <div>empty</div>;
  }
  return (
    <>
    <GlobalStyle/>
    <CommentListDiv>
      {comments.map(({ text, author: { name, avatar } }) => (
        <CommentItemDiv key={`comment_${name}`}>
          <AvatarDiv>
            <AvatarImg src={avatar} />
          </AvatarDiv>
          <MessageDiv>
            <AuthorSpan>{name}</AuthorSpan> <TextSpan>{text}</TextSpan>
          </MessageDiv>
        </CommentItemDiv>
      ))}
    </CommentListDiv>
    </>
  );
}

CommentList.propTypes = {
  /**
   * Is the component in the loading state
   */
  loading: PropTypes.bool,

  /**
   * Total number of comments
   */
  totalCount: PropTypes.number,
  /**
   * List of comments
   */
  comments: PropTypes.arrayOf(
    PropTypes.shape({
      text: PropTypes.string,
      author: PropTypes.shape({
        name: PropTypes.string,
        avatar: PropTypes.string,
      }),
    })
  ),
};

CommentList.defaultProps = {
  loading: false,
  totalCount: 10,
  comments: [],
};
Commit the change, push it to the repo and run Chromatic:
git commit -am "make CommentList sparkle"
git push -u origin change-commentlist-outline
yarn chromatic --project-token=<project-token>
Open a pull request for the new branch in your GitHub repository.
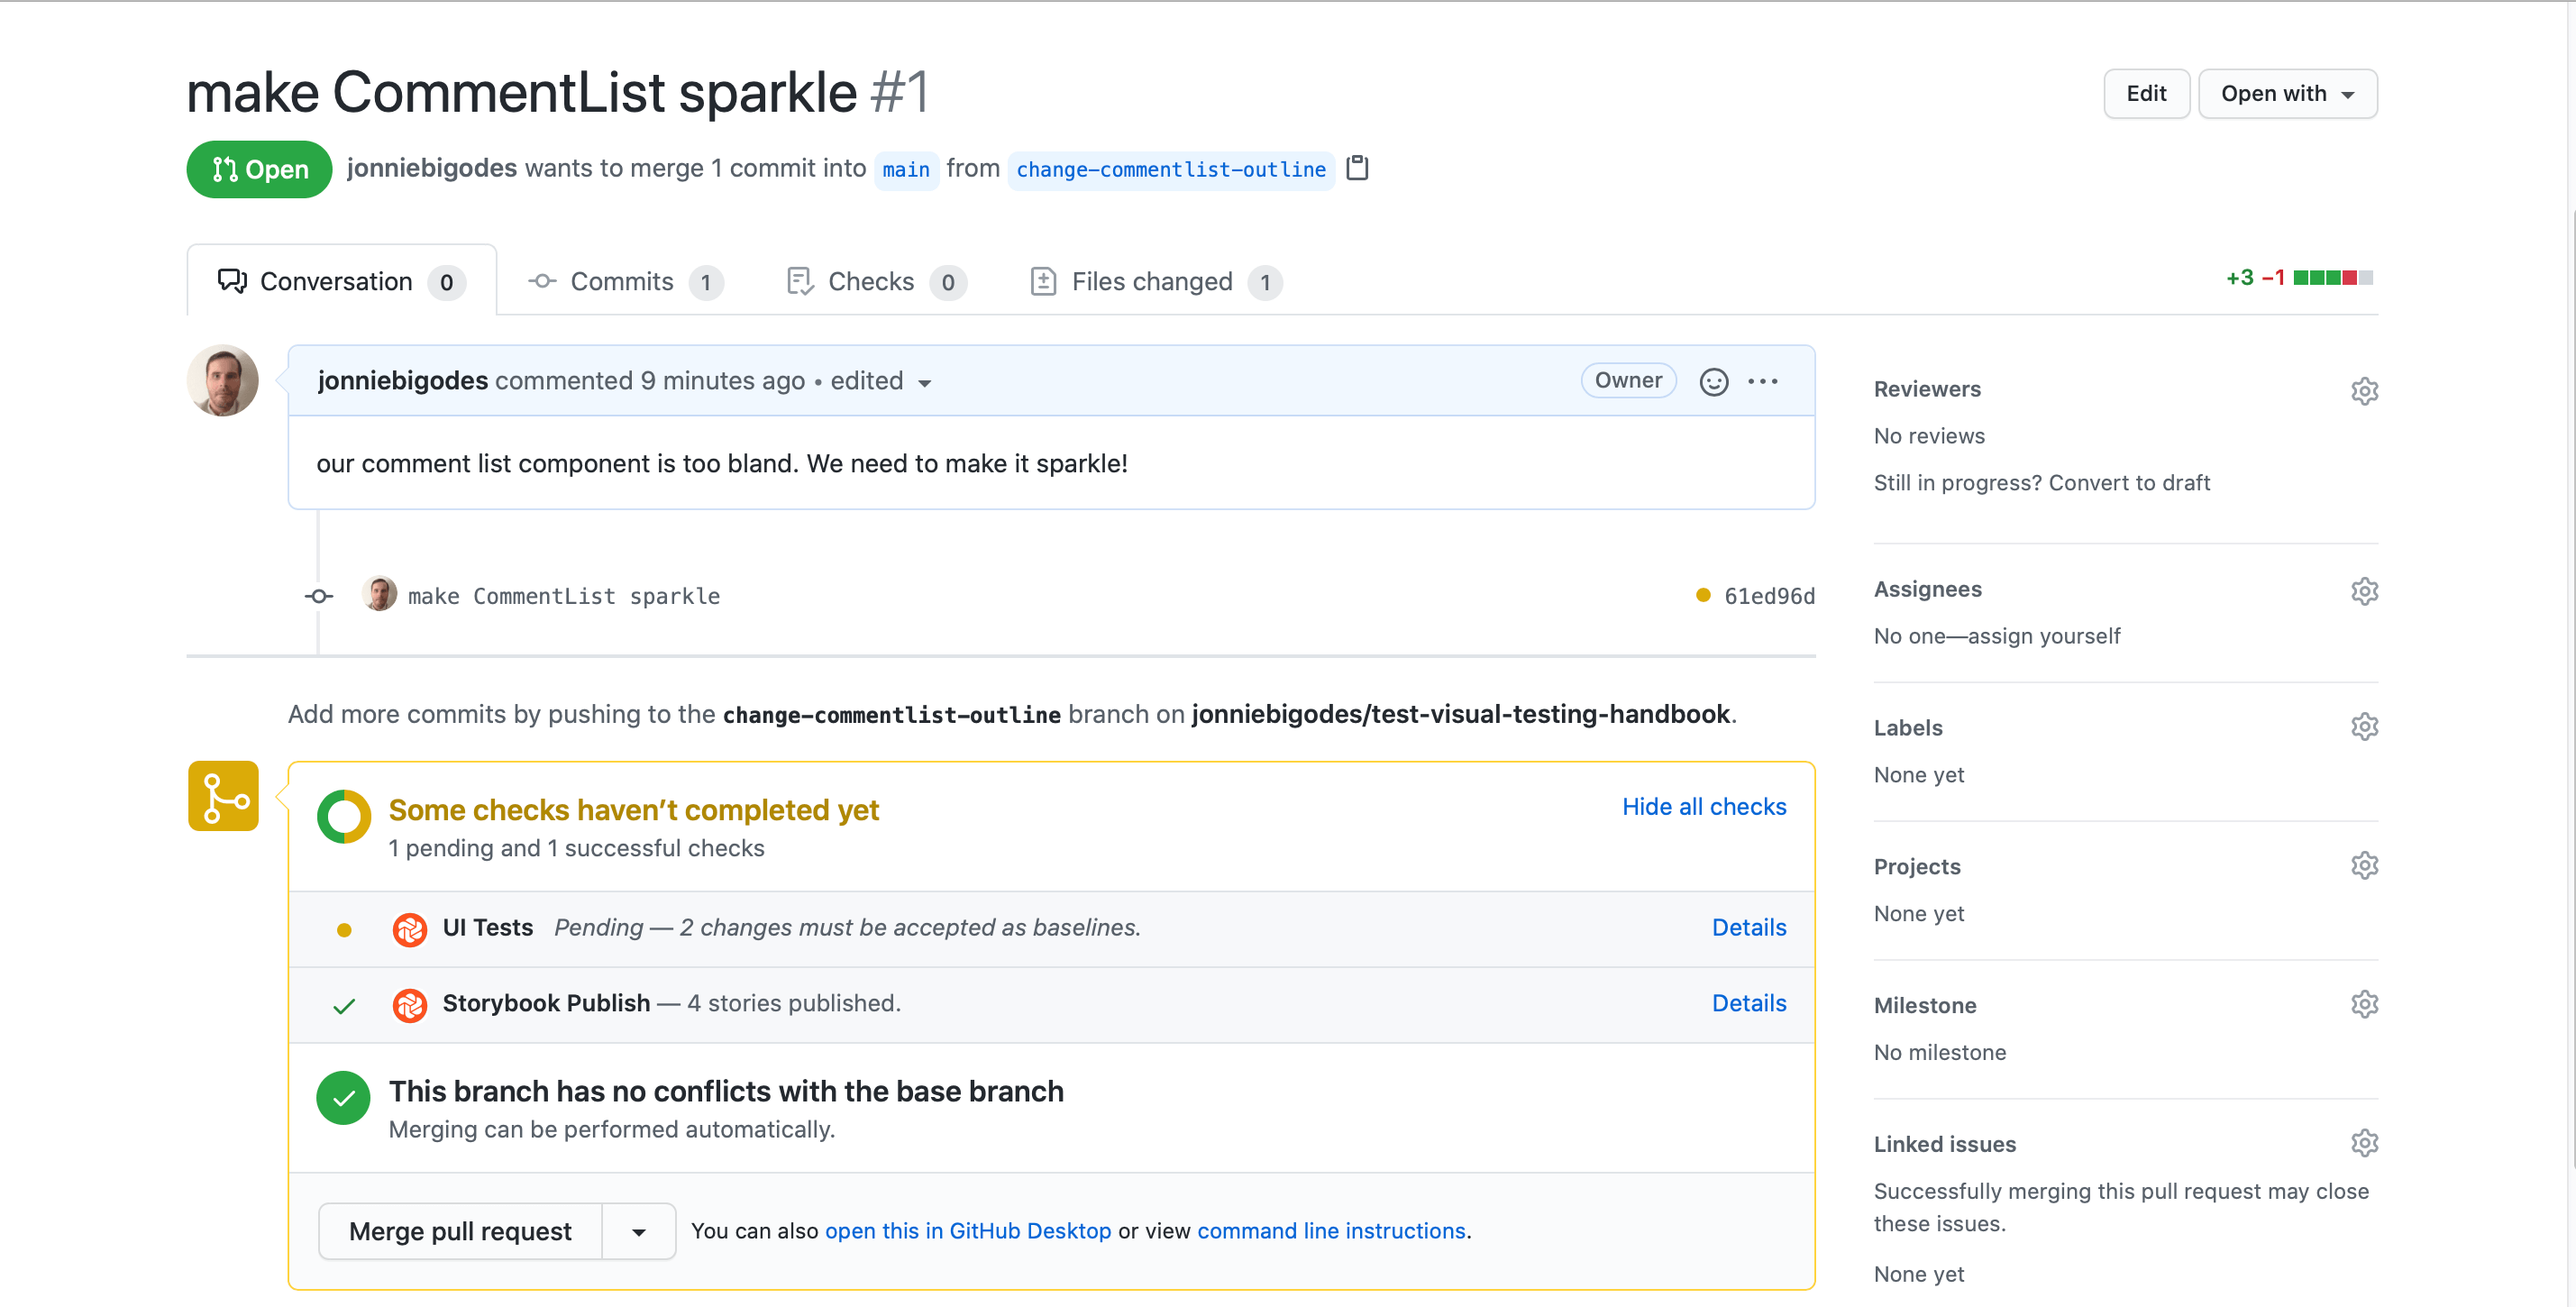
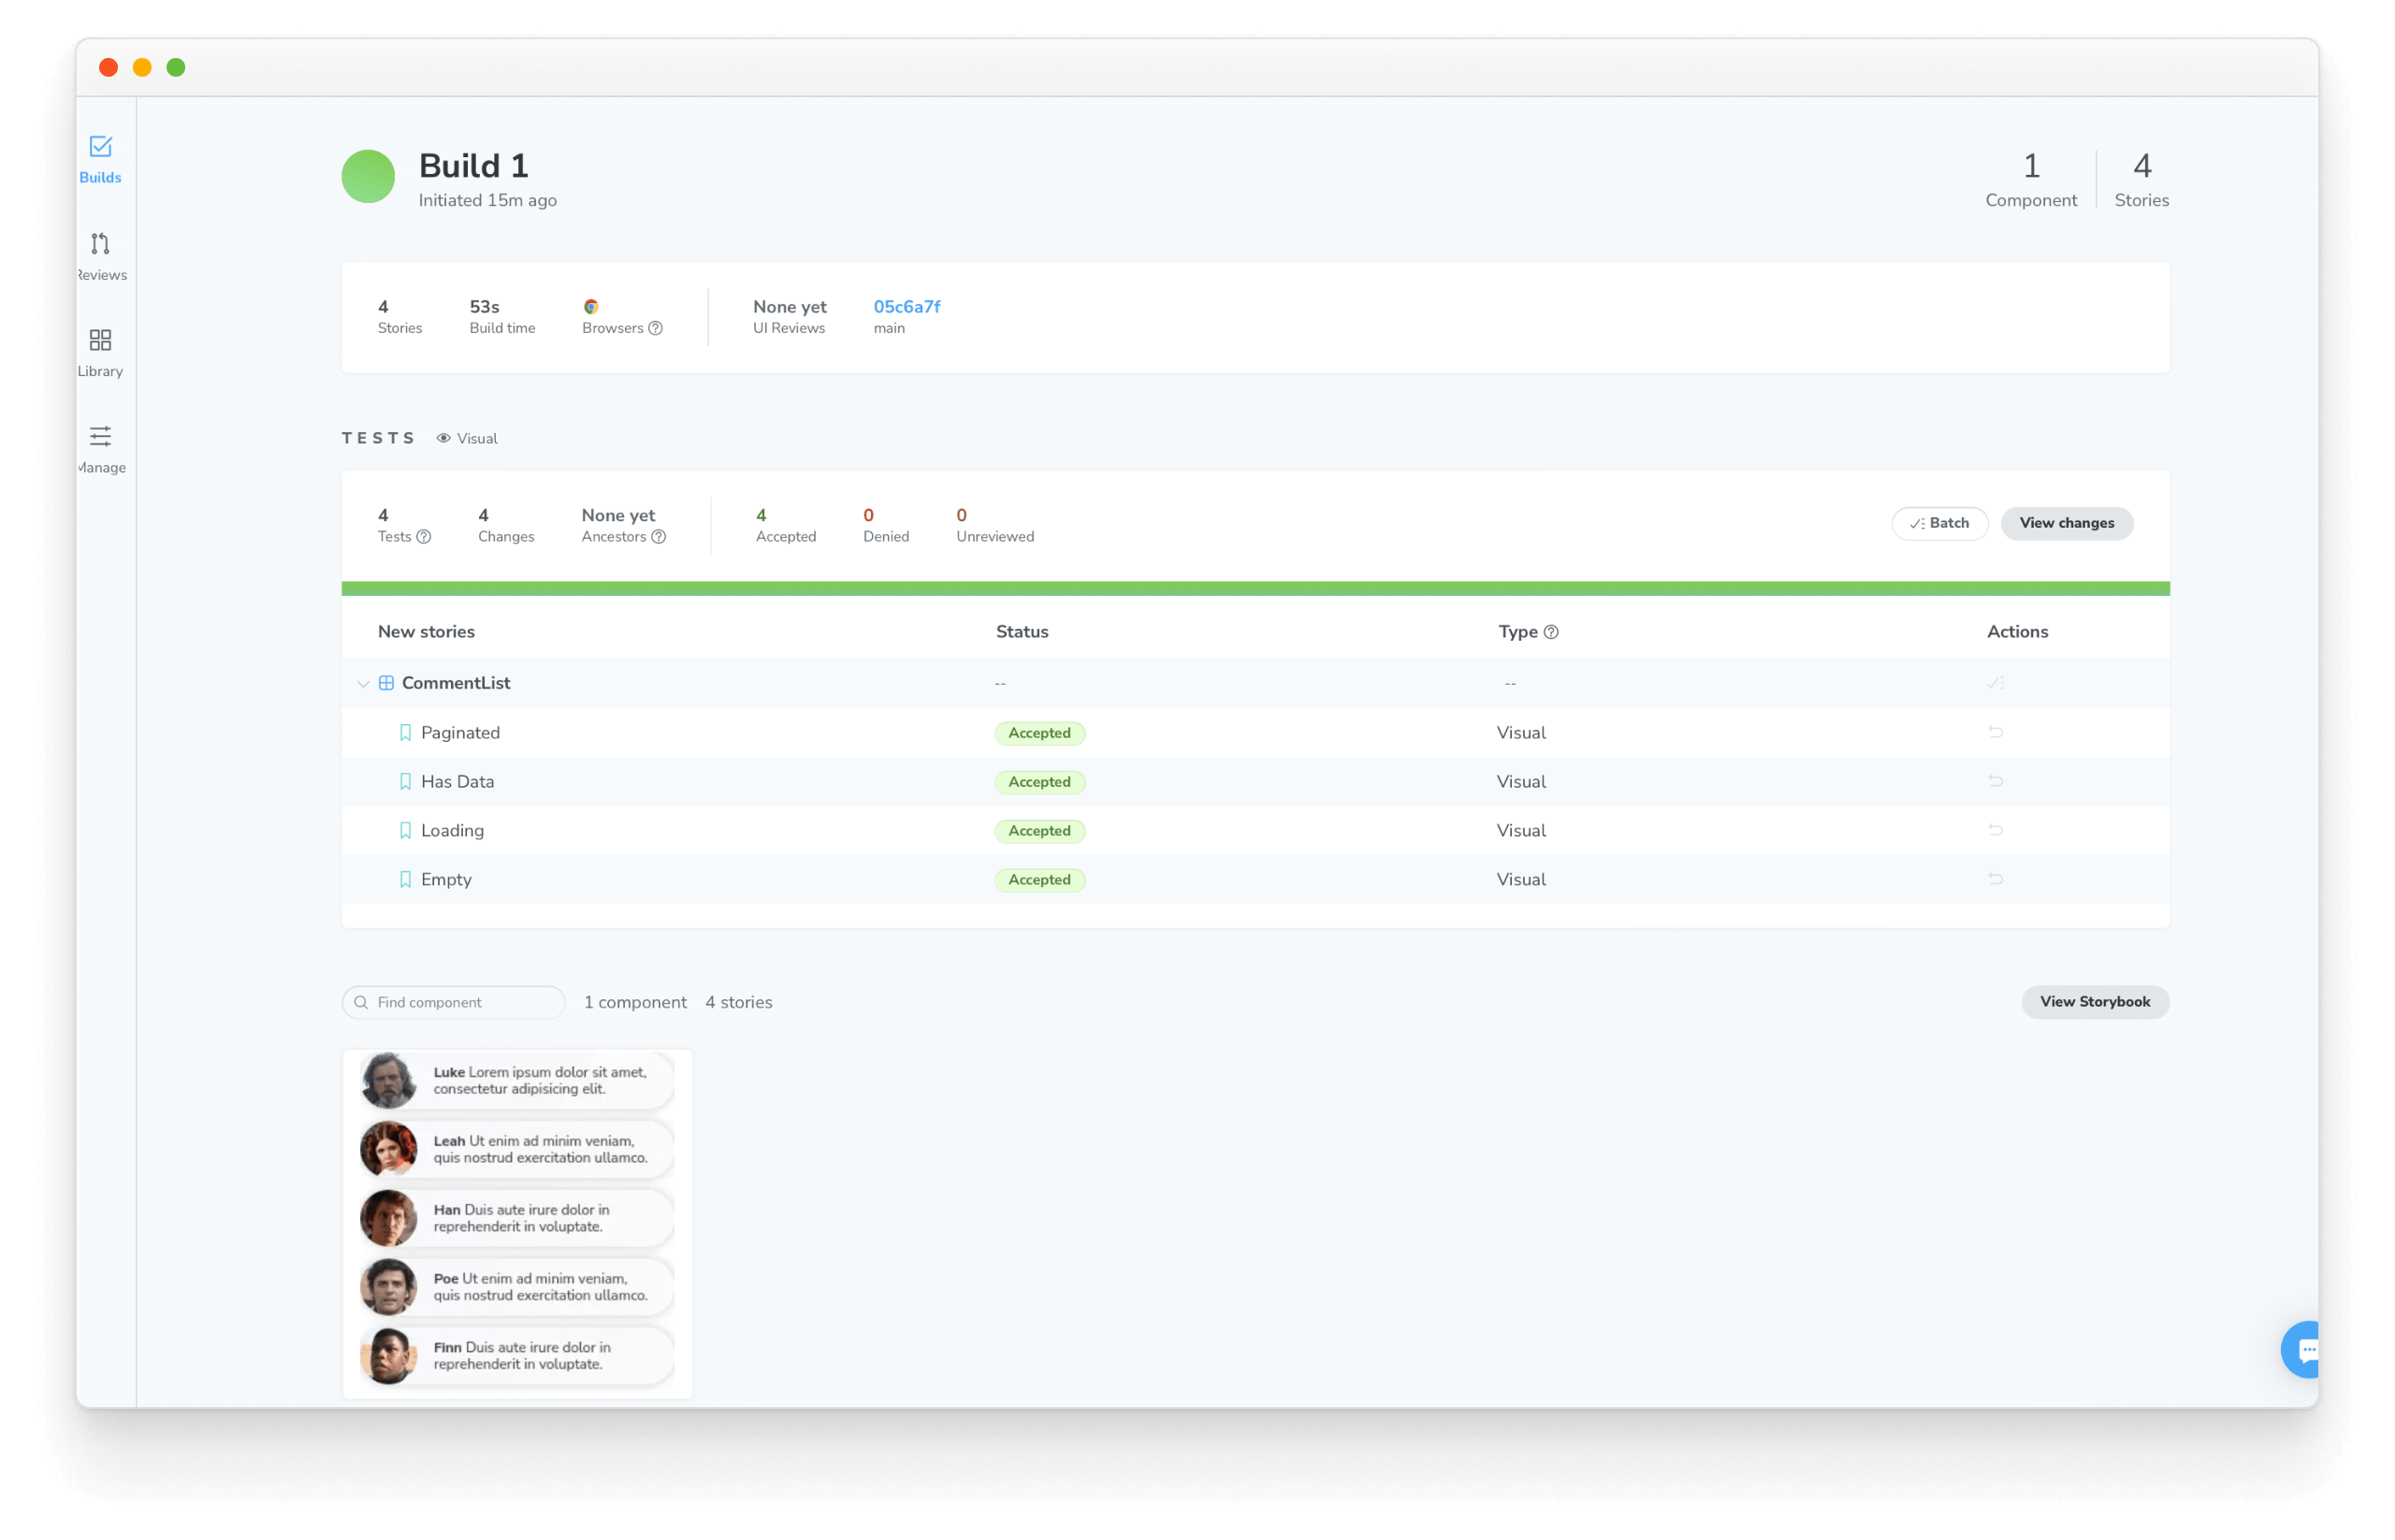
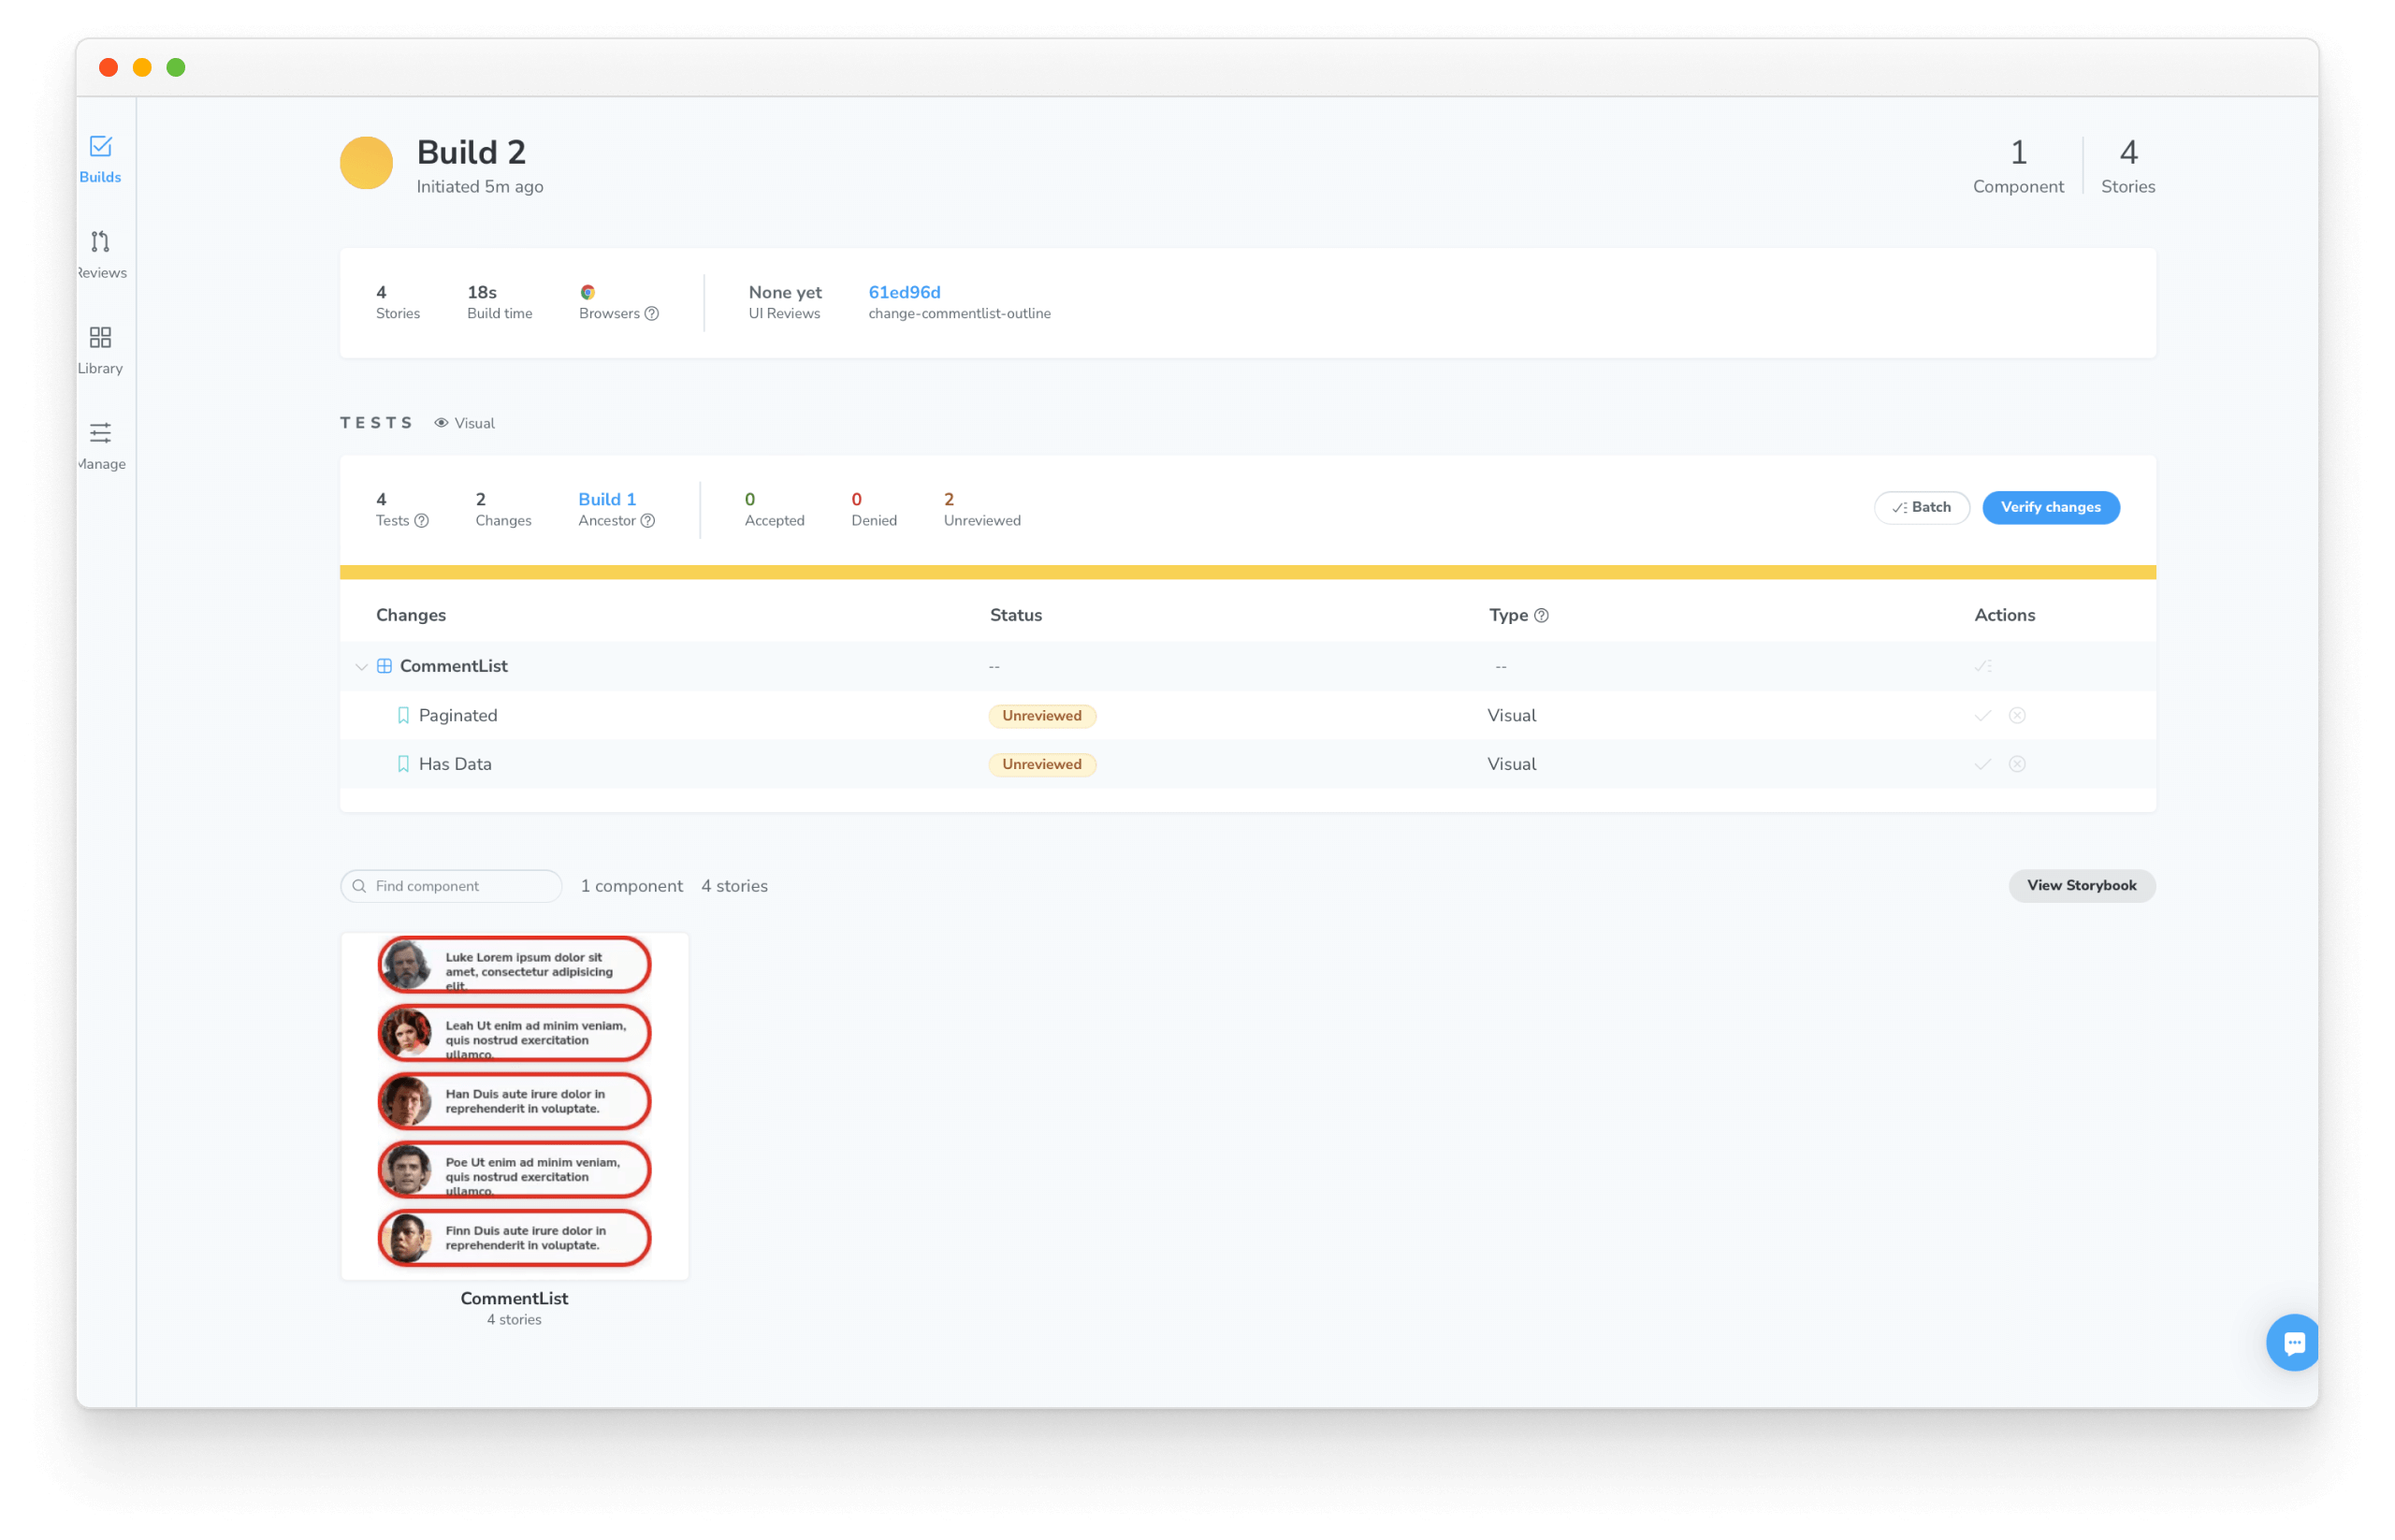
Chromatic detected UI changes for you to review! Go to the PR checks and click "🟡 UI Test" to see the list of changes. The build will be marked “unreviewed” and the changes listed in the “Tests” table.
Review changes
Automating visual testing ensures components don’t change by accident. But it’s still up to developers to determine whether changes are intentional or not.
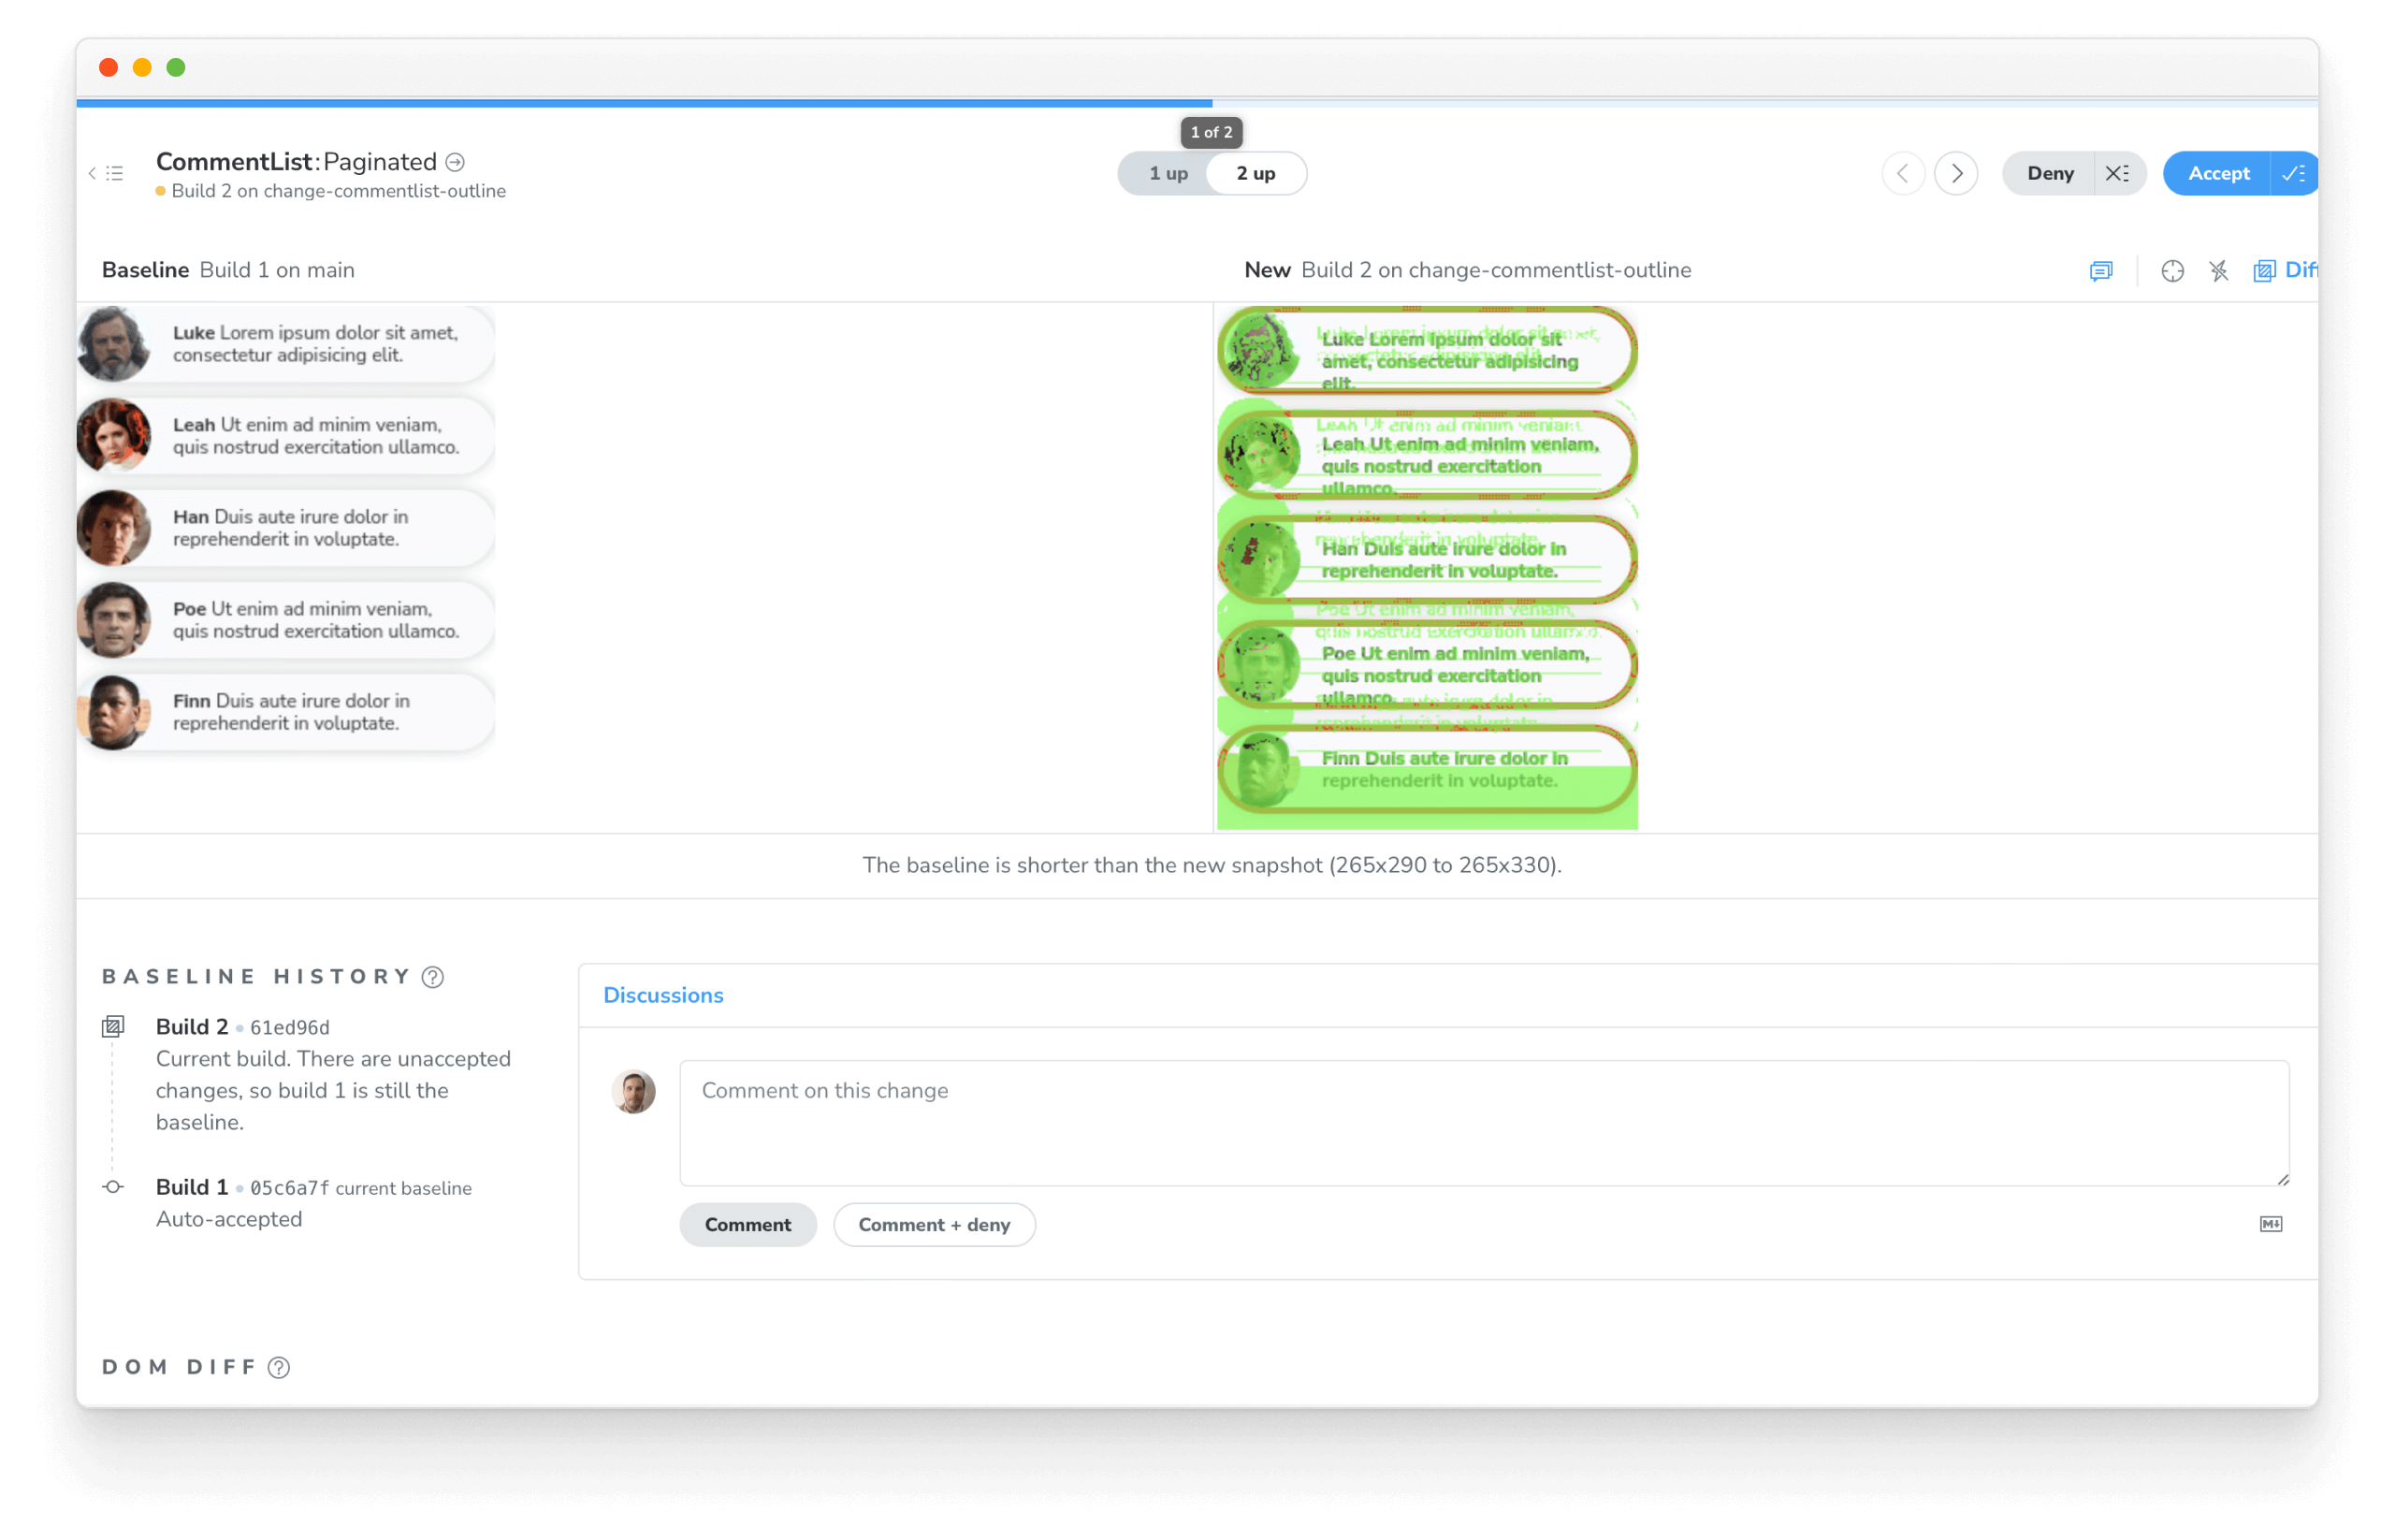
If a change is intentional, we accept the snapshot to update the baseline. That means future tests will be compared to the CommentList with red borders.
If a change is unintentional, it needs fixing. Our designer thinks the ✨majestic✨ red border is horrendous so let's undo it.
Merge changes
Once bugs are fixed and baselines are up to date, you're ready to merge code back into the target branch. Chromatic will transfer any accepted baselines between branches so that you only need to accept baselines once.
Continuous integration
Running this command locally each time we make a change is tiresome. Productions teams trigger visual test runs when code is pushed in their CI/CD pipeline. While we won't set that up in this tutorial, you can learn more in Chromatic's CI docs.
Your journey begins
Visual Testing Handbook showcases the how leading frontend teams test UI appearance. It's a practical way to verify that UI matches the intended design and remains bug free over time.
We hope this guide inspires your own visual test strategy. The final chapter concludes with the complete sample code and helpful resources.