Interaction Testing with Storybook
You write stories, Storybook runs tests

Storybook is the industry-standard tool for building component-driven user interfaces. It enables you to capture component use cases as stories and render them in a browser. During development, you can quickly cycle through them to verify UI appearance.
But there's more to a component than just looks. Teams at Target, Adobe, and Shopify import stories in their tests to verify component behavior. Now, that workflow is built right into Storybook!
I'm excited to announce the beta of Storybook Interaction Testing! You can script interactions and check expectations in the story itself.
Interaction Testing combines the power of play functions (introduced in Storybook 6.4) with a new test runner and assertion library. These tests run in a live browser and can be executed via the command line or your CI server.
- ✅ Test interactions while developing
- 🐛 Debug tests interactively in a live browser
- ⚡️ Run tests in parallel via command line
- 🎭 Powered by Jest, Playwright, and Testing Library
- 👀 Watch mode, filters, and the ergonomics you'd expect
- 🛠 Customizable API with fully-configurable "eject" mode
The big picture
Automated testing is table stakes for serious software projects. Modern testing tools like Jest provide convenient ways to write and run large unit test suites against a codebase.
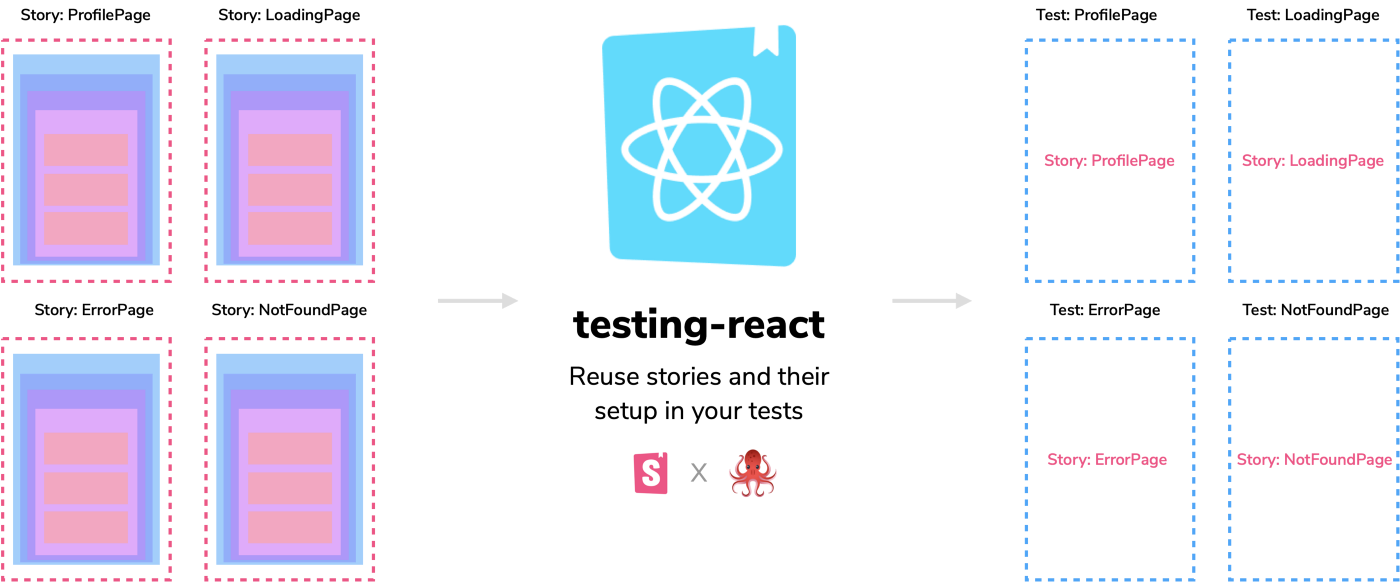
The first step to testing a component is isolating it from external concerns and supplying mock data to render it in a given state. This is exactly what you do with stories.
Teams already write thousands of stories, so last year we made it easy to import them into Jest. Developers flocked to this testing mode because they could reuse stories as test cases and simplify their setup. The workflow is magical, we intend to continue developing and supporting it.
What if you could run UI tests in Storybook itself?
Jest and tools like it are excellent for running generalized tests. But these tests run in Node using JSDOM. That means you have to debug broken tests by inspecting blobs of HTML. You end up spending more time looking at the DOM output than the actual component as your users see it.
Furthermore, splitting code across two files (test case in the story file and actions & assertions in the test file) means more moving parts.
Storybook interaction testing streamlines your workflow by allowing you to write tests in the story file itself. The tests execute in the browser, and you get a GUI to visualize and debug them.
Storybook for UI testing
Interactive stories were the first step towards testing UIs in Storybook. It made it possible to model user interaction—click, drag, tap, type, etc.—in Storybook. Users could add a play function to their stories, which runs after a story is rendered.
Script interactions and assertions with play function
With play functions, you can write tests alongside your stories. The interactions are written using a Storybook-instrumented version of Testing Library. Now you can layer on assertions using Jest. For example:
// AccountForm.stories.js
import { within, userEvent } from '@storybook/testing-library';
import { expect } from '@storybook/jest';
import { AccountForm } from './AccountForm';

export default { component: AccountForm };

export const VerificationSuccess = {
  args: { passwordVerification: true },
  play: async ({ canvasElement }) => {
    const canvas = within(canvasElement);
    await userEvent.type(canvas.getByTestId('email'), 'michael@chromatic.com');
    await userEvent.type(canvas.getByTestId('password1'), 'k32904n£#1kjad');
    await userEvent.type(canvas.getByTestId('password2'), 'k32904n£#1kjad');
    await userEvent.click(canvas.getByTestId('submit'));
    await expect(canvas.getByText('Everything is perfect. Your account is ready and we should probably get you started!')).toBeInTheDocument();
  },
};
Debug with playback controls
The Storybook Interactions addon helps you visualize and debug these tests in the browser. You get playback controls to step through the interactions. If a test fails, you can inspect the UI using the browser dev tools. Being able to see and examine the UI makes debugging a breeze.
The play function and interactions addon makes it possible to build and test components in the same tool.
Execute tests with test runner
Test runner is the last chapter of the story. It’s a utility that runs play functions across your entire Storybook and catches broken stories.
Bugs are inevitable. Often changes in one component can unintentionally break others. It's unrealistic to manually go through the entire Storybook whenever you make a change. The test runner verifies that stories are rendering correctly (even those without a play function) and that assertions are passing.
Click to debug
One of the test runner’s key workflows is click-to-debug, which allows you to browse a failing test in Storybook.
When a text-based testing tool fails a UI test in CI, it's painful to parse the resulting mass of text to figure out what went wrong.
End-to-end testing tools like Cypress take this further by recording a video of what went wrong. While this is an improvement over text-based debugging, it’s no substitute for being able to inspect your actual UI to see exactly what went wrong. We're enabling an in-browser debugging workflow with Storybook!
Consider the following failing test in CI:
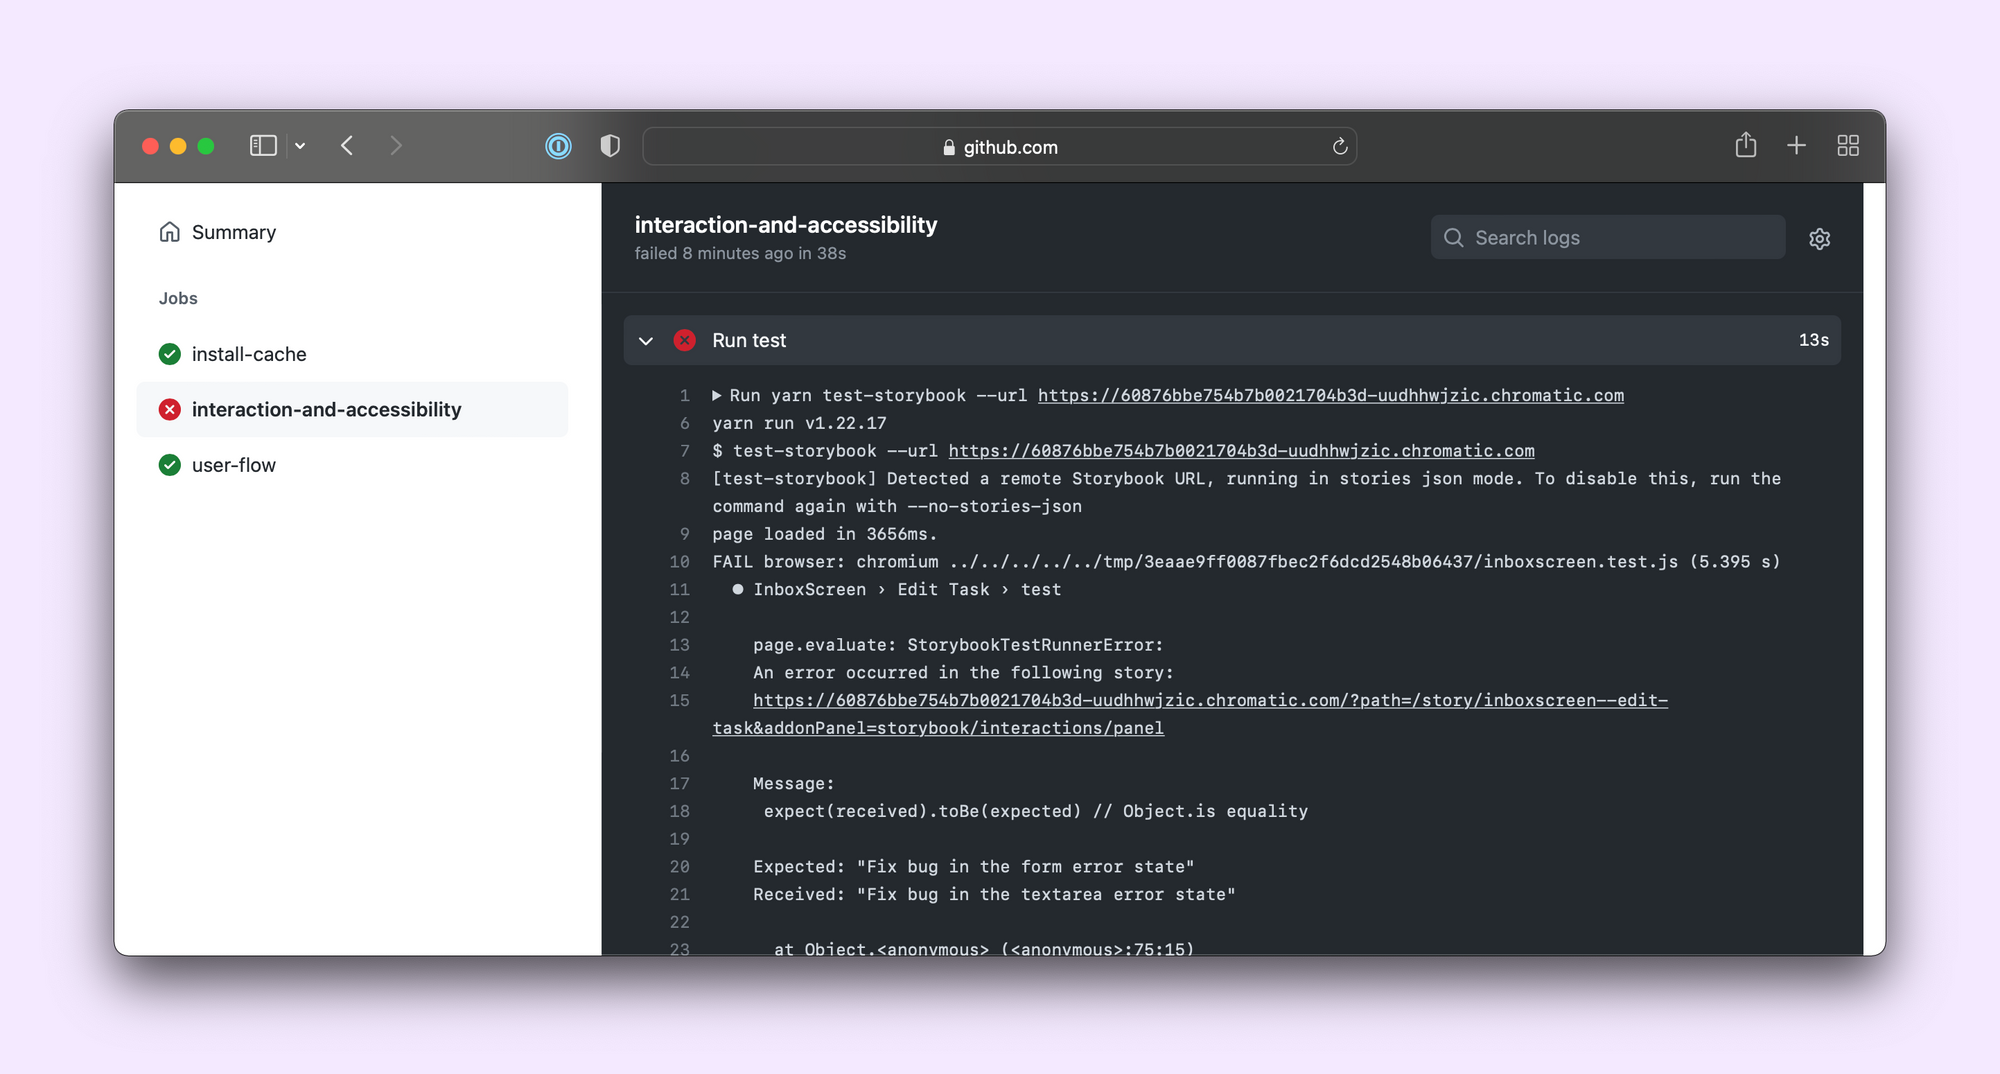
Clicking on the link brings you to the failing story on your published Storybook, with the interactions addon selected. You can even step through the failing story to find the root cause (if using Storybook 6.5, you'll need to enable that feature).
Interaction test example
Let’s walk through the setup and testing workflow with our example Taskbox app. It displays a list of tasks that the user can pin, archive, and edit.
Start by installing the test runner and related packages. It’s zero-config and requires Storybook 6.4 or above.
npm install -D @storybook/addon-interactions @storybook/testing-library @storybook/jest jest @storybook/test-runner
Then add a test task to your project’s package.json:
{
  "scripts": {
    "test-storybook": "test-storybook"
  }
}
Optionally, enable playback controls in the interactions addon:
// .storybook/main.js
module.exports = {
  features: {
    interactionsDebugger: true,
  },
};
Then start your Storybook:
npm run storybook
Lastly, start the test runner:
npm run test-storybook
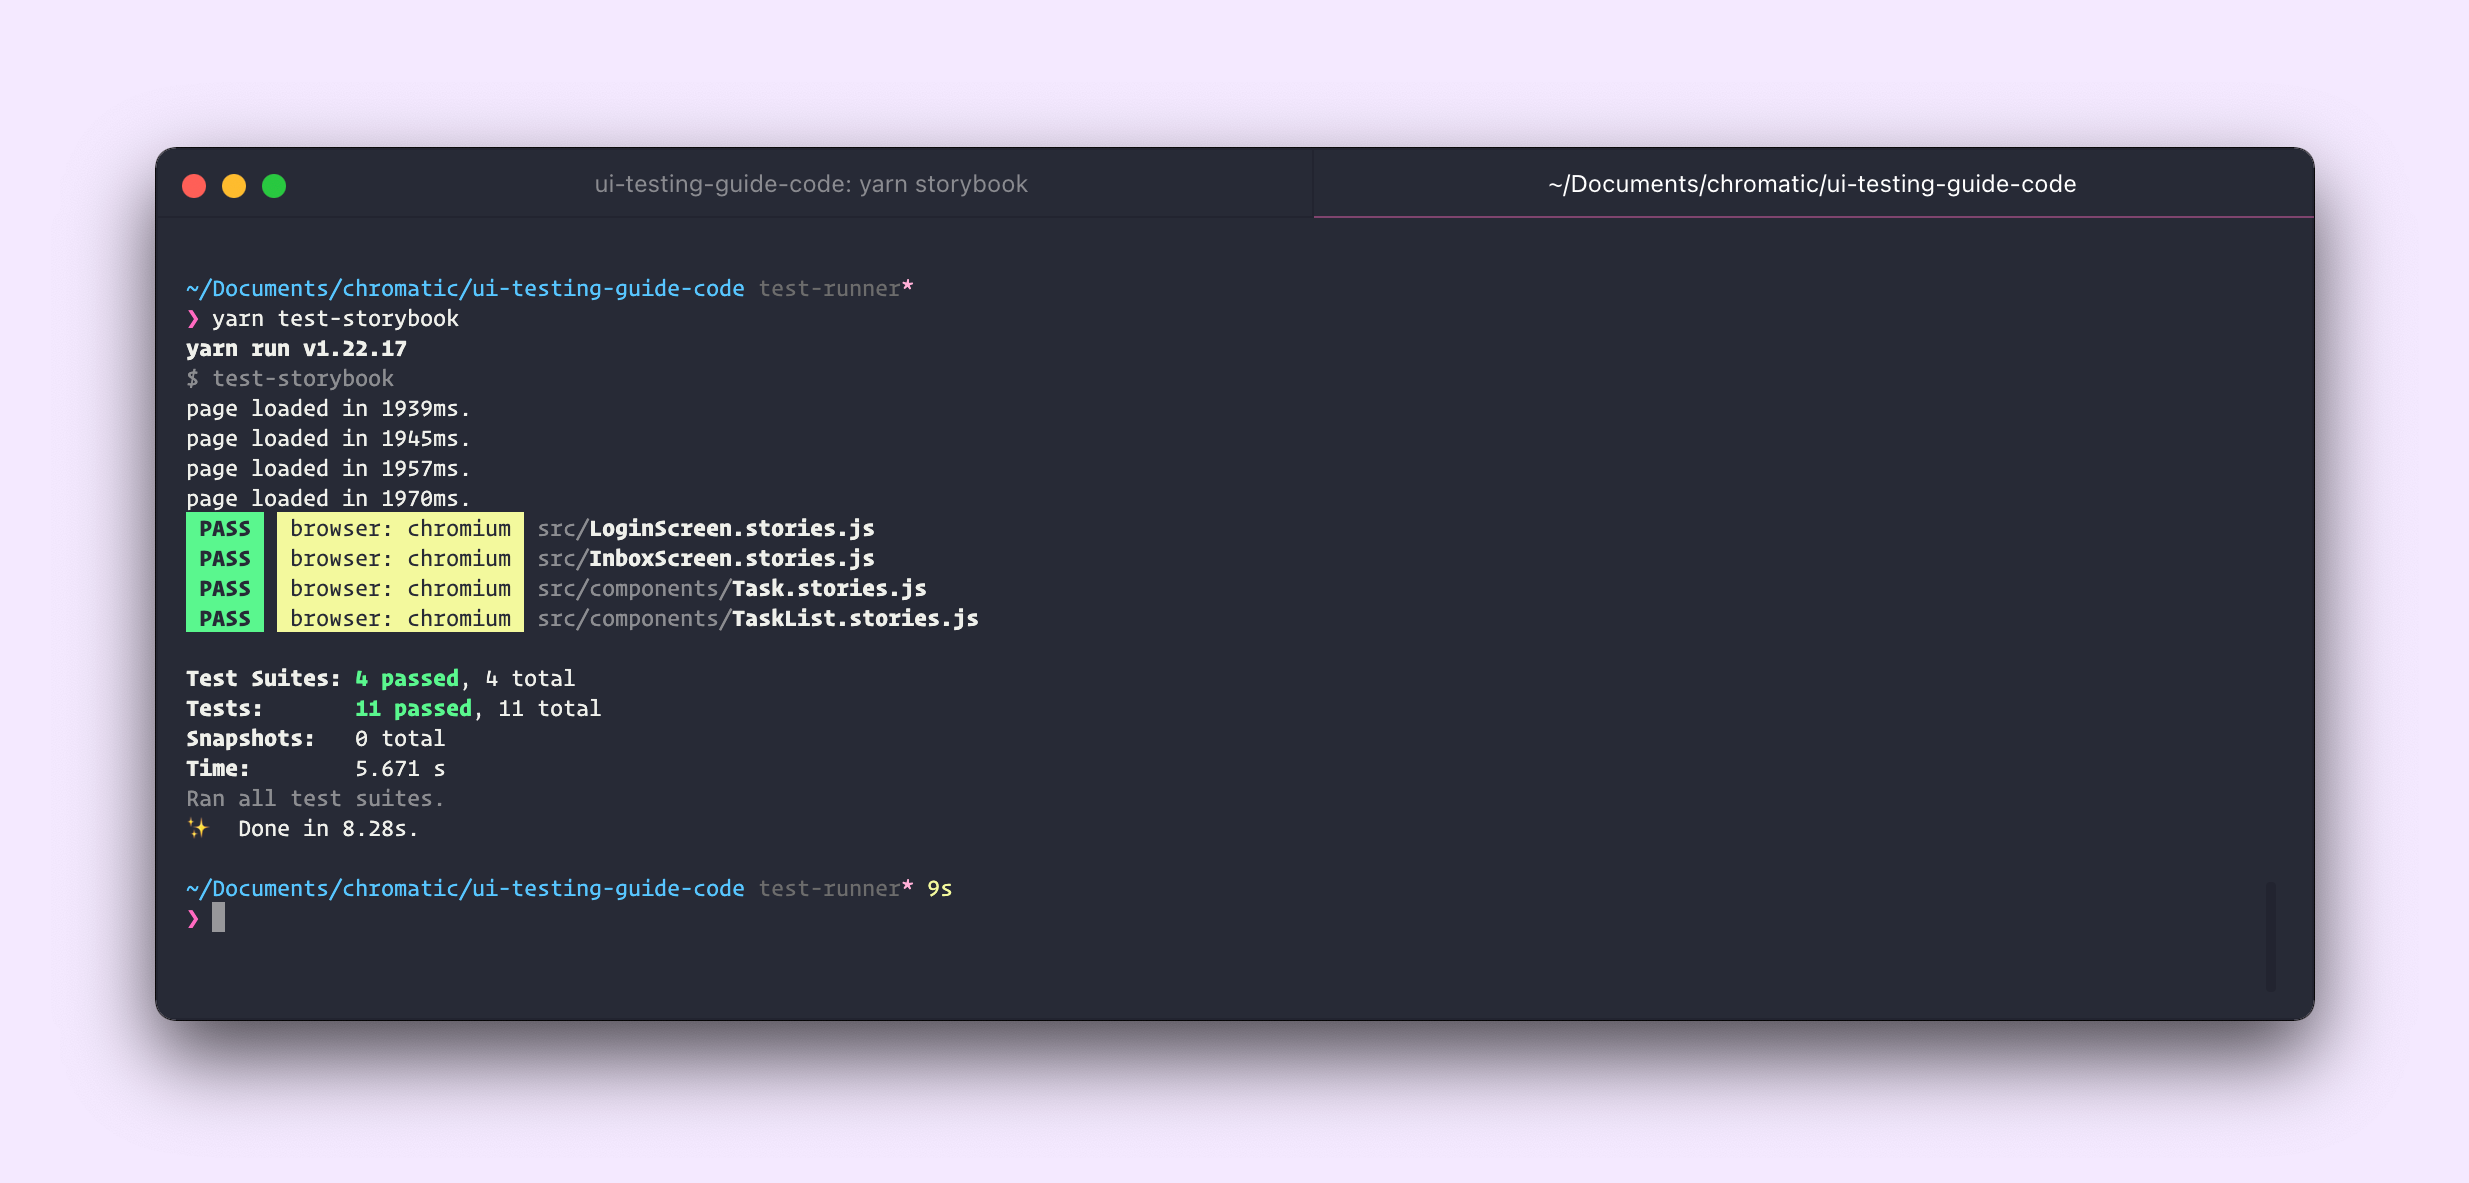
The test runner treats all stories as tests. For those without a play function, it verifies whether the story rendered without any errors. For those with a play function, it also checks for errors in the play function and that all assertions passed.
Let’s add a test to verify that users can pin a task.
// InboxScreen.stories.js
import React from 'react';
import { rest } from 'msw';
import { within, fireEvent, findByRole } from '@storybook/testing-library';
import { expect } from '@storybook/jest';
import { InboxScreen } from './InboxScreen';
import { mockTasks } from './mocks/tasks';
export default {
component: InboxScreen,
title: 'InboxScreen',
};
const Template = (args) => <InboxScreen {...args} />;
export const Default = Template.bind({});
Default.parameters = {
msw: {
handlers: [
rest.get('/tasks', (req, res, ctx) => {
return res(ctx.json(mockTasks));
}),
],
},
};
export const PinTask = Template.bind({});
PinTask.parameters = { ...Default.parameters };
PinTask.play = async ({ canvasElement }) => {
const canvas = within(canvasElement);
const getTask = (name) => canvas.findByRole('listitem', { name });
const itemToPin = await getTask('Export logo');
const pinButton = await findByRole(itemToPin, 'button', { name: 'pin' });
await fireEvent.click(pinButton);
const unpinButton = within(itemToPin).getByRole('button', { name: 'unpin' });
await expect(unpinButton).toBeInTheDocument();
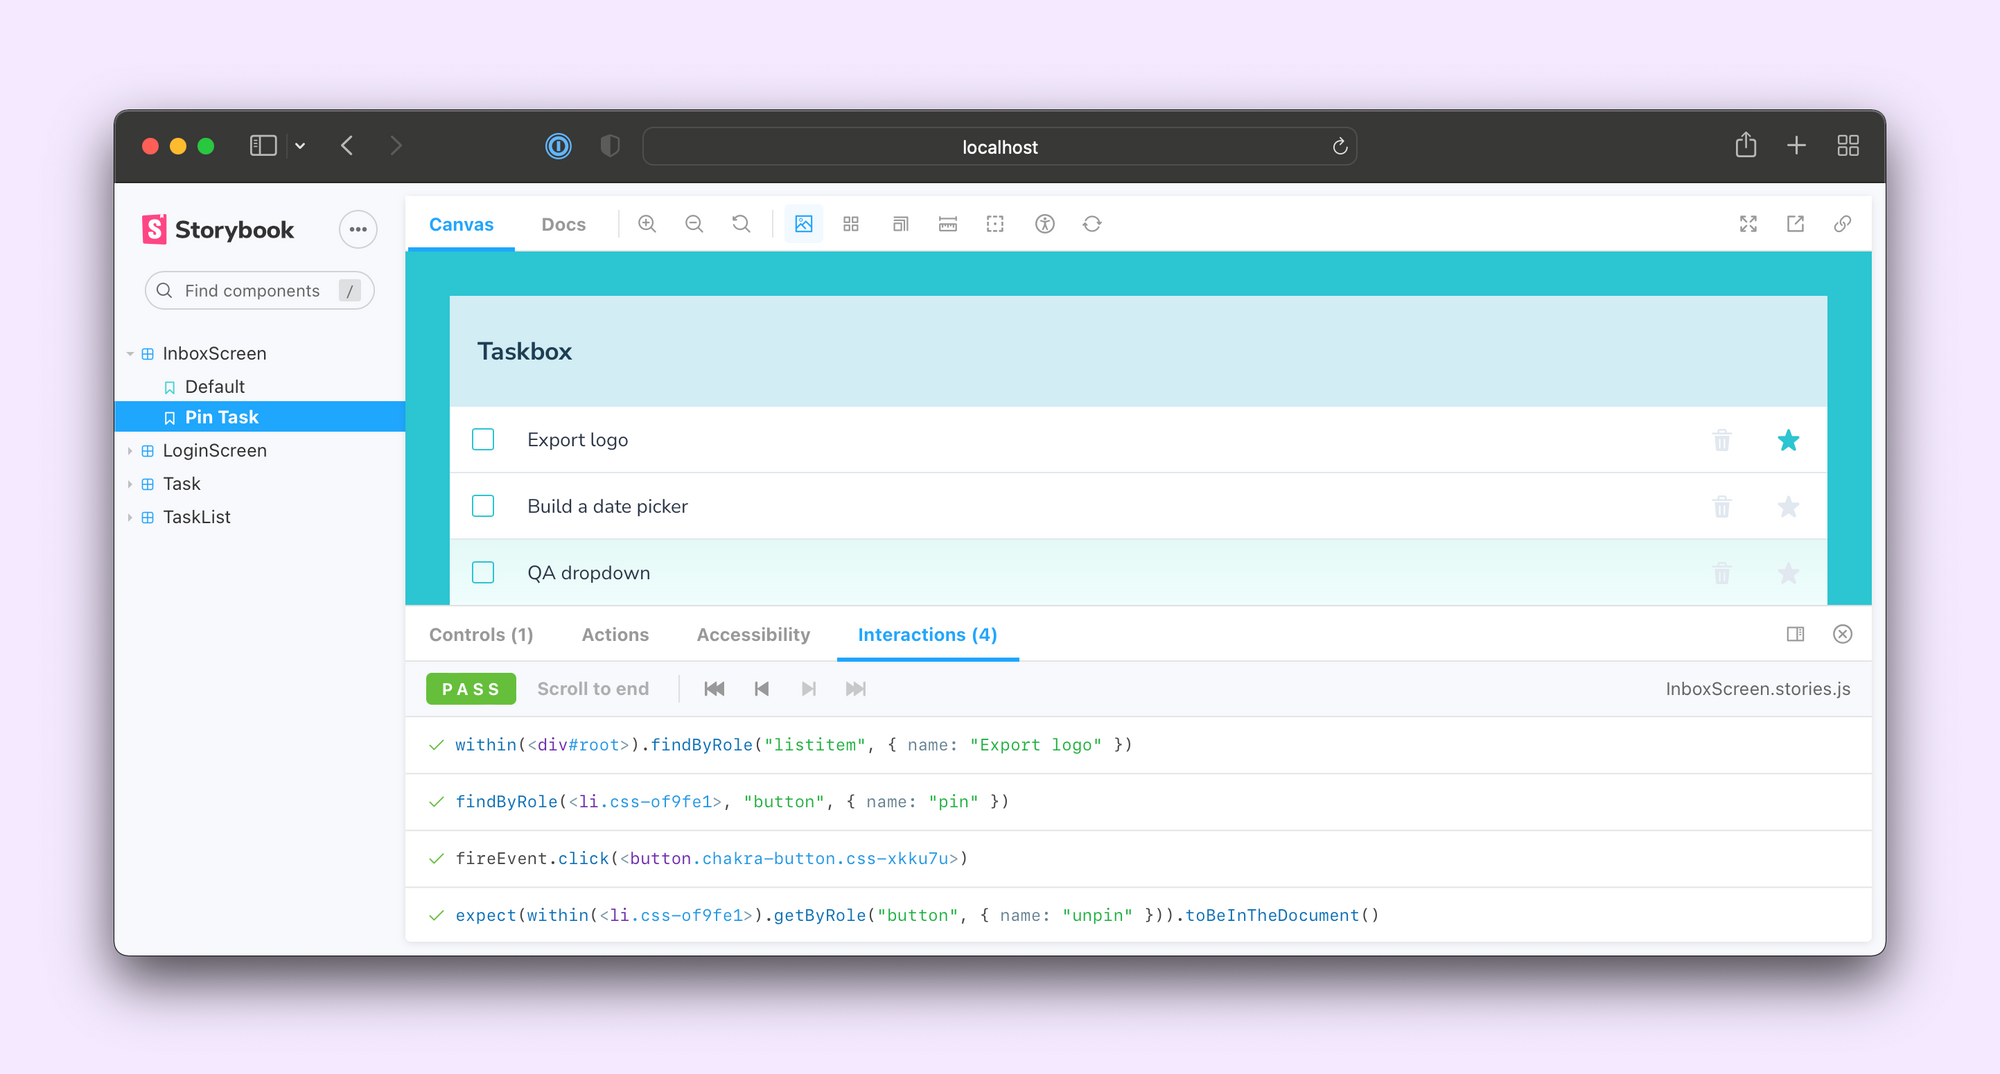
};The test-runner will execute this test whenever you run test-storybook. You can see it and step through each setup step in the interactions panel:
For more examples and documentation on writing tests in play functions, see the Storybook official documentation.
Familiar Jest ergonomics
We wanted the test runner to have the same high-quality ergonomics as Jest, such as watch mode, test filtering, and more. Rather than trying to recreate all of this ourselves, we built Storybook test runner on top of Jest itself.
If you already use Jest, picking up the test runner should be a snap. For example, we use the same CLI options for filtering and watch mode:
# filtered by stories matching "button"
npm run test-storybook button
# watch mode
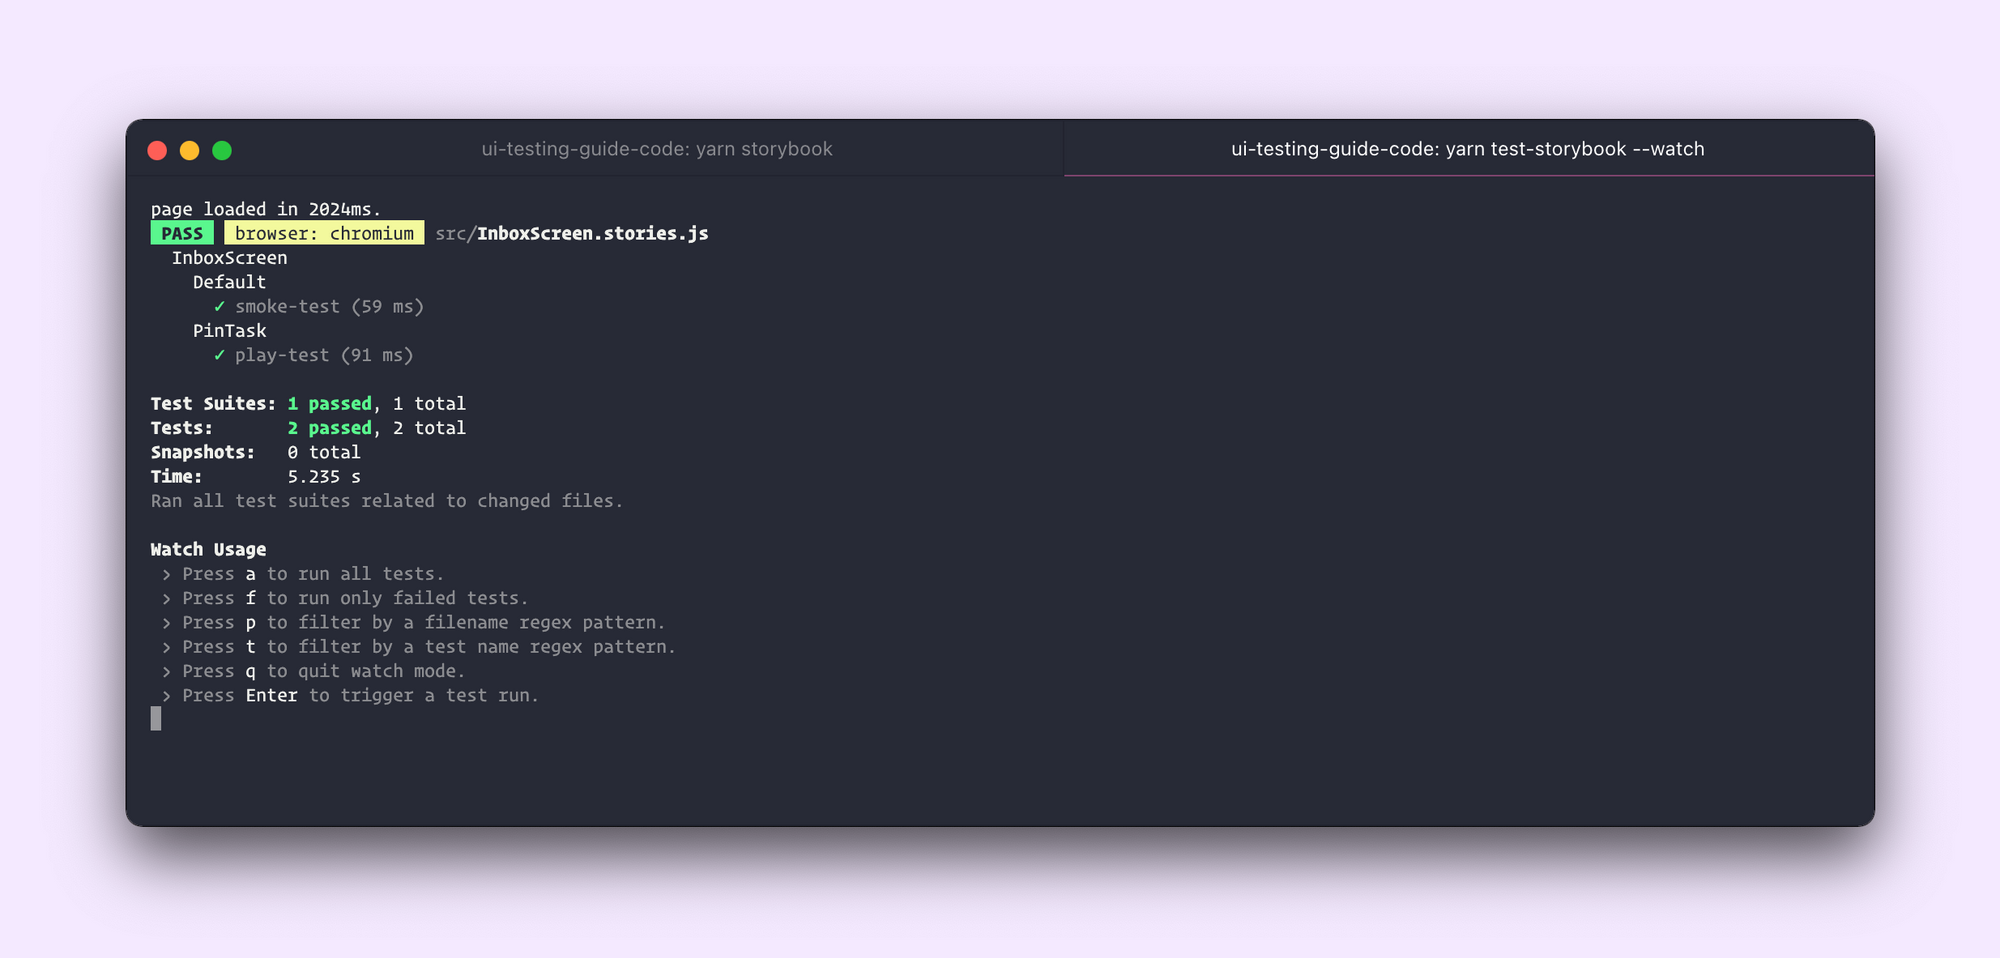
npm run test-storybook --watch
When you run the test runner in watch mode, changes to your components or stories trigger a re-run of the tests as you would expect.
Cross-browser testing
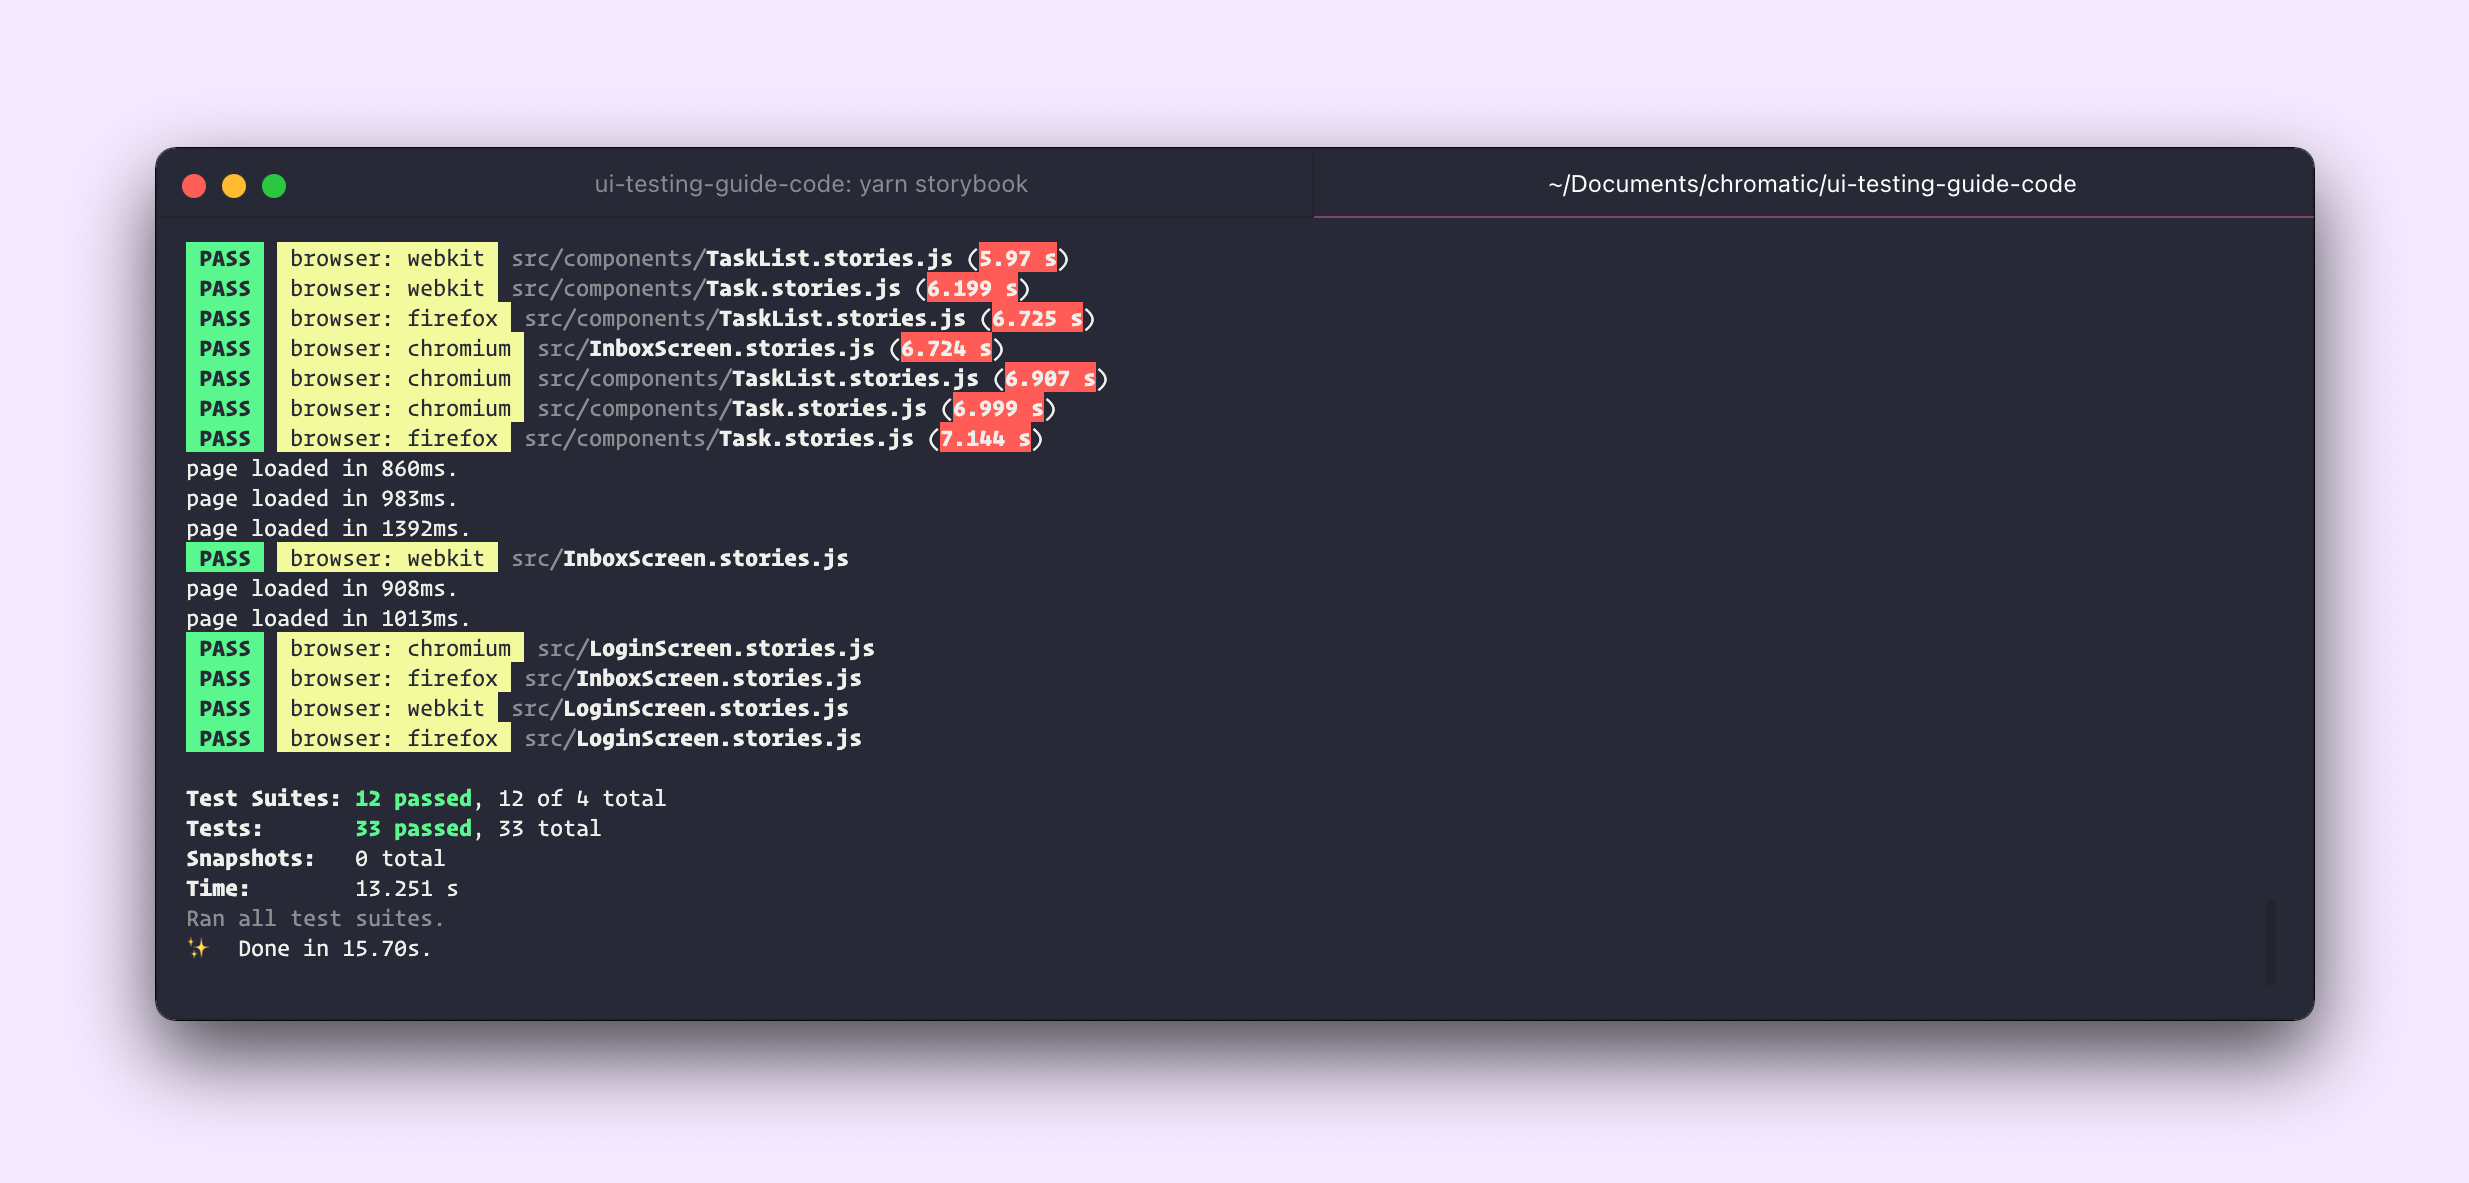
We also wanted the tests to run in the same browsers that you use to view your stories and ultimately your production website. To achieve this we use Playwright, the cross-browser successor to Puppeteer. These tests run in parallel and with comparable performance to a lower-fidelity JSDOM-based test.
# cross-browser testing
npm run test-storybook --browsers chromium firefox webkit
Finally, we wanted to make it easy to run the test runner against any production Storybook that exports a stories.json file (opt-in since 6.4):
# remote testing
npm run test-storybook --url <http://my-storybook.com>
For more detailed documentation, including CLI options, API docs, and configuration options (including Continuous Integration setup), please see the package README.
Extend and customize using the test hook API
We've also included an experimental API to execute code in the test render lifecycle to customize its behavior. For example, to capture a screenshot of the story and run a snapshot test.
// .storybook/test-runner.js
const { toMatchImageSnapshot } = require('jest-image-snapshot');

const customSnapshotsDir = `${process.cwd()}/__snapshots__`;

module.exports = {
  setup() {
    expect.extend({ toMatchImageSnapshot });
  },
  async postRender(page, context) {
    const image = await page.screenshot();
    expect(image).toMatchImageSnapshot({
      customSnapshotsDir,
      customSnapshotIdentifier: context.id,
    });
  },
};
This offers an alternative to Storyshots, our most popular testing addon. Unlike Storyshots, you can also run these tests parallel, in the browser, and in watch mode. We'll be adding more recipes to the Storybook docs on using the test runner for everyday development tasks.
Join the beta
Storybook Interaction Testing is our vision for what component testing should be: fast, interactive, and integrated with tools you already use. It combines the intuitive debugging environment of a live browser with the performance and scriptability of headless browsers.
Interaction testing is in beta – we'd love you to try it out and report any issues. Join us in the Storybook Discord #testing channel to come along for the journey.
The new test runner was developed by Yann Braga and Michael Shilman (me!) with feedback from Zoltan Olah, Tom Coleman, Ian VanSchooten and the Storybook community. Up next, we're adding official documentation on how to use the play function, interactions addon, and test runner to build bulletproof UIs.
If Storybook makes your UI development workflow easier, help Storybook get better. You can contribute a new feature, fix a bug, or improve the docs. Join us on Discord or just jump in on GitHub. To get project updates and early access to features, sign up to Storybook’s mailing list below.
Write interaction tests in your stories. Now in beta!
— Storybook (@storybookjs) February 24, 2022
✅ Test user behavior and automate runs via CLI
🐛 Debug interactively in your browser
⚡️ Run tests in parallel & across browsers
🎭 Powered by Jest, Playwright & Testing Library
🧪 No flakehttps://t.co/MvfdTuNUio pic.twitter.com/Rs4qRIRJ8W