Integrate React i18next with Storybook
Before we begin, ensure that you have a working React app using react-i18next which is set up with Storybook 6.0 or newer. If you need resources to set these up, I’ve included some recommendations below:
Or if you'd prefer a video, check out Chantastic's awesome video on adding i18next to your React app.
1. Expose i18next to Storybook
To make your translations available in your stories, you’ll first need to expose your i18next instance to Storybook. Here’s an example of an i18next instance from the ./src/i18n.js file being used in my React app.
// src/i18n.js

import i18n from 'i18next';
import Backend from 'i18next-http-backend';
import LanguageDetector from 'i18next-browser-languagedetector';

i18n
  .use(Backend) // lazy loads translations from /public/locales
  .use(LanguageDetector) // detect user language
  .init({
    fallbackLng: 'en',
    debug: true,
    interpolation: {
      escapeValue: false,
    },
  });

export default i18n;
To expose this instance to Storybook, we can import it into the ./.storybook/preview.js file where Storybook holds its shared story configurations.
// .storybook/preview.jsx

import i18n from '../src/i18n';
2. Wrap your stories with the i18next provider
Now that Storybook has access to i18next, we need to share that with our stories. To do that we’re going to make a decorator to wrap our stories in.
// .storybook/preview.jsx

import React, { Suspense } from 'react';
import { I18nextProvider } from 'react-i18next';
import i18n from '../src/i18n';

// Wrap your stories in the I18nextProvider component
const withI18next = (Story) => {
  return (
    // This catches the suspense from components not yet ready (still loading translations)
    // Alternative: set useSuspense to false on i18next.options.react when initializing i18next
    <Suspense fallback={<div>loading translations...</div>}>
      <I18nextProvider i18n={i18n}>
        <Story />
      </I18nextProvider>
    </Suspense>
  );
};

// export decorators for storybook to wrap your stories in
export const decorators = [withI18next];
Sweet! Our stories officially have access to our translations. If we change the lng defined in ./src/i18n.js you’ll see your stories reload in the new language.

3. Add a locale switcher
Hardcoding your locale is annoying and won’t be helpful to anyone viewing your deployed Storybook, so let’s add a locale switcher to the Storybook toolbar. If you want to learn more about switchers, check out Yann Braga’s article on adding a theme switcher.
To do this, we can declare a global variable named locale in .storybook/preview.js and assign it to a list of supported languages to choose from.
// .storybook/preview.jsx
/* Snipped for brevity */
// Create a global variable called locale in storybook
// and add a menu in the toolbar to change your locale
export const globalTypes = {
locale: {
name: 'Locale',
description: 'Internationalization locale',
toolbar: {
icon: 'globe',
items: [
{ value: 'en', title: 'English' },
{ value: 'de', title: 'Deutsch' },
],
showName: true,
},
},
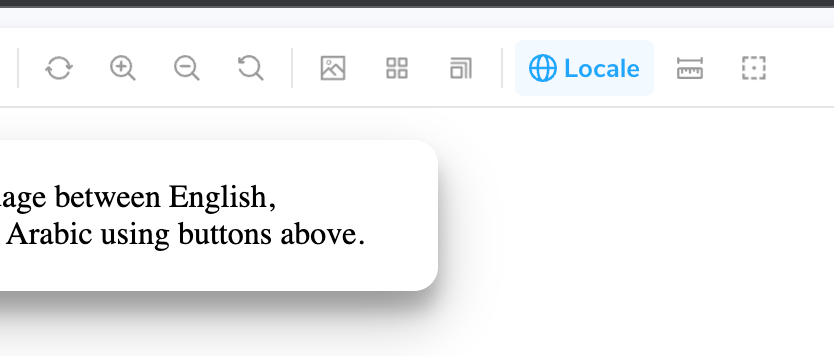
};Looking back at Storybook, we can now see that we have a “Locale” switcher added to the toolbar with the options we just set.
Now let’s update our decorator to change our locale when we select a new language.
// .storybook/preview.jsx

/* Snipped for brevity */

const withI18next = (Story, context) => {
  const { locale } = context.globals;

  // When the locale global changes
  // Set the new locale in i18n
  useEffect(() => {
    i18n.changeLanguage(locale);
  }, [locale]);

  return (
    <Suspense fallback={<div>loading translations...</div>}>
      <I18nextProvider i18n={i18n}>
        <Story />
      </I18nextProvider>
    </Suspense>
  );
};
Voila— a fully functioning locale switcher for your stories powered by react-i18next!
4. Set document direction
Some languages are not read from left to right like English is. Arabic, for example, is read from right to left. HTML has built-in support for this with the dir attribute.
First of all, let's add Arabic as an option in our locale switcher by adding an object into the items array of our globalTypes.
// .storybook/preview.jsx

/* Snipped for brevity */

// Create a global variable called locale in storybook
// and add a menu in the toolbar to change your locale
export const globalTypes = {
  locale: {
    name: 'Locale',
    description: 'Internationalization locale',
    toolbar: {
      icon: 'globe',
      items: [
        { value: 'en', title: 'English' },
        { value: 'de', title: 'Deutsch' },
        { value: 'ar', title: 'عربي' },
      ],
      showName: true,
    },
  },
};
Using i18next’s dir(lng) function and languageChanged event, we can set the document direction for the selected locale.
// .storybook/preview.jsx

/* Snipped for brevity */

// When The language changes, set the document direction
i18n.on('languageChanged', (locale) => {
  const direction = i18n.dir(locale);
  document.dir = direction;
});
Now when we set our storybook to Arabic, the document direction gets set to ”rtl” 🎉
- shaunlloyd
