建構頁面
先前專注在由下而上的方式打造 UI,小規模著手,再不斷增加複雜度。這樣能夠以互不干擾的方式開發元件、瞭解資料需求,然後在 Storybook 裡把玩。完全不必設立伺服器,或蓋出畫面!
在這章,我們使用 Storybook 將元件組合在畫面上,複雜度會繼續增加。
巢狀容器元件
因為 App 非常簡樸,要做的畫面也相當無腦。就只要把 TaskList 元件(會透過 Redux 提供自用資料的那個)以某種排版包起來,然後在 Redux 外面的頂層堆上 error 欄位(假設連接伺服器的時候出問題,就要放置這個欄位)。在 components 資料夾新增 InboxScreen.js:
import React from 'react';
import PropTypes from 'prop-types';

import { connect } from 'react-redux';

import TaskList from './TaskList';

export function PureInboxScreen({ error }) {
  if (error) {
    return (
      <div className="page lists-show">
        <div className="wrapper-message">
          <span className="icon-face-sad" />
          <div className="title-message">Oh no!</div>
          <div className="subtitle-message">Something went wrong</div>
        </div>
      </div>
    );
  }
  return (
    <div className="page lists-show">
      <nav>
        <h1 className="title-page">
          <span className="title-wrapper">Taskbox</span>
        </h1>
      </nav>
      <TaskList />
    </div>
  );
}

PureInboxScreen.propTypes = {
  /** The error message */
  error: PropTypes.string,
};

PureInboxScreen.defaultProps = {
  error: null,
};

export default connect(({ error }) => ({ error }))(PureInboxScreen);
App 元件也要修改成可以渲染 InboxScreen(到最後會用 router 來選擇正確的畫面,但在這裡先不用擔心):
import { Provider } from 'react-redux';
import store from './lib/redux';

import InboxScreen from './components/InboxScreen';

import './index.css';

function App() {
  return (
    <Provider store={store}>
      <InboxScreen />
    </Provider>
  );
}
export default App;
然而,有趣的地方就在 Storybook 渲染 story。
就像前面已知 TaskList 元件是渲染展示元件 PureTaskList 的容器。容器元件,在字面上的意思就是不能直接獨立渲染,它們應該要收到一些情境,或連接服務。這意思是在 Storybook,渲染容器時應該要 情境或要用到的服務。
只要把 TaskList 放在 Storybook,將 PureTaskList 渲染而不使用容器,就能夠避開這個問題。接著還會在 Storybook 渲染類似的 PureInboxScreen。
只不過,PureInboxScreen 會遇到的問題是:它本身是只用來展示的,但裡面的 TaskList不是。某種程度上來說,PureInboxScreen 已經被容器化污染。因此,在 InboxScreen.stories.js 設定 story 的時候:
import React from 'react';

import { PureInboxScreen } from './InboxScreen';

export default {
  component: PureInboxScreen,
  title: 'InboxScreen',
};

const Template = args => <PureInboxScreen {...args} />;

export const Default = Template.bind({});

export const Error = Template.bind({});
Error.args = {
  error: 'Something',
};
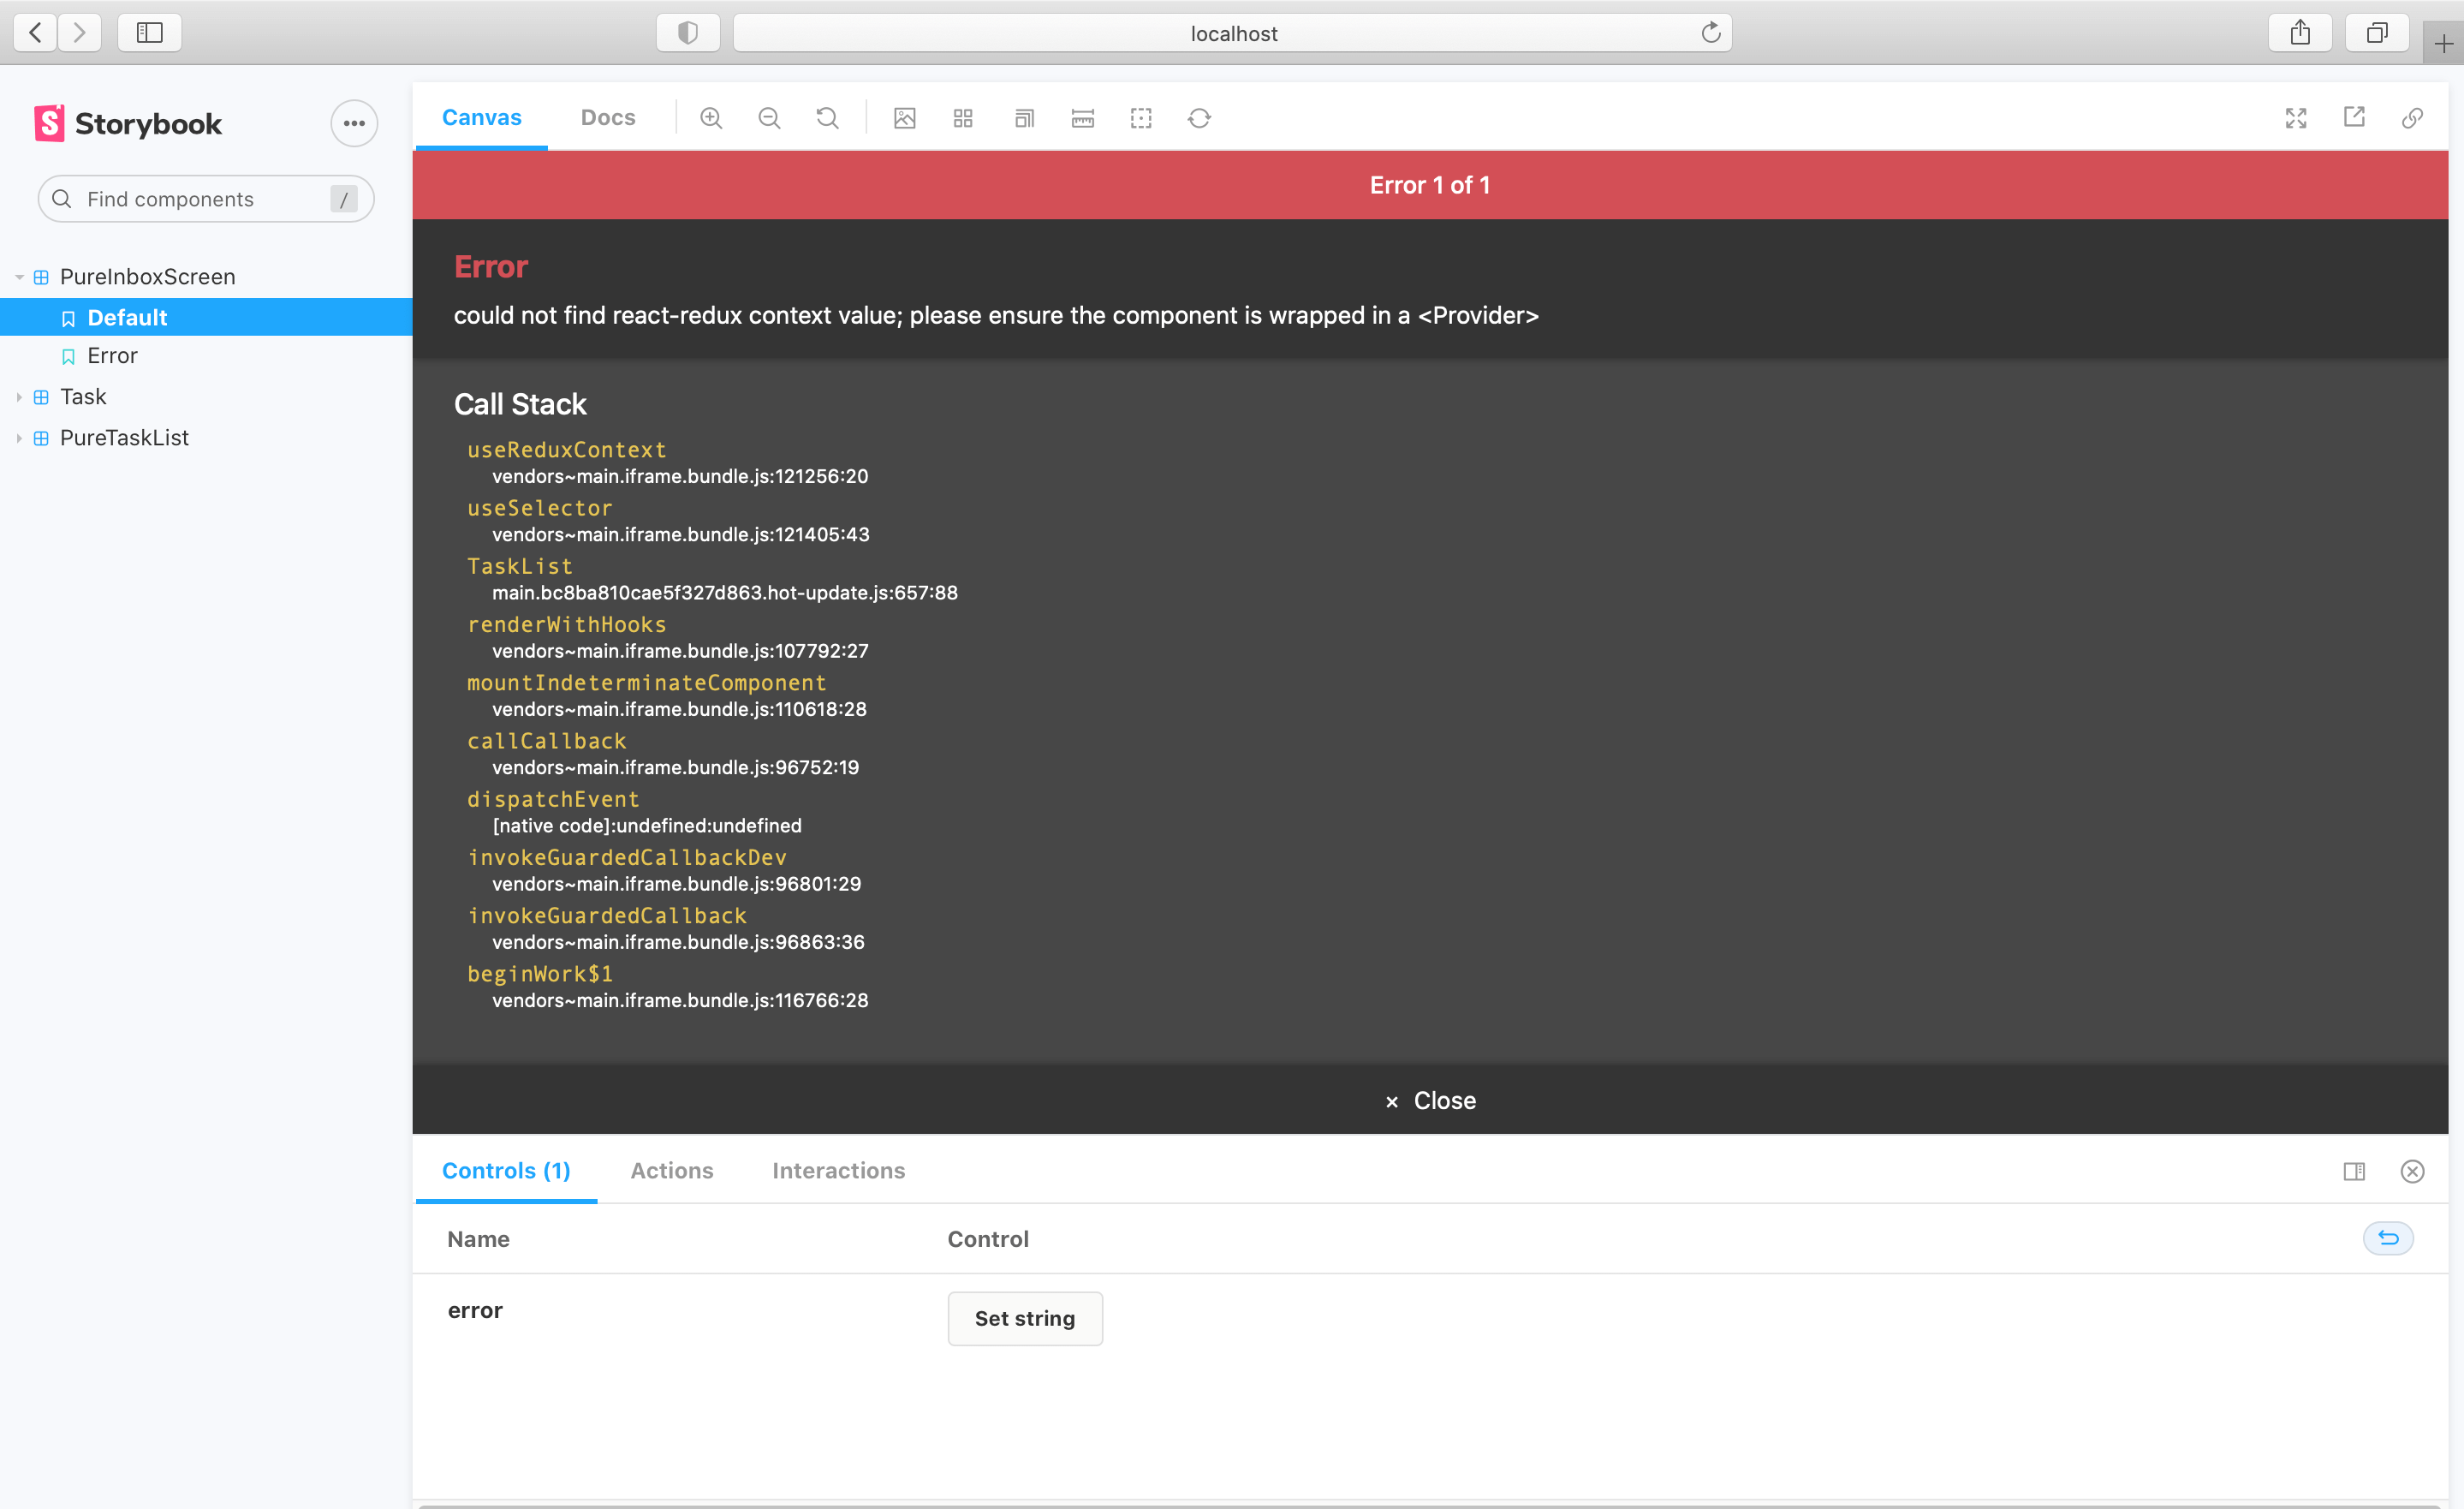
雖然 error 這個 story 運作良好,default 卻有問題,因為 TaskList 沒有可以連接的 Redux store(想要為 PureInboxScreen 進行單元測試的時候也會遇到類似的問題)。

一種避開這問題的方法,是在 App 裡除了最高層級,其它都絕不渲染容器元件,並且把所有資料需求在元件結構往下傳。
只不過,開發者們肯定無可避免地得要在元件層級下方渲染容器。如果想要在 Storybook 盡可能渲染幾乎所有,或全部 App(我們有做到),這問題就要有解決方案。
以 Decorator 提供情境
好消息是:在 story 裡,可以很輕易地為 InboxScreen 準備好 Redux store!只要使用在 Decorator 裡,使用虛構版的 Redux store。
import React from 'react';
+ import { Provider } from 'react-redux';

import { PureInboxScreen } from './InboxScreen';

+ import { action } from '@storybook/addon-actions';

+ import * as TaskListStories from './TaskList.stories';

+ // A super-simple mock of a redux store
+ const store = {
+   getState: () => {
+    return {
+      tasks: TaskListStories.Default.args.tasks,
+    };
+   },
+   subscribe: () => 0,
+   dispatch: action('dispatch'),
+ };

export default {
  component: PureInboxScreen,
+ decorators: [story => <Provider store={store}>{story()}</Provider>],
  title: 'InboxScreen',
};

const Template = args => <PureInboxScreen {...args} />;

export const Default = Template.bind({});

export const Error = Template.bind({});
Error.args = {
  error: 'Something',
};
其他資料函式庫,像是 Apollo 和 Relay …等也有類似提供虛構情境的功能。
在 Storybook 裡做好狀態的循環,就可以輕鬆、正確地使用做好的測試:
元件驅動開發
我們從最底層的 Task 開始,進展到 TaskList,現在已經是一整個畫面的 UI。InboxScreen 容納巢狀容器元件,還有對應的 story。
元件驅動開發能夠隨著元件結構往上疊加,讓複雜度逐漸擴張。各種好處可以帶來更專注的開發流程、涵蓋所有可能的 UI 排列。簡單來說,CDD 有助於打造更高品質且更複雜的使用者介面。
還沒有搞定。UI 打造出來之前,工作都不算結束。還要確保隨著時間,仍保持可用狀態。