How to test component interactions
Learn how to simulate user behaviour and run functional checks

You flip the switch, and the light doesn’t turn on. It could be a burnt-out light bulb, or it could be faulty wiring. The switch and the bulb are connected to each other with wires inside the walls.
Apps are the same. On the surface is the UI that the user sees and interacts with. Under the hood, the UI is wired up to facilitate the flow of data and events.
As you build more complex UIs like pages, components become responsible for more than just rendering the UI. They fetch data and manage state. This article walks through testing interactive components. You’ll learn how to use a computer to simulate and verify user interactions.
Does that component really work?
A component's primary task is to render a piece of the UI given a set of props. More complex components also track application state and pass behaviours down the component tree.
For example, a component will start with an initial state. When the user types something in an input field or clicks a button, it triggers an event within the app. The component updates state in response to this event. Those state changes then update the rendered UI. That's the complete cycle for an interaction.
Consider the Taskbox app I introduced in a previous post. On the InboxScreen, the user can click on the star icon to pin a task. Or click on the checkbox to archive it. Visual tests ensure that the component looks right in all those states. We also need to ensure that the UI is responding to those interactions correctly.
Here's what the interaction testing workflow looks like:
- 📝 Setup: isolate the component and supply the appropriate props for the initial state.
- 🤖 Action: render the component and simulate interactions.
- ✅ Run assertions to verify that the state updated correctly.
The Taskbox app was bootstrapped using Create React App, which comes pre-configured with Jest. That's what we'll use to write and run the tests.
Test what a component does, not how it does it
Much like unit tests, we want to avoid testing the inner workings of a component. This makes tests brittle because any time you refactor code it'll break the tests, regardless of whether the output changed or not. Which in turn slows you down.
This is why teams at Adobe, Twilio, Gatsby and many more use Testing-Library. It allows you to evaluate the rendered output. It works by mounting the component in a virtual browser (JSDOM) and provides utilities that replicate user interactions.
We can write tests that mimic real-world usage, instead of accessing a component’s internal state and methods. And writing tests from the user’s perspective gives us a lot more confidence that our code works.
Let’s dive into some code and see this process in action. Our starting point this time is the composition-testing branch.
Reuse stories as interaction test cases
We start by writing a test case. Previously, we catalogued all the use cases of the InboxScreen component in the InboxScreen.stories.js file. That allowed us to spot check appearance during development and to catch regressions via visual tests. These stories will now also power our interaction tests.
// InboxScreen.stories.js
import React from 'react';
import { rest } from 'msw';
import { InboxScreen } from './InboxScreen';
import { Default as TaskListDefault } from './components/TaskList.stories';

export default {
 component: InboxScreen,
 title: 'InboxScreen',
};

const Template = (args) => <InboxScreen {...args} />;

export const Default = Template.bind({});
Default.parameters = {
 msw: [
   rest.get('/tasks', (req, res, ctx) => {
     return res(ctx.json(TaskListDefault.args));
   }),
 ],
};

export const Error = Template.bind({});
Error.args = {
 error: 'Something',
};
Error.parameters = {
 msw: [
   rest.get('/tasks', (req, res, ctx) => {
     return res(ctx.json([]));
   }),
 ],
};
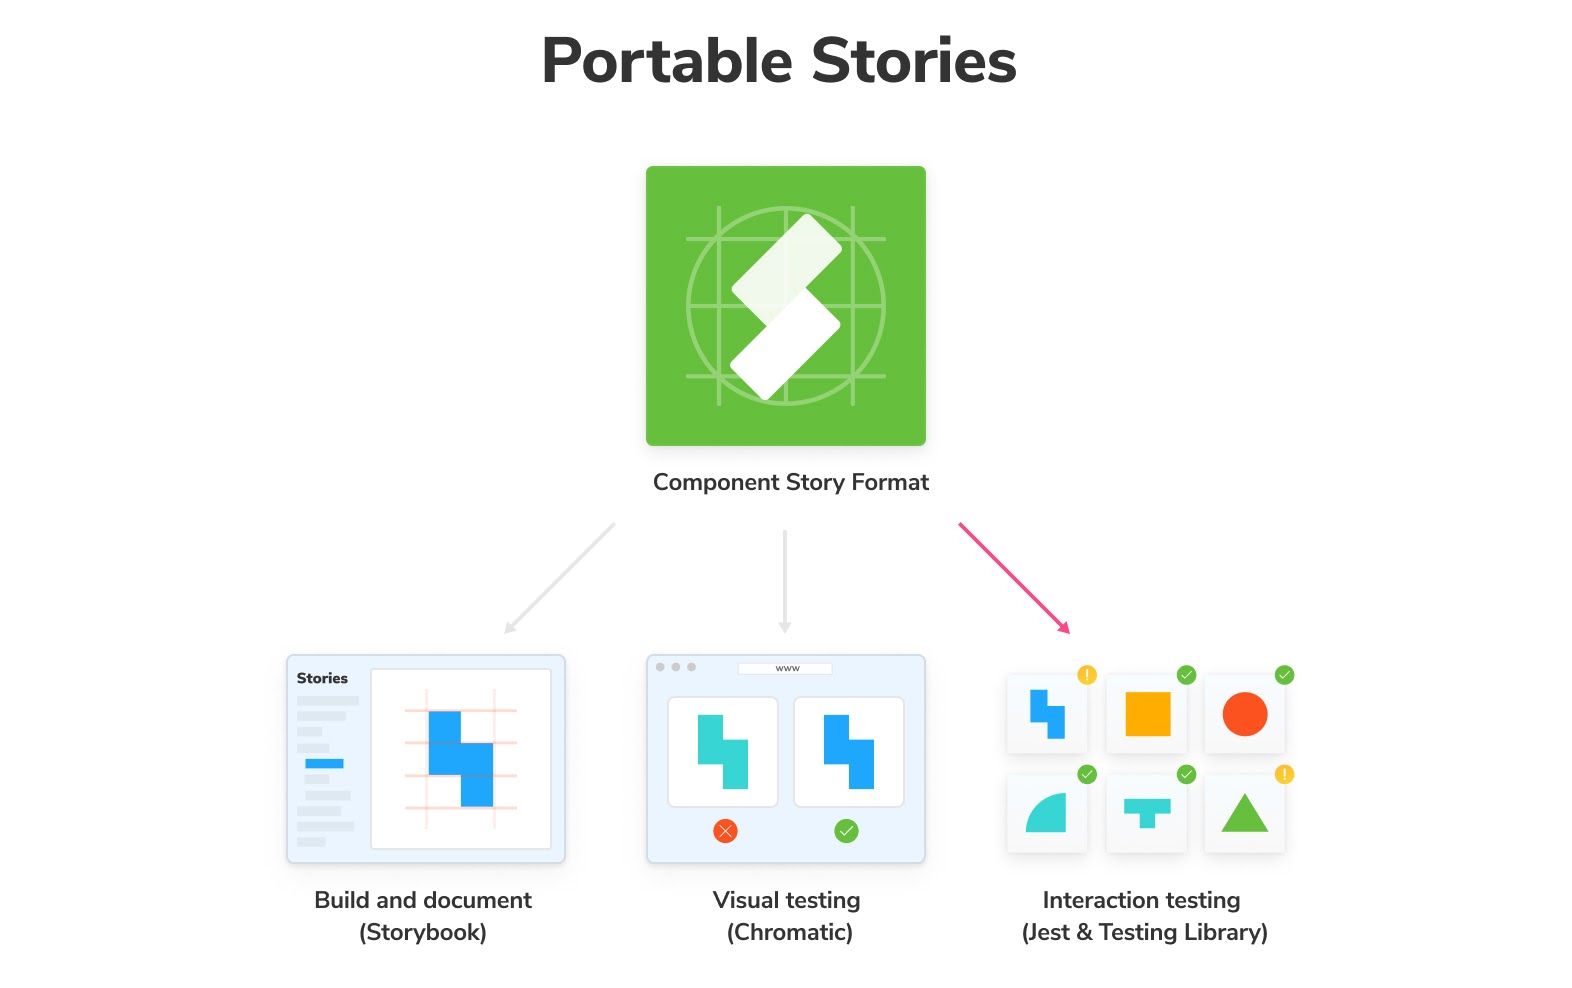
Stories are written in a portable format based on standard JavaScript modules. You can reuse them with any JavaScript-based testing library (Jest, Testing Lib, Playwright). That saves you from needing to set up and maintain test cases for each testing tool in your suite. For example, the Adobe Spectrum design system team uses this pattern to test interactions for their menu and dialog components.
When you write your test cases as stories, any form of assertion can be layered on top. Let’s try that out. Create the InboxScreen.test.js file and write the first test. Like the example above, we are importing a story into this test and mounting it using the render function from Testing-Library.
The it block describes our test. We start by rendering the component, waiting for it to fetch data, finding a particular task, and clicking the pin button. The assertion checks to see if the pinned state has been updated. Finally, the afterEach block cleans up by un-mounting React trees mounted during the test.
// InboxScreen.test.js
import React from 'react';
import '@testing-library/jest-dom/extend-expect';
import { render, waitFor, cleanup } from '@testing-library/react';
import * as stories from './InboxScreen.stories';

describe('InboxScreen', () => {
 afterEach(() => {
   cleanup();
 });

 const { Default } = stories;

 it('should pin a task', async () => {
   const { queryByText, getByRole } = render(<Default />);

   await waitFor(() => {
     expect(queryByText('You have no tasks')).not.toBeInTheDocument();
   });

   const getTask = () => getByRole('listitem', { name: 'Export logo' });

   const pinButton = within(getTask()).getByRole('button', { name: 'pin' });

   fireEvent.click(pinButton);

   const unpinButton = within(getTask()).getByRole('button', {
     name: 'unpin',
   });

   expect(unpinButton).toBeInTheDocument();
 });
});
Run yarn test to start up Jest. You’ll notice that the test fails.
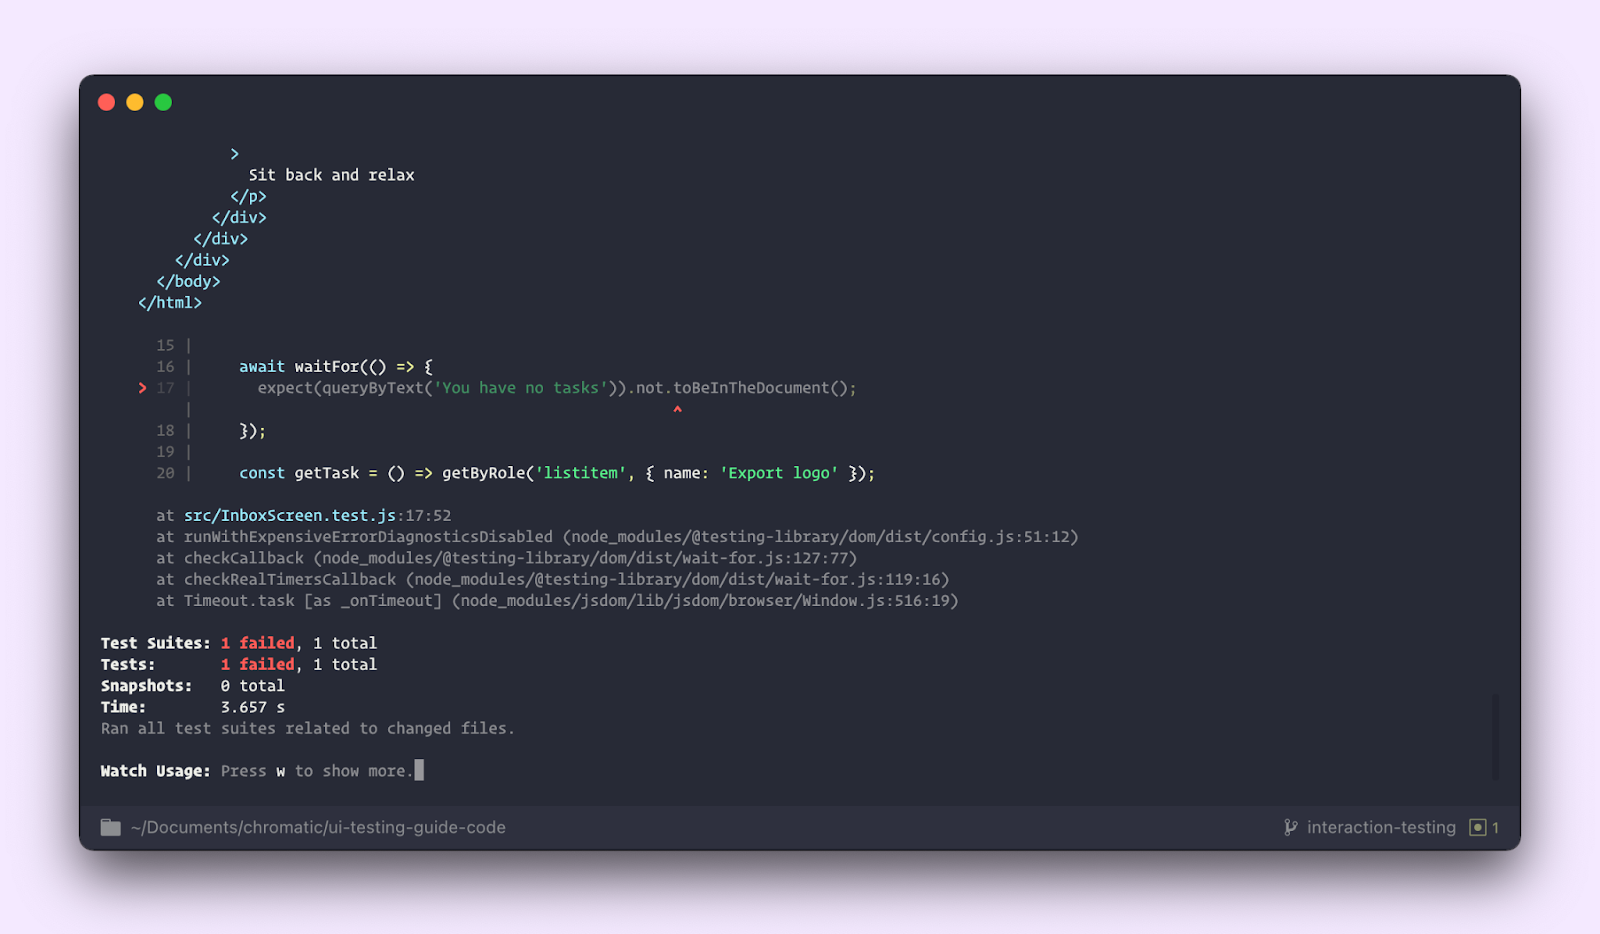
InboxScreen fetches data from the back-end. In the previous post, we set up Storybook MSW addon to mock this API request. However, that isn’t available to Jest. We’ll need a way to bring this and other component dependencies along.
Component configs to go
Complex components rely on external dependencies such as theme providers and context to share global data. Storybook uses decorators to wrap a story and provide such functionality. To import stories along with all their config, we'll use the @storybook/testing-react library.
This is usually a two-step process. First, we need to register all global decorators. In our case, we have two: a decorator that provides the Chakra UI theme and one for the MSW addon. We previously configured these in .storybook/preview.
Jest offers a global setup file setupTests.js, auto-generated by CRA when the project is bootstrapped. Update that file to register Storybook’s global config.
// setupTests.js
import '@testing-library/jest-dom';
import { setGlobalConfig } from '@storybook/testing-react';
import * as globalStorybookConfig from '../.storybook/preview';
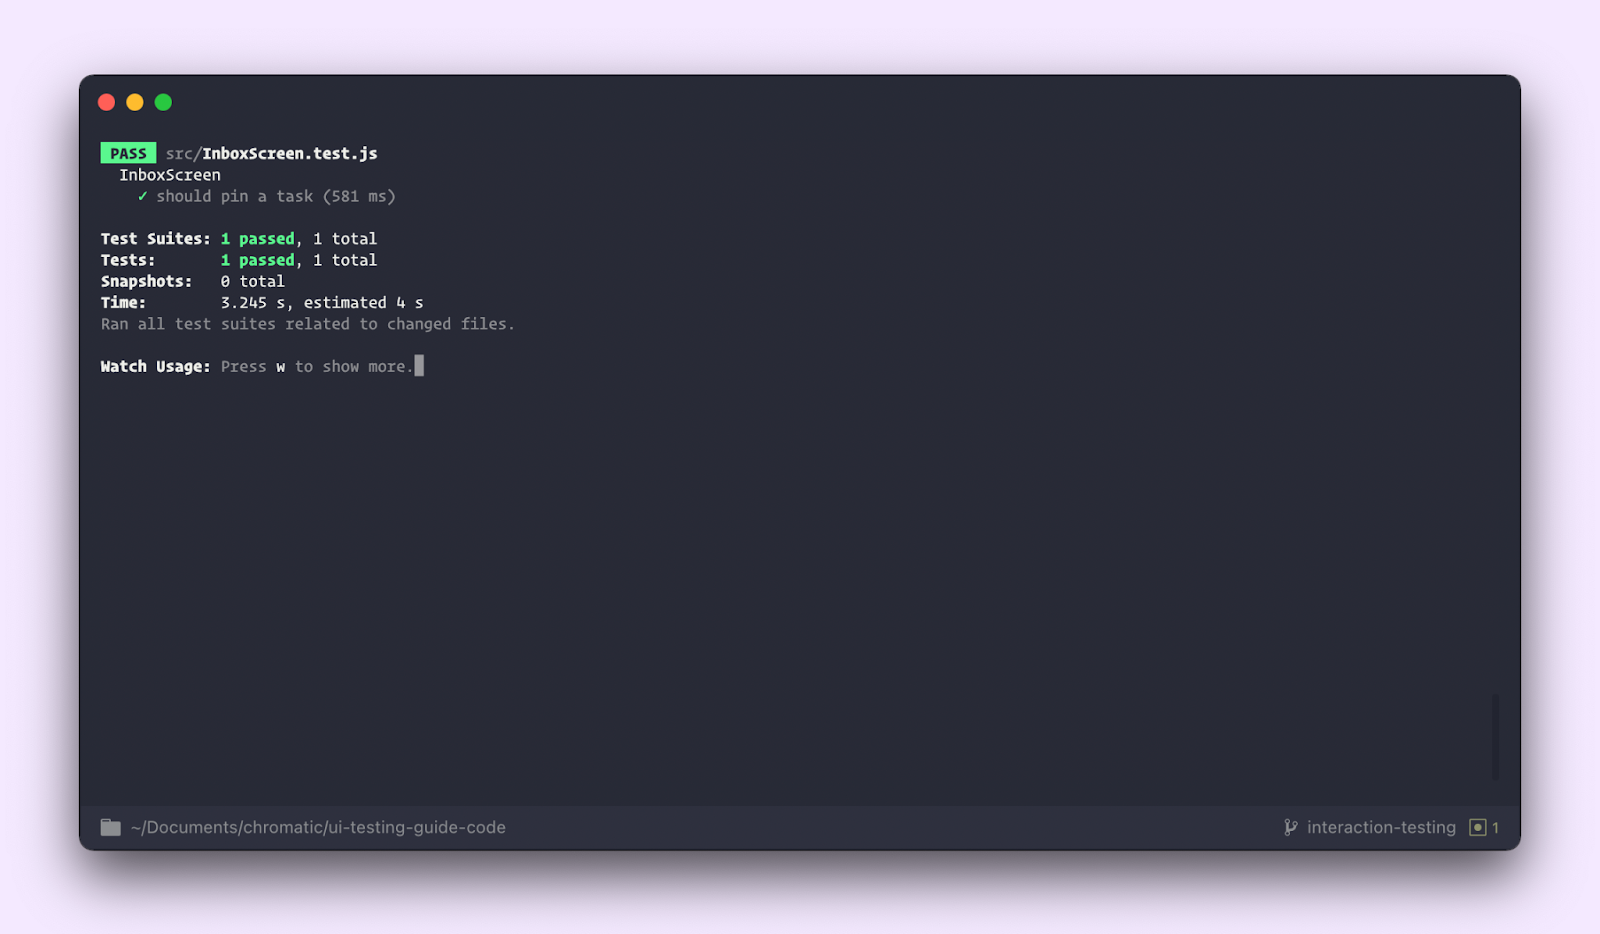
setGlobalConfig(globalStorybookConfig);Next, update the test to use the composeStories utility from @storybook/testing-react. It returns a 1:1 map of the stories with all decorators applied to them. And voilà, our test is passing!
// InboxScreen.test.js
import React from 'react';
import '@testing-library/jest-dom/extend-expect';
import { render, waitFor, cleanup } from '@testing-library/react';
import { composeStories } from '@storybook/testing-react';
import { getWorker } from 'msw-storybook-addon';
import * as stories from './InboxScreen.stories';

describe('InboxScreen', () => {
 afterEach(() => {
   cleanup();
 });

 // Clean up after all tests are done, preventing this
 // interception layer from affecting irrelevant tests
 afterAll(() => getWorker().close());

 const { Default } = composeStories(stories);

 it('should pin a task', async () => {
   const { queryByText, getByRole } = render(<Default />);

   await waitFor(() => {
     expect(queryByText('You have no tasks')).not.toBeInTheDocument();
   });

   const getTask = () => getByRole('listitem', { name: 'Export logo' });

   const pinButton = within(getTask()).getByRole('button', { name: 'pin' });

   fireEvent.click(pinButton);

   const unpinButton = within(getTask()).getByRole('button', {
     name: 'unpin',
   });

   expect(unpinButton).toBeInTheDocument();
 });
});
We’ve successfully written a test that loads up a story and renders it using Testing Library. Which then applies simulated user behaviour and checks to see if the component state is updated accurately or not.
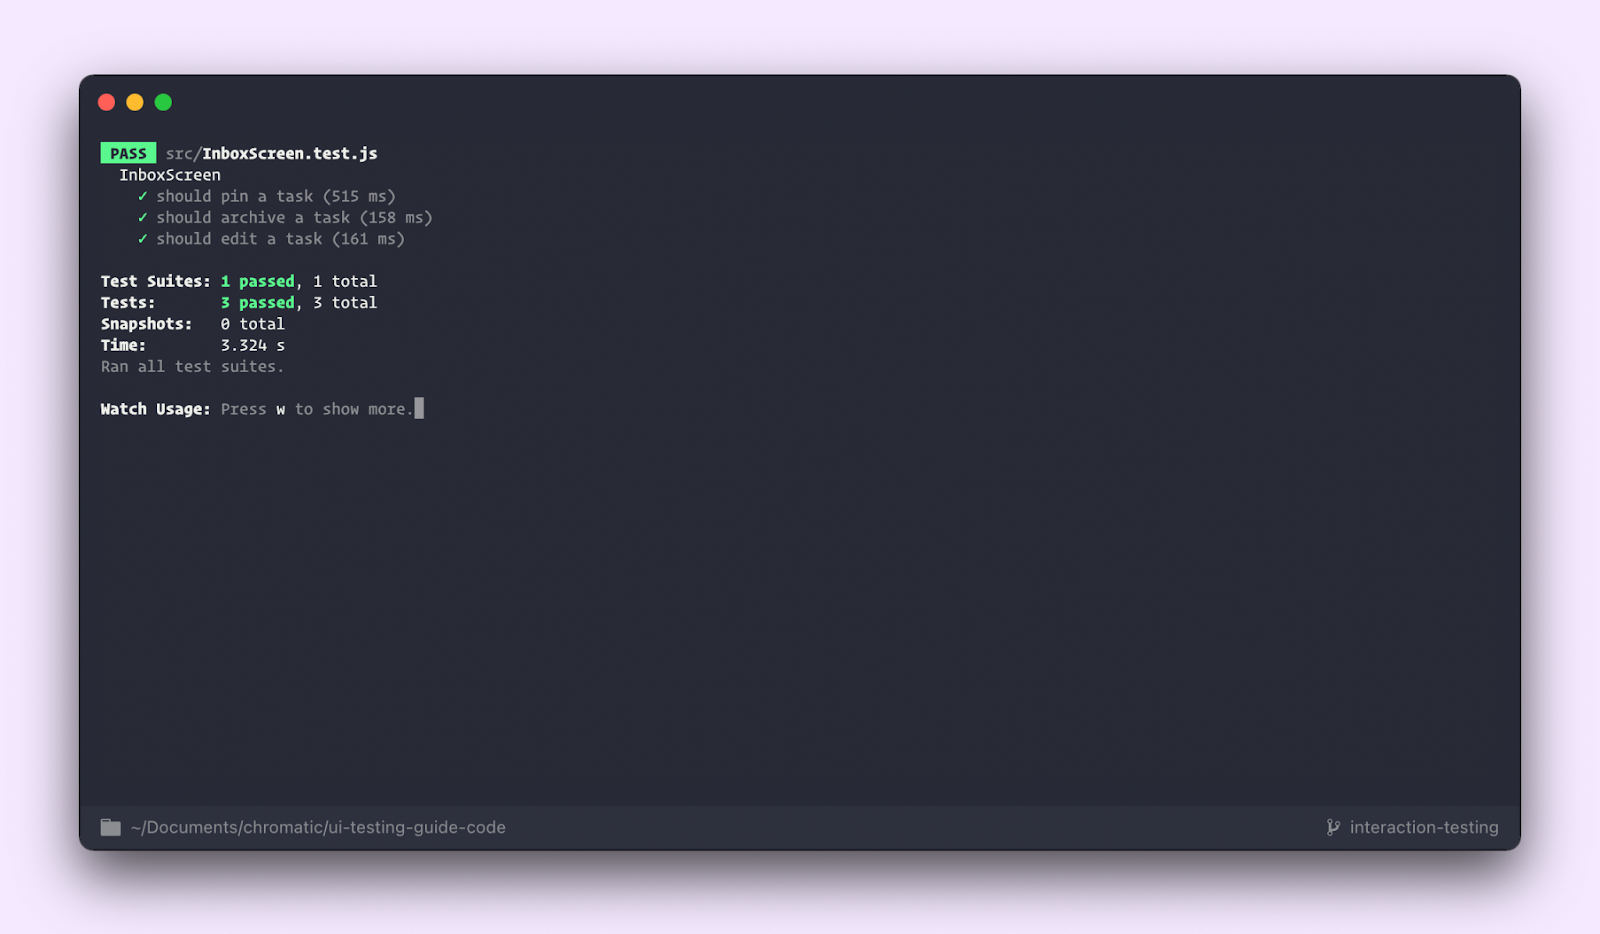
Using the same pattern, we can also add tests for the archive and editing scenarios.
 it('should archive a task', async () => {
   const { queryByText, getByRole } = render(<Default />);

   await waitFor(() => {
     expect(queryByText('You have no tasks')).not.toBeInTheDocument();
   });

   const task = getByRole('listitem', { name: 'QA dropdown' });
   const archiveCheckbox = within(task).getByRole('checkbox');
   expect(archiveCheckbox.checked).toBe(false);

   fireEvent.click(archiveCheckbox);
   expect(archiveCheckbox.checked).toBe(true);
 });

 it('should edit a task', async () => {
   const { queryByText, getByRole } = render(<Default />);

   await waitFor(() => {
     expect(queryByText('You have no tasks')).not.toBeInTheDocument();
   });

   const task = getByRole('listitem', {
     name: 'Fix bug in input error state',
   });
   const taskInput = within(task).getByRole('textbox');

   const updatedTaskName = 'Fix bug in the textarea error state';

   fireEvent.change(taskInput, {
     target: { value: 'Fix bug in the textarea error state' },
   });
   expect(taskInput.value).toBe(updatedTaskName);
 });
In summary, the setup code lives in the stories file, and the actions and assertions live in the test file. With Testing Library, we interacted with the UI in the way a user would. In the future, if the component implementation changes, it will only break the test if the output or behaviour is modified.
Stories are a jumping-off point for all types of tests
Components aren't static. The user can interact with the UI and trigger state updates. To verify these functional qualities, you write tests that simulate user behaviour. Interaction tests check the connection between the components, i.e., events and data are flowing. And that the underlying logic is correct.
Writing test cases as stories means that you only need to do the tricky setup once: isolate components, mock their dependencies and capture their use cases. All that setup can then be imported into other testing frameworks which saves you time and headache.
What’s more, the portability of stories also simplifies accessibility testing. When you ensure your UI is usable to every user, you impact the business financials and satisfy legal requirements. It’s a win-win.
But accessibility can seem like a lot of work. The next article breaks down how to automate accessibility checks during dev and QA. That allows you to catch violations early which ends up saving you time and effort.
You click the buy button and nothing happens 😰
— Storybook (@storybookjs) July 21, 2021
Testing component functionality is essential but tricky. You have to simulate user behaviour & evaluate the rendered output.
This post shows you how to use @fbjest & @TestingLib to verify user interactions: https://t.co/CViSSIUwyc pic.twitter.com/jGYsuYkz8e