
Install Storybook
Use the Storybook CLI to install it in a single command. Run this inside your project’s root directory:
npm create storybook@latestAsk your AI agent to set up Storybook for you.
Storybook will look into your project's dependencies during its install process and provide you with the best configuration available.
Watch a video tutorial
Project requirements
Storybook is designed to work with a variety of frameworks and environments. If your project is using one of the packages listed here, please ensure that you have the following versions installed:
- Angular 18+
- Lit 3+
- Next.js 14+
- Node.js 22.12+
- npm 10+
- pnpm 9+
- Preact 10.8.0+
- React Native 0.72+
- React Native Web 0.19+
- Svelte 5+
- SvelteKit 3+
- TypeScript 5.9 or newer
- Vite 5+
- Vitest 3+
- Vue 3+
- Webpack 5.101+
- Yarn 4
Yarn 4 is the release we test with. Yarn 6 is a rewrite in Rust, and it is still a release candidate. The latest release of Yarn is still 4. You can try Storybook on Yarn 6. Until Yarn 6 is stable, support for it is best effort.
Additionally, the Storybook app supports the following browsers:
- Chrome 147+
- Edge 150+
- Firefox 152+
- Safari 26.5+
How do I use Storybook with older browsers?
If your browser meets Storybook 10's requirements but not Storybook 11's raised floors, stay on Storybook 10. For browsers below the requirements introduced in Storybook 9, use a version prior to 9.0.0 whose requirements your browser meets.
You can also develop or build your Storybook in "preview-only" mode. This omits the manager UI; browser compatibility depends on your builder and its configuration. Open /iframe.html?navigator=true instead of /index.html. This does not add older-browser support to the Storybook manager.
Package manager release delays
Some package managers (pnpm 11 and later, Yarn 4.15 and later) wait about a day before they will install a version that was just published. The wait is a supply-chain precaution, because a bad release is often removed from the registry inside that window.
On the day a new Storybook version is published (e.g. 11.1.0), storybook@latest can still resolve to the previous version (11.0.x) with Yarn, or to the most recent pre-release (11.1.0-alpha.x) with pnpm, until the new version is old enough.
You can exempt Storybook from this wait. Each list below includes create-storybook (the package behind create storybook), along with the storybook binary itself.
pnpm
In pnpm 11 and 12, minimumReleaseAge defaults to 1440 minutes (one day). Add an exemption in pnpm-workspace.yaml with minimumReleaseAgeExclude. Patterns are allowed, so @storybook/* covers the scoped packages:
minimumReleaseAgeExclude:
  - storybook
  - create-storybook
  - '@storybook/*'
To run a single upgrade without editing that file, set the age to zero for one command. pnpm reads the pnpm_config_minimum_release_age environment variable as the minimumReleaseAge setting:
pnpm_config_minimum_release_age=0 pnpm dlx storybook@latest upgradeYarn
Yarn 4.15 changed the default of npmMinimalAgeGate to 1d for new projects. When you upgrade Yarn inside an existing project, Yarn writes the previous default into .yarnrc.yml, so that project keeps the old behavior until you change the setting. To let a new Storybook release through, list it under npmPreapprovedPackages in .yarnrc.yml. Entries can be package names or glob patterns:
npmPreapprovedPackages:
  - storybook
  - create-storybook
  - '@storybook/*'
yarn add and yarn up also accept --no-time-gate, which skips the check for that one command. yarn create and yarn dlx do not have this flag.
npm
npm does not wait unless you opt in with min-release-age. If you have set it, you can allow specific packages to update immediately with min-release-age-exclude in an .npmrc file. Each entry is a package name or a minimatch pattern:
min-release-age-exclude[]=storybook
min-release-age-exclude[]=create-storybook
min-release-age-exclude[]=@storybook/*
Bun
Bun does not wait unless you set minimumReleaseAge. If you have set it, exempt packages with minimumReleaseAgeExcludes under [install] in bunfig.toml. An entry is a package name, or one exact version of a package. Bun's docs do not describe glob patterns for this setting, so list @storybook packages by name if you need them exempted too:
[install]
minimumReleaseAgeExcludes = ["storybook", "create-storybook", "@storybook/react-vite"]
Installation
Run this command inside your project's root directory to install the latest version of Storybook:
npm create storybook@latestInstall a specific version
To install Storybook 8.3 or newer, you can use the create command with a specific version:
npm create storybook@8.3To install a Storybook version prior to 8.3, you must use the init command:
npx storybook@8.2 initFor either command, you can specify either an npm tag such as latest or next, or a (partial) version number. For example:
storybook@latest initwill initialize the latest versionstorybook@7.6.10 initwill initialize7.6.10storybook@7 initwill initialize the newest7.x.xversion
When installing, Storybook will present you with a series of interactive prompts to help customize your installation:
New to Storybook?
Storybook will ask if you're new to Storybook. If you select "Yes":
- You will be welcomed with an interactive tour
- Example stories will be created to help you learn
If you're experienced with Storybook, you can skip the onboarding to get a minimal setup.
What configuration should we install?
Storybook will ask what type of configuration you want to install:
- Recommended: Includes component development, documentation, testing, and accessibility features
- Minimal: Just the essentials for component development
You can also manually select these features using the --features flag. For example:
npm create storybook@latest --features docs test a11yAfter completing the prompts, the command above will make the following changes to your local environment:
- 📦 Install the required dependencies.
- 🛠 Set up the necessary scripts to run and build Storybook.
- 🛠 Add the default Storybook configuration.
- 📝 Add some boilerplate stories to get you started.
- 📡 Set up telemetry to help us improve Storybook. Read more about it here.
Run the Setup Wizard
If all goes well, you should see a setup wizard that will help you get started with Storybook introducing you to the main concepts and features, including how the UI is organized, how to write your first story, and how to test your components' response to various inputs utilizing controls.
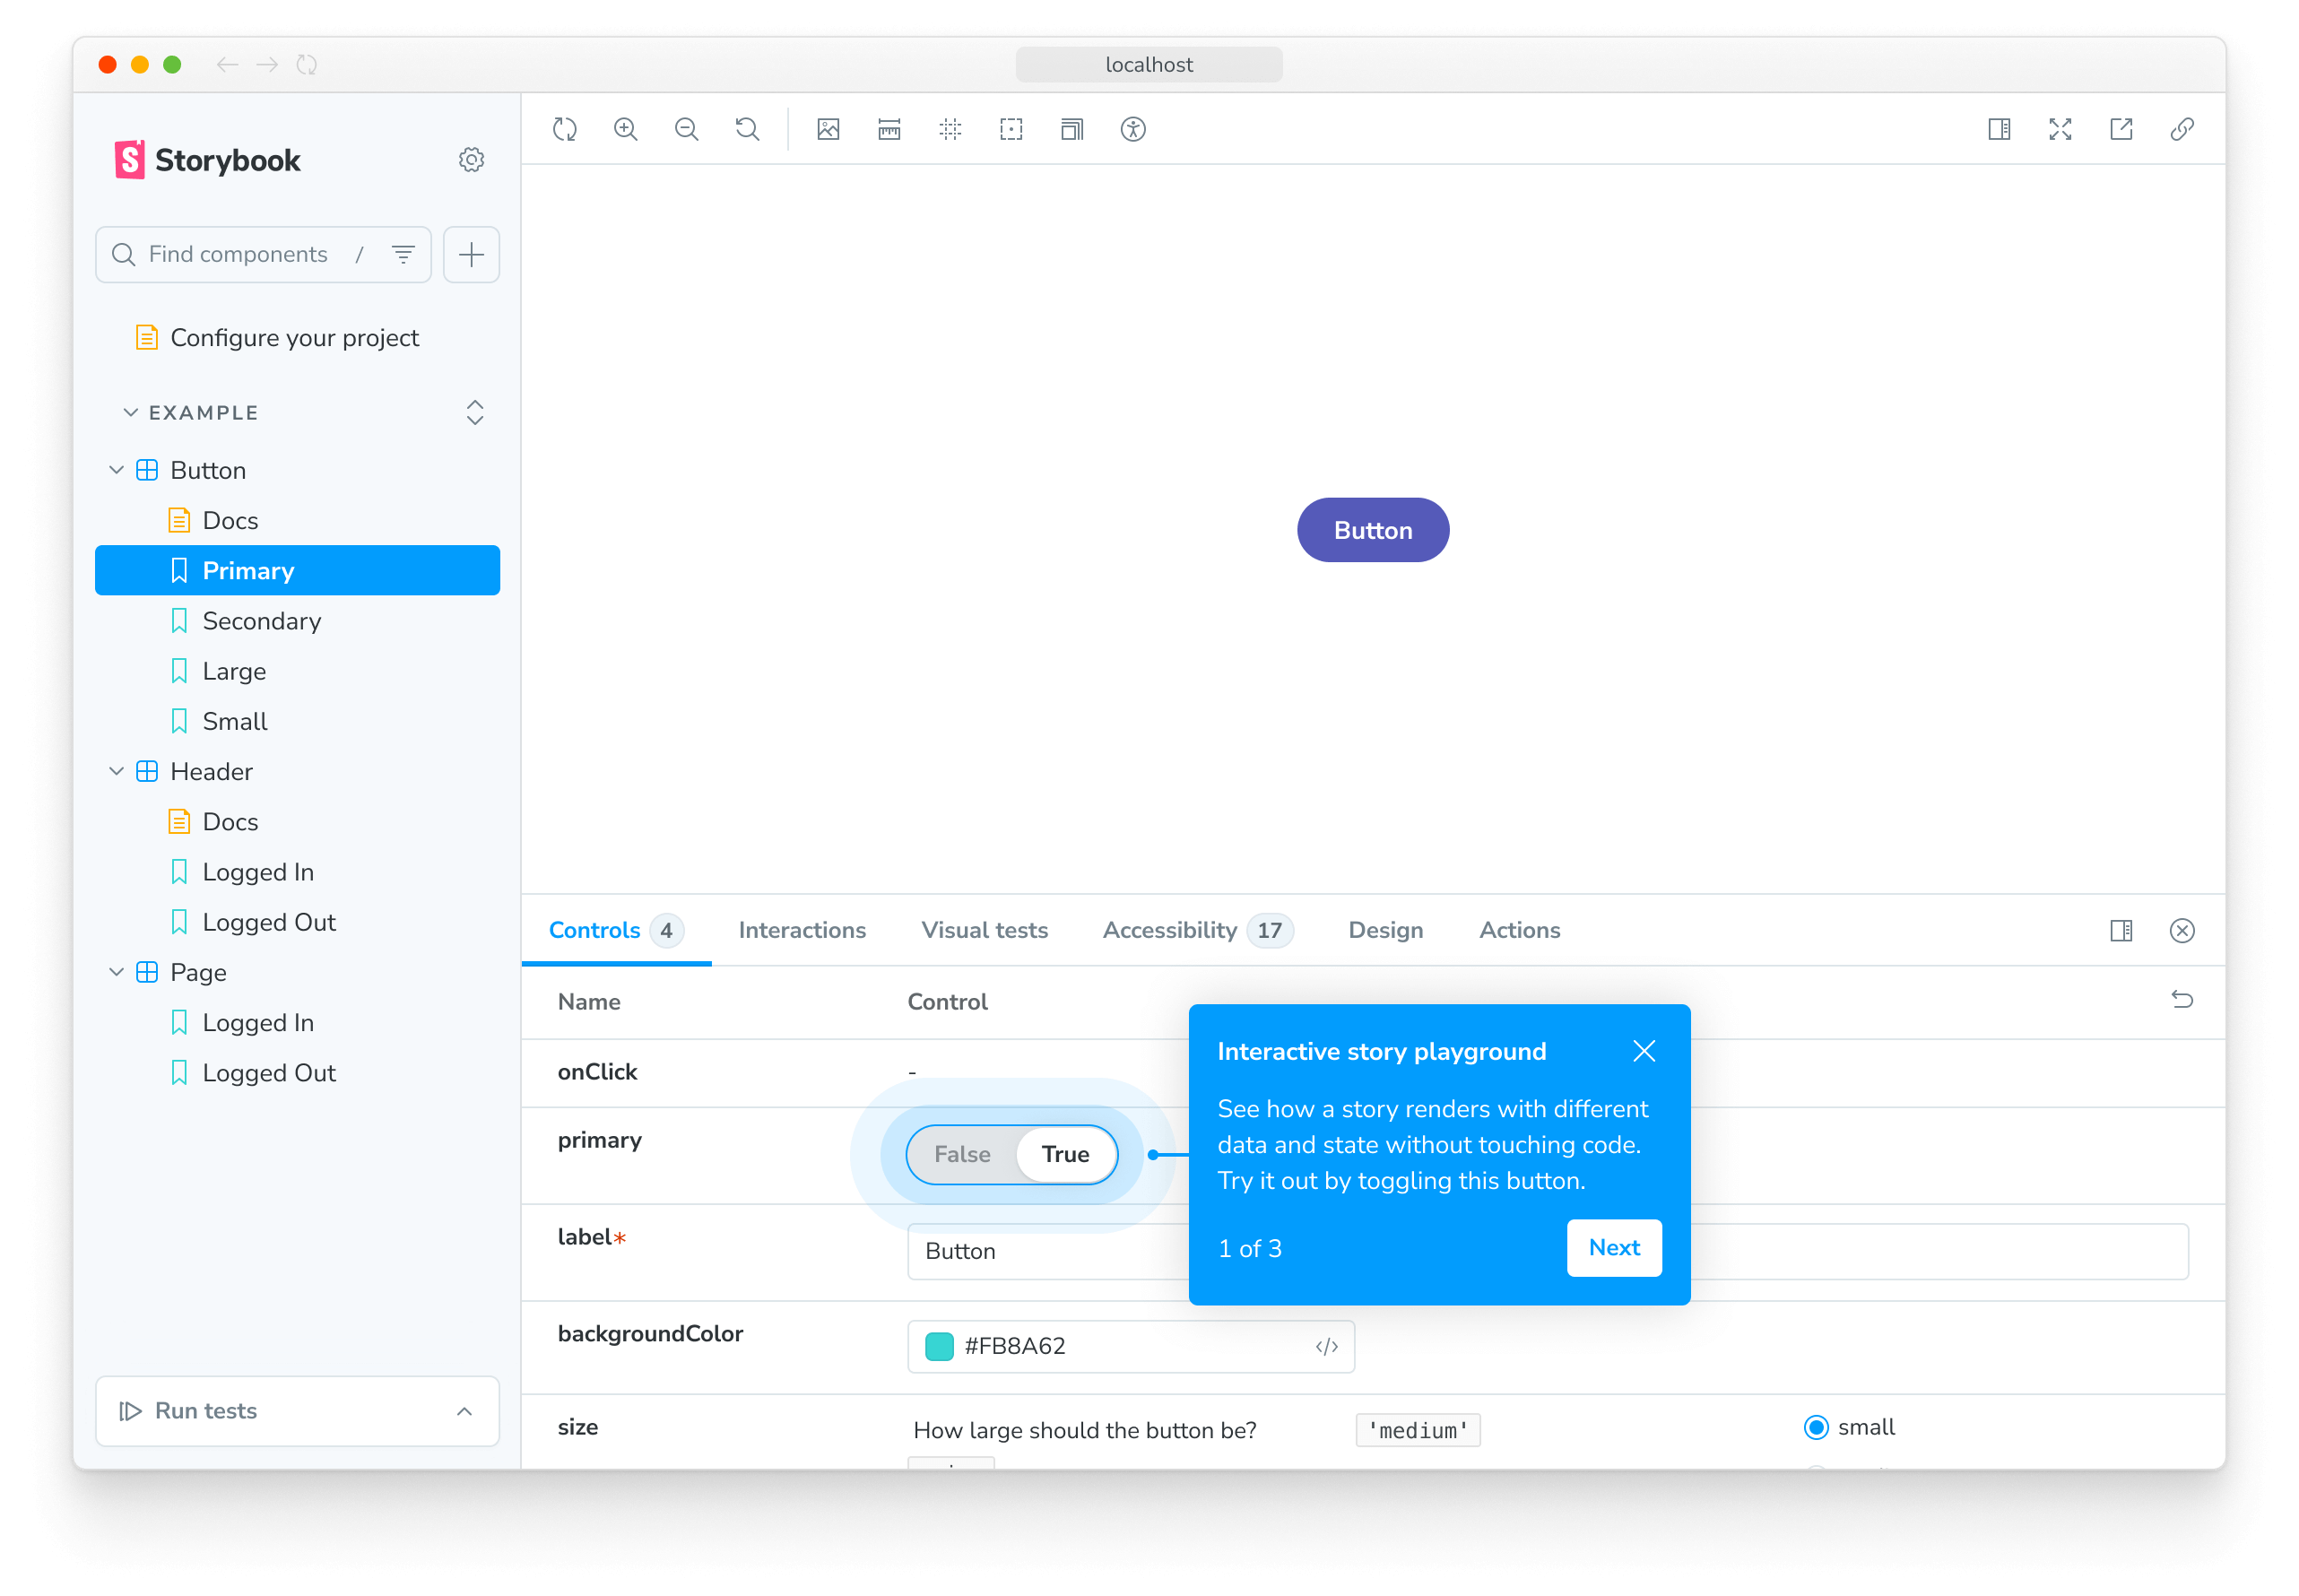
If you skipped the wizard, you can always run it again by adding the ?path=/onboarding query parameter to the URL of your Storybook instance, provided that the example stories are still available.
Start Storybook
Storybook comes with a built-in development server featuring everything you need for project development. Depending on your system configuration, running the storybook command will start the local development server, output the address for you, and automatically open the address in a new browser tab where a welcome screen greets you.
npm run storybookStorybook collects completely anonymous data to help us improve user experience. Participation is optional, and you may opt-out if you'd not like to share any information.
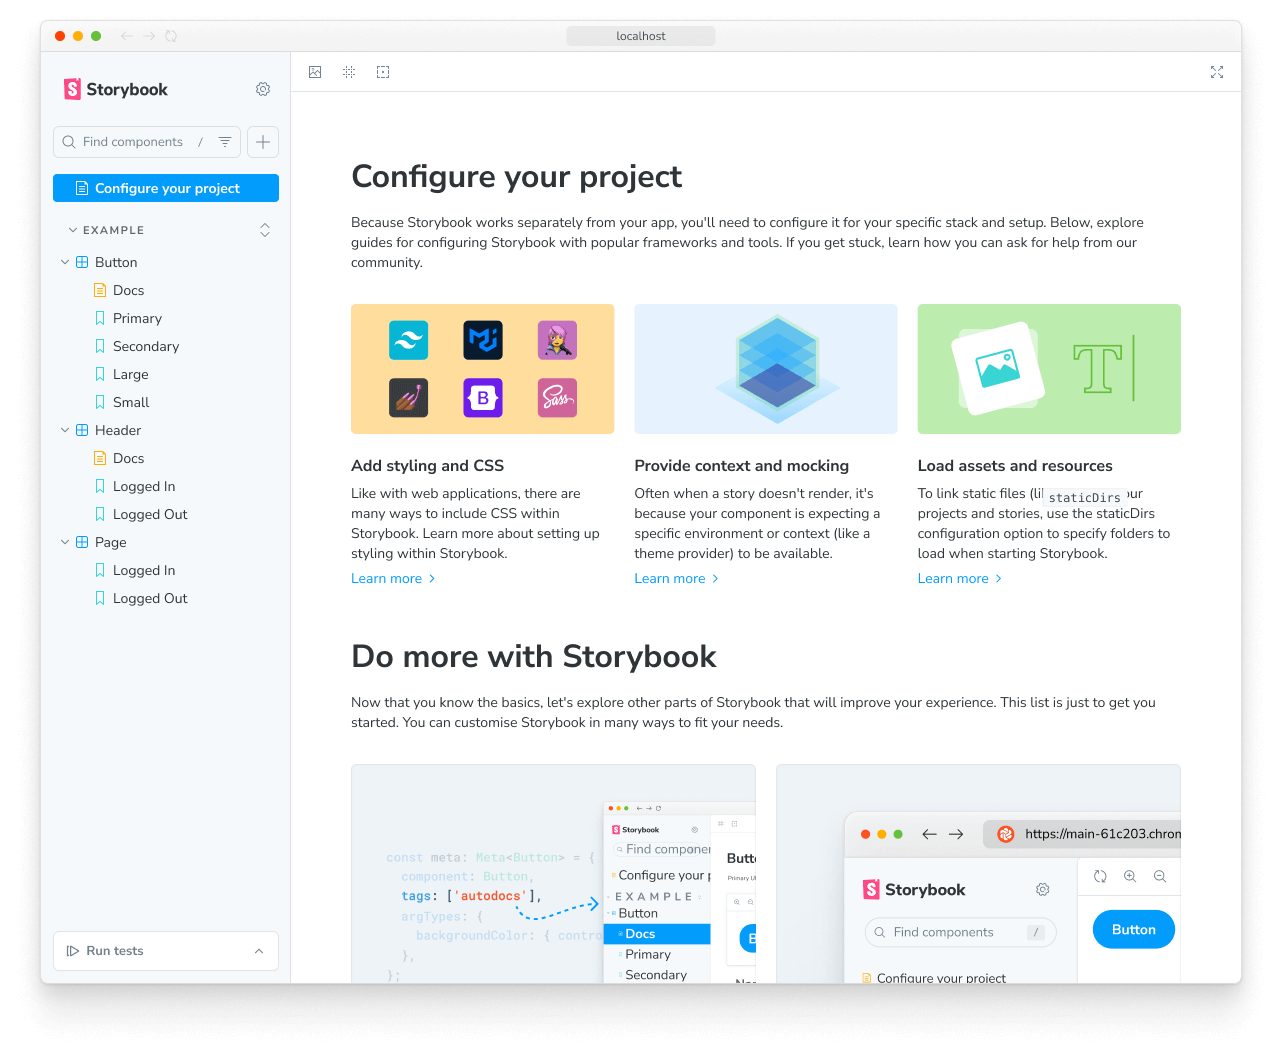
There are some noteworthy items here:
- A collection of useful links for more in-depth configuration and customization options you have at your disposal.
- A second set of links for you to expand your Storybook knowledge and get involved with the ever-growing Storybook community.
- A few example stories to get you started.
Troubleshooting
Run Storybook with other package managers
The Storybook CLI includes support for the industry's popular package managers (e.g., Yarn, npm, and pnpm) automatically detecting the one you are using when you initialize Storybook. However, if you want to use a specific package manager as the default, add the --package-manager flag to the installation command. For example:
npm create storybook@latest --package-manager=npmpnpm asks me to approve builds, or reports "Ignored build scripts: esbuild"
pnpm 10+ blocks dependencies' postinstall scripts until you approve them. Storybook depends on esbuild, which uses a postinstall script. You can pass --allow-build=esbuild to pnpm create or pnpm dlx to run the Storybook CLI with esbuild pre-approved (available since pnpm 10.2).
The Storybook CLI approves esbuild for your project by recording it under allowBuilds in pnpm-workspace.yaml (available since pnpm 10.26), so that future installs and updates run without problems. On older pnpm 10 releases, you may need to run pnpm approve-builds manually before installing Storybook.
The CLI doesn't detect my framework
If auto‑detection fails or you’re using a custom setup, pass the project type explicitly with --type when running the initializer. The allowed values are:
| Type | Framework |
|---|---|
angular | Angular |
astro | Astro |
ember | Ember |
html | HTML |
nextjs | Next.js |
nuxt | Nuxt |
preact | Preact |
qwik | Qwik |
react | React |
react_native | React Native |
react_native_web | React Native Web |
react_native_and_rnw | React Native (+ Web) |
react_project | React Project |
server | Server renderer |
solid | Solid |
svelte | Svelte |
sveltekit | SvelteKit |
vue3 | Vue 3 |
web_components | Web Components |
npm create storybook@latest --type solidRun Storybook with Webpack 4
If you previously installed Storybook in a project that uses Webpack 4, it will no longer work. This is because Storybook now uses Webpack 5 by default. To solve this issue, we recommend you upgrade your project to Webpack 5 and then run the following command to migrate your project to the latest version of Storybook:
npx storybook@latest automigrateStorybook doesn't work with an empty directory
By default, Storybook is configured to detect whether you're initializing it on an empty directory or an existing project. However, if you attempt to initialize Storybook, select a Vite-based framework (e.g., React) in a directory that only contains a package.json file, you may run into issues with Yarn Modern. This is due to how Yarn handles peer dependencies and how Storybook is set up to work with Vite-based frameworks, as it requires the Vite package to be installed. To solve this issue, you must install Vite manually and initialize Storybook.
The installation process seems flaky and keeps failing
If you're still running into some issues during the installation process, we encourage you to check out the following resources:
- Storybook's React Vite framework documentation for more information on how to set up Storybook in your React project with Vite.
- Storybook's React Webpack framework documentation for more information on how to set up Storybook in your React project with Webpack 5.
- Storybook's help documentation to contact the community and ask for help.
Now that you have successfully installed Storybook and understood how it works, let's continue where you left off in the setup wizard and delve deeper into writing stories.