Wire in data
So far, we have created isolated stateless components-–great for Storybook, but ultimately not helpful until we give them some data in our app.
This tutorial doesn’t focus on the particulars of building an app, so we won’t dig into those details here. But we will take a moment to look at a common pattern for wiring in data into connected components.
Connected components
Our TaskList component as currently written is “presentational” in that it doesn’t talk to anything external to its own implementation. We need to wire it to a data provider to get data into it.
This example uses Redux Toolkit, the most effective toolset for developing applications for storing data with Redux, to build a simple data model for our app. However, the pattern used here applies just as well to other data management libraries like Apollo and MobX.
Add the necessary dependencies to your project with:
yarn add @reduxjs/toolkit react-redux
First, we’ll construct a simple Redux store that responds to actions that change the task's state in a file called store.js in the root of our project.
/* A simple redux store/actions/reducer implementation.
 * A true app would be more complex and separated into different files.
 */
import { configureStore, createSlice } from '@reduxjs/toolkit';

/*
 * The initial state of our store when the app loads.
 * Usually, you would fetch this from a server. Let's not worry about that now
 */
const defaultTasks = [
  { id: '1', title: 'Something', state: 'TASK_INBOX' },
  { id: '2', title: 'Something more', state: 'TASK_INBOX' },
  { id: '3', title: 'Something else', state: 'TASK_INBOX' },
  { id: '4', title: 'Something again', state: 'TASK_INBOX' },
];
const TaskBoxData = {
  tasks: defaultTasks,
  status: 'idle',
  error: null,
};

/*
 * The store is created here.
 * You can read more about Redux Toolkit's slices in the docs:
 * https://redux-toolkit.js.org/api/createSlice
 */
const TasksSlice = createSlice({
  name: 'taskbox',
  initialState: TaskBoxData,
  reducers: {
    updateTaskState: (state, action) => {
      const { id, newTaskState } = action.payload;
      const task = state.tasks.findIndex((task) => task.id === id);
      if (task >= 0) {
        state.tasks[task].state = newTaskState;
      }
    },
  },
});

// The actions contained in the slice are exported for usage in our components
export const { updateTaskState } = TasksSlice.actions;

/*
 * Our app's store configuration goes here.
 * Read more about Redux's configureStore in the docs:
 * https://redux-toolkit.js.org/api/configureStore
 */
const store = configureStore({
  reducer: {
    taskbox: TasksSlice.reducer,
  },
});

export default store;
Then we’ll update our TaskList component to connect to the Redux store and render the tasks we are interested in:
import { Task } from './Task';
import { FlatList, Text, View } from 'react-native';
import { LoadingRow } from './LoadingRow';
import { MaterialIcons } from '@expo/vector-icons';
import { styles } from './styles';
import { useDispatch, useSelector } from 'react-redux';
import { updateTaskState } from '../store';

export const TaskList = () => {
  // We're retrieving our state from the store
  const tasks = useSelector((state) => {
    const tasksInOrder = [
      ...state.taskbox.tasks.filter((t) => t.state === 'TASK_PINNED'),
      ...state.taskbox.tasks.filter((t) => t.state !== 'TASK_PINNED'),
    ];
    const filteredTasks = tasksInOrder.filter(
      (t) => t.state === 'TASK_INBOX' || t.state === 'TASK_PINNED'
    );
    return filteredTasks;
  });

  const { status } = useSelector((state) => state.taskbox);

  const dispatch = useDispatch();

  const pinTask = (value) => {
    // We're dispatching the Pinned event back to our store
    dispatch(updateTaskState({ id: value, newTaskState: 'TASK_PINNED' }));
  };

  const archiveTask = (value) => {
    // We're dispatching the Archive event back to our store
    dispatch(updateTaskState({ id: value, newTaskState: 'TASK_ARCHIVED' }));
  };

  if (status === "loading") {
    return (
      <View style={[styles.listItems, { justifyContent: "center" }]}>
        <LoadingRow />
        <LoadingRow />
        <LoadingRow />
        <LoadingRow />
        <LoadingRow />
        <LoadingRow />
      </View>
    );
  }

  if (tasks.length === 0) {
    return (
      <View style={styles.listItems}>
        <View style={styles.wrapperMessage}>
          <MaterialIcons name="check" size={64} color={"#2cc5d2"} />
          <Text style={styles.titleMessage}>You have no tasks</Text>
          <Text style={styles.subtitleMessage}>Sit back and relax</Text>
        </View>
      </View>
    );
  }

  return (
    <View style={styles.listItems}>
      <FlatList
        data={tasks}
        keyExtractor={(task) => task.id}
        renderItem={({ item }) => (
          <Task
            key={item.id}
            task={item}
            onPinTask={(task) => pinTask(task)}
            onArchiveTask={(task) => archiveTask(task)}
          />
        )}
      />
    </View>
  );
};
Now that we have some actual data populating our component, obtained from the Redux store, we could have wired it up our app App.jsx and render the component there. But for now, let's hold off doing that and continue on our component-driven journey.
Supplying context with decorators
Our Storybook stories have stopped working with this change because our Tasklist is now a connected component since it relies on a Redux store to retrieve and update our tasks.
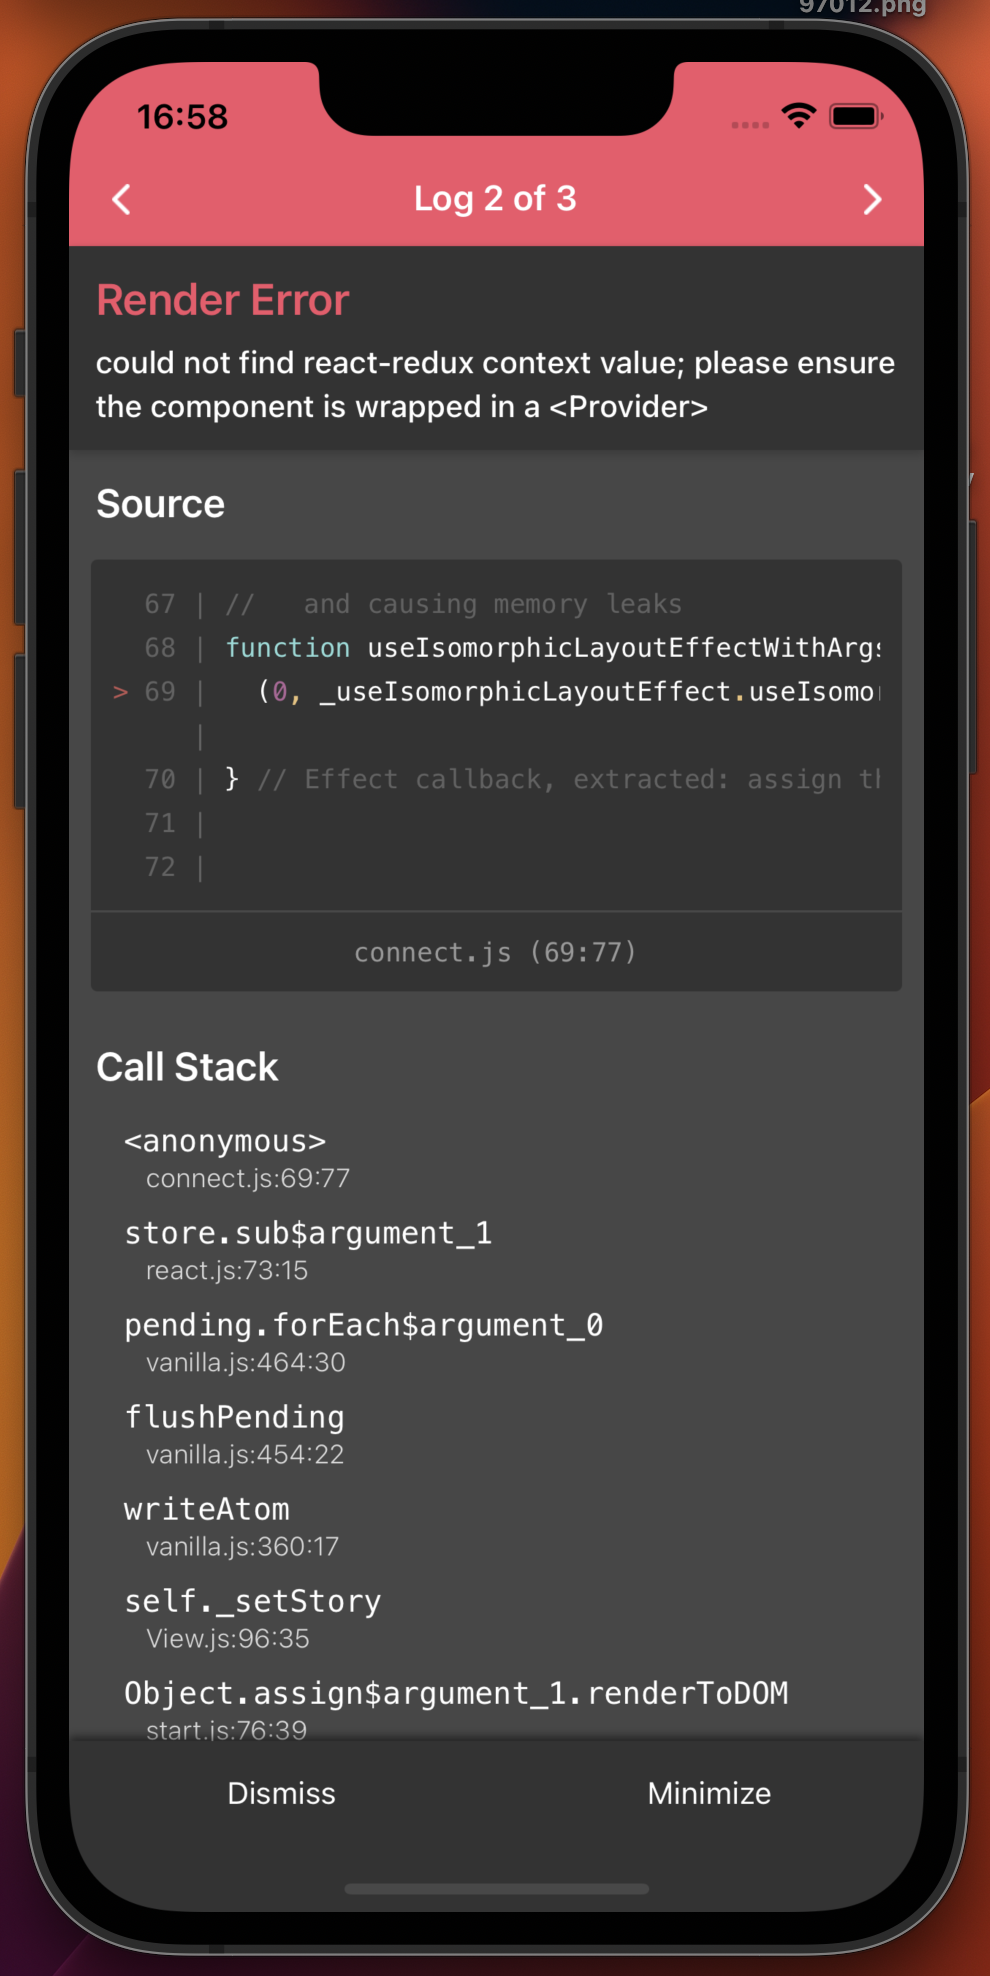
We can use various approaches to solve this issue. Still, as our app is pretty straightforward, we can rely on a decorator, similar to what we did in the previous chapter and provide a mocked store-- in our Storybook stories:
import { TaskList } from './TaskList';
import { Default as TaskStory } from './Task.stories';
import { View } from 'react-native';
import { Provider } from 'react-redux';

import { configureStore, createSlice } from '@reduxjs/toolkit';

// A super-simple mock of the state of the store
const MockedState = {
  tasks: [
    { ...TaskStory.args.task, id: '1', title: 'Task 1' },
    { ...TaskStory.args.task, id: '2', title: 'Task 2' },
    { ...TaskStory.args.task, id: '3', title: 'Task 3' },
    { ...TaskStory.args.task, id: '4', title: 'Task 4' },
    { ...TaskStory.args.task, id: '5', title: 'Task 5' },
    { ...TaskStory.args.task, id: '6', title: 'Task 6' },
  ],
  status: 'idle',
  error: null,
};

// A super-simple mock of a redux store
const Mockstore = ({ taskboxState, children }) => (
  <Provider
    store={configureStore({
      reducer: {
        taskbox: createSlice({
          name: 'taskbox',
          initialState: taskboxState,
          reducers: {
            updateTaskState: (state, action) => {
              const { id, newTaskState } = action.payload;
              const task = state.tasks.findIndex((task) => task.id === id);
              if (task >= 0) {
                state.tasks[task].state = newTaskState;
              }
            },
          },
        }).reducer,
      },
    })}
  >
    {children}
  </Provider>
);

export default {
  component: TaskList,
  title: 'TaskList',
  decorators: [
    (Story) => (
      <View style={{ padding: 42, flex: 1 }}>
        <Story />
      </View>
    ),
  ],
  argTypes: {
    onPinTask: { action: 'onPinTask' },
    onArchiveTask: { action: 'onArchiveTask' },
  },
};

export const Default = {
  decorators: [
    (story) => <Mockstore taskboxState={MockedState}>{story()}</Mockstore>,
  ],
  args: {
    // Shaping the stories through args composition.
    // The data was inherited from the Default story in Task.stories.js.
    tasks: [
      { ...TaskStory.args.task, id: '1', title: 'Task 1' },
      { ...TaskStory.args.task, id: '2', title: 'Task 2' },
      { ...TaskStory.args.task, id: '3', title: 'Task 3' },
      { ...TaskStory.args.task, id: '4', title: 'Task 4' },
      { ...TaskStory.args.task, id: '5', title: 'Task 5' },
      { ...TaskStory.args.task, id: '6', title: 'Task 6' },
    ],
  },
};

export const WithPinnedTasks = {
  decorators: [
    (story) => {
      const pinnedtasks = [
        ...MockedState.tasks.slice(0, 5),
        { id: '6', title: 'Task 6 (pinned)', state: 'TASK_PINNED' },
      ];

      return (
        <Mockstore
          taskboxState={{
            ...MockedState,
            tasks: pinnedtasks,
          }}
        >
          {story()}
        </Mockstore>
      );
    },
  ],
  args: {
    // Shaping the stories through args composition.
    // Inherited data coming from the Default story.
    tasks: [
      ...Default.args.tasks.slice(0, 5),
      { id: '6', title: 'Task 6 (pinned)', state: 'TASK_PINNED' },
    ],
  },
};

export const Loading = {
  decorators: [
    (story) => (
      <Mockstore
        taskboxState={{
          ...MockedState,
          status: 'loading',
        }}
      >
        {story()}
      </Mockstore>
    ),
  ],
  args: {
    tasks: [],
    loading: true,
  },
};

export const Empty = {
  decorators: [
    (story) => (
      <Mockstore
        taskboxState={{
          ...MockedState,
          tasks: [],
        }}
      >
        {story()}
      </Mockstore>
    ),
  ],
  args: {
    // Shaping the stories through args composition.
    // Inherited data coming from the Loading story.
    ...Loading.args,
    loading: false,
  },
};
Success! We're right where we started, our Storybook is now working, and we're able to see how we could supply data into a connected component.