Install Storybook
Use the Storybook CLI to install it in a single command. Run this inside your project’s root directory:
npm create storybook@latestInstall a specific version
For installing Storybook 8.3 or newer, you can use the create command with a specific version:
npm create storybook@8.3To install a Storybook version prior to 8.3, you must use the init command:
npx storybook@8.2 initFor either command, you can specify either an npm tag such as latest or next, or a (partial) version number. For example:
-
storybook@latest initwill initialize the latest version -
storybook@7.6.10 initwill initialize7.6.10 -
storybook@7 initwill initialize the newest7.x.xversion
Storybook will look into your project's dependencies during its install process and provide you with the best configuration available.
The command above will make the following changes to your local environment:
- 📦 Install the required dependencies.
- 🛠 Setup the necessary scripts to run and build Storybook.
- 🛠 Add the default Storybook configuration.
- 📝 Add some boilerplate stories to get you started.
- 📡 Set up telemetry to help us improve Storybook. Read more about it here.
Watch a video tutorial
Run the Setup Wizard
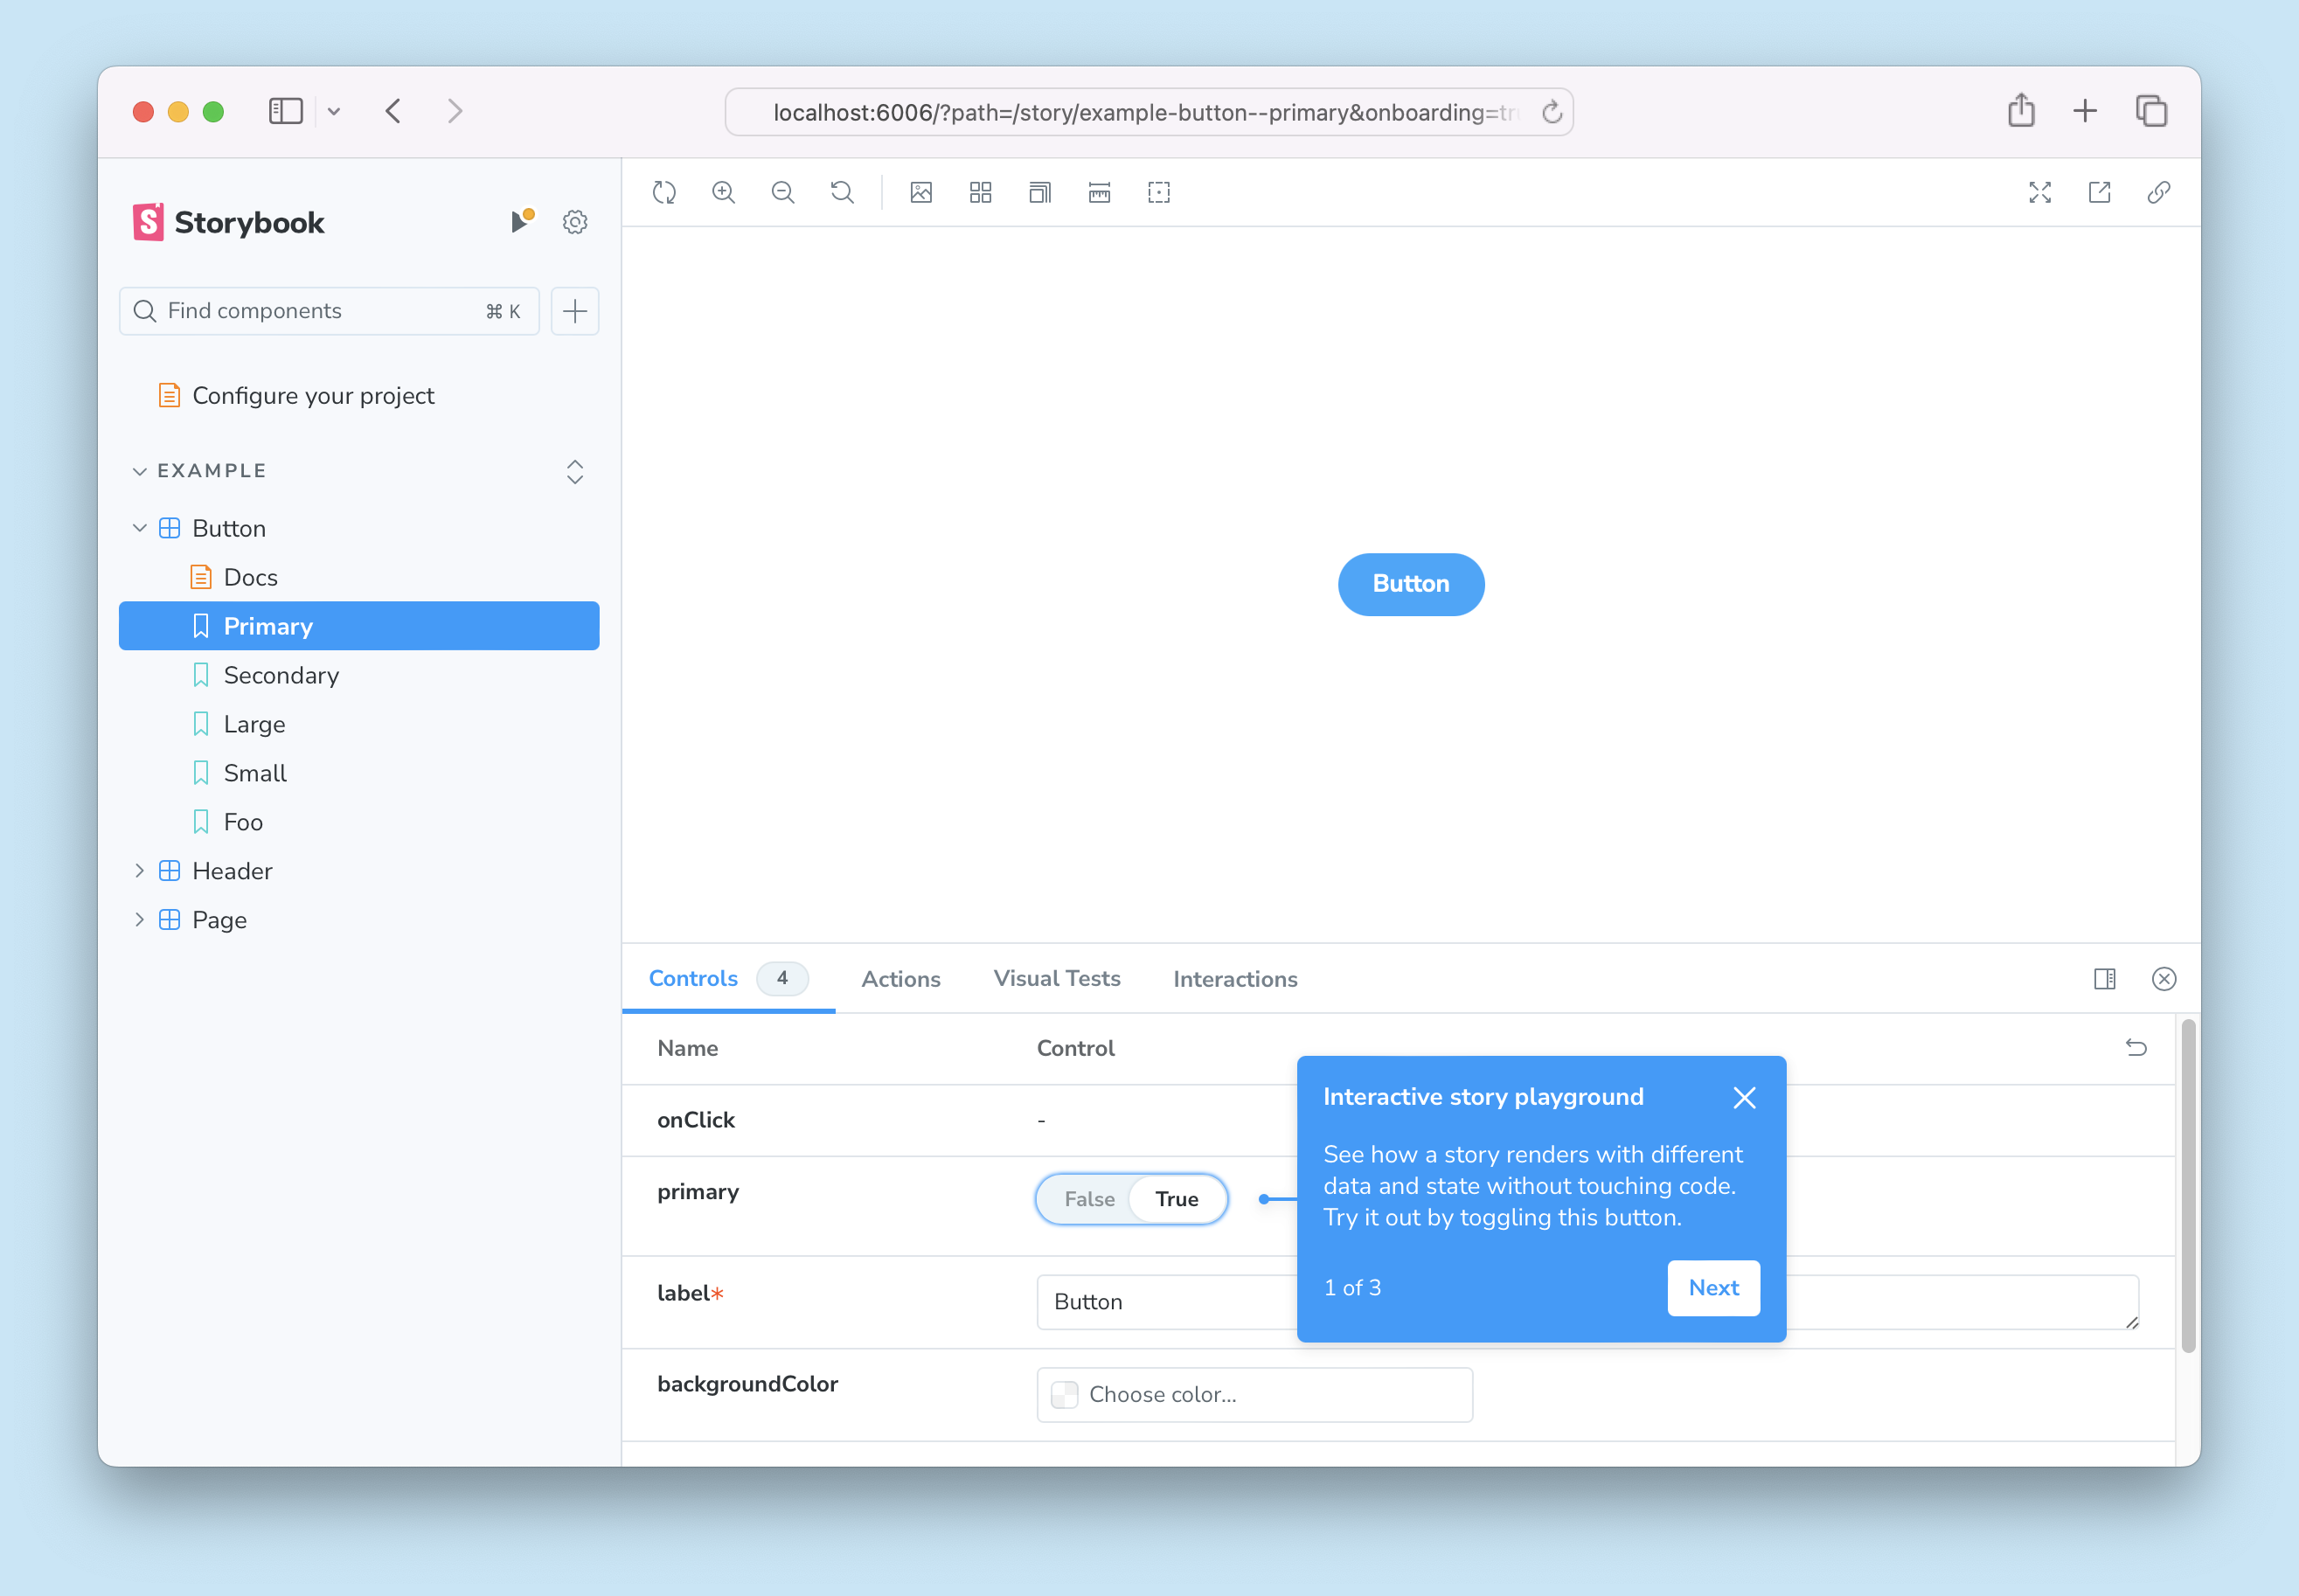
If all goes well, you should see a setup wizard that will help you get started with Storybook introducing you to the main concepts and features, including how the UI is organized, how to write your first story, and how to test your components' response to various inputs utilizing controls.

If you skipped the wizard, you can always run it again by adding the ?path=/onboarding query parameter to the URL of your Storybook instance, provided that the example stories are still available.
Start Storybook
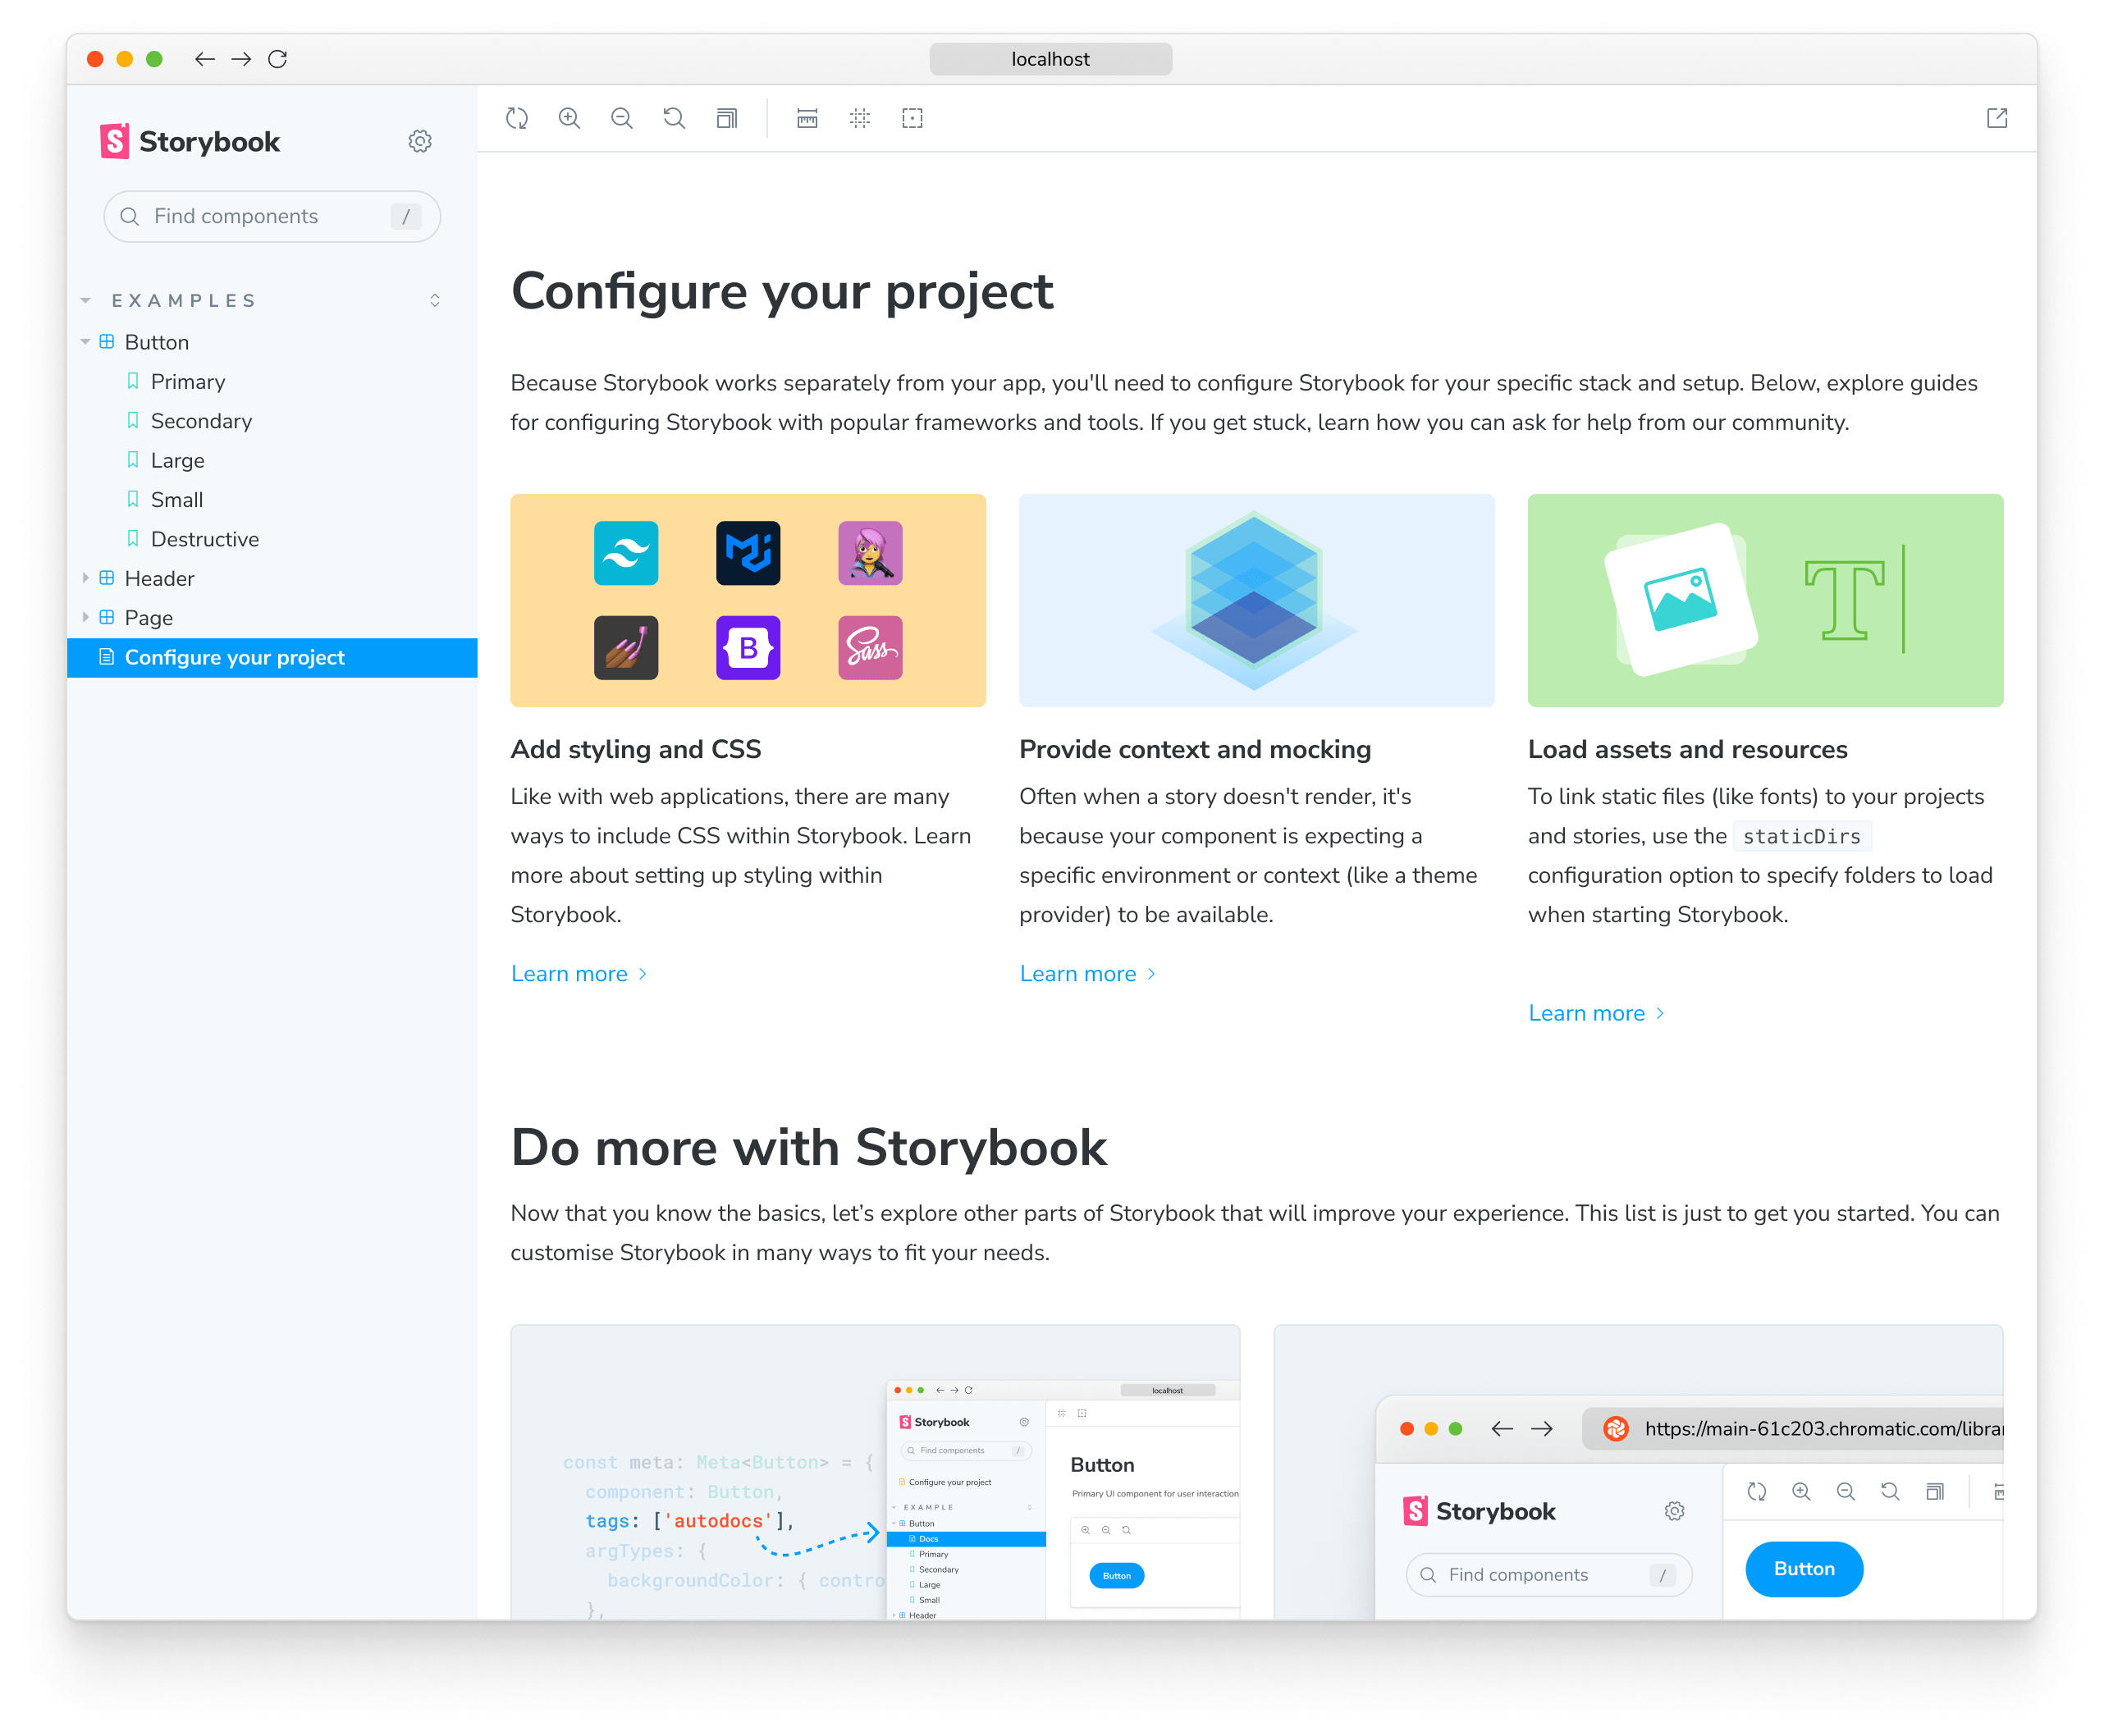
Storybook comes with a built-in development server featuring everything you need for project development. Depending on your system configuration, running the storybook command will start the local development server, output the address for you, and automatically open the address in a new browser tab where a welcome screen greets you.
npm run storybookStorybook collects completely anonymous data to help us improve user experience. Participation is optional, and you may opt-out if you'd not like to share any information.

There are some noteworthy items here:
- A collection of useful links for more in-depth configuration and customization options you have at your disposal.
- A second set of links for you to expand your Storybook knowledge and get involved with the ever-growing Storybook community.
- A few example stories to get you started.
Troubleshooting
Run Storybook with other package managers
The Storybook CLI includes support for the industry's popular package managers (e.g., Yarn, npm, and pnpm) automatically detecting the one you are using when you initialize Storybook. However, if you want to use a specific package manager as the default, add the --package-manager flag to the installation command. For example:
npm create storybook@latest --package-manager=npmThe CLI doesn't detect my framework
If you're working with a custom environment setup or need to set up Storybook manually, you can use the --type flag to specify the framework you need to use. Listed below are the supported frameworks and examples of how to use them:
| Framework | Type |
|---|---|
| Angular | angular |
| Ember | ember |
| HTML | html |
| Next.js | nextjs |
| Preact | preact |
| Qwik | qwik |
| React | react |
| Server | server |
| Solid | solid |
| Svelte | svelte |
| Vue 3 | vue3 |
| Web Components | web_components |
npm create storybook@latest --type solidYarn Plug'n'Play (PnP) support with Storybook
If you've enabled Storybook in a project running on a new version of Yarn with Plug'n'Play (PnP) enabled, you may notice that it will generate node_modules with some additional files and folders. This is a known constraint as Storybook relies on some directories (e.g., .cache) to store cache files and other data to improve performance and faster builds. You can safely ignore these files and folders, adjusting your .gitignore file to exclude them from the version control you're using.
Run Storybook with Webpack 4
If you previously installed Storybook in a project that uses Webpack 4, it will no longer work. This is because Storybook now uses Webpack 5 by default. To solve this issue, we recommend you upgrade your project to Webpack 5 and then run the following command to migrate your project to the latest version of Storybook:
npx storybook@latest automigrateStorybook doesn't work with an empty directory
By default, Storybook is configured to detect whether you're initializing it on an empty directory or an existing project. However, if you attempt to initialize Storybook, select a Vite-based framework (e.g., React) in a directory that only contains a package.json file, you may run into issues with Yarn Modern. This is due to how Yarn handles peer dependencies and how Storybook is set up to work with Vite-based frameworks, as it requires the Vite package to be installed. To solve this issue, you must install Vite manually and initialize Storybook.
The installation process seems flaky and keeps failing
If you're still running into some issues during the installation process, we encourage you to check out the following resources:
- Storybook's React Vite framework documentation for more information on how to set up Storybook in your React project with Vite.
- Storybook's React Webpack framework documentation for more information on how to set up Storybook in your React project with Webpack 5.
- Storybook's help documentation to contact the community and ask for help.
Now that you have successfully installed Storybook and understood how it works, let's continue where you left off in the setup wizard and delve deeper into writing stories.
