Testing component interactions
You flip the switch, and the light doesn’t turn on. It could be a burnt-out light bulb, or it could be faulty wiring. The switch and the bulb are connected to each other with wires inside the walls.
Apps are the same. On the surface is the UI that the user sees and interacts with. Under the hood, the UI is wired up to facilitate the flow of data and events.
As you build more complex UIs like pages, components become responsible for more than just rendering the UI. They fetch data and manage state. This chapter will teach you how to use a computer to simulate and verify user interactions.
Does that component really work?
A component's primary task is to render a piece of the UI given a set of props. More complex components also track application state and pass behaviours down the component tree.
For example, a component will start with an initial state. When the user types something in an input field or clicks a button, it triggers an event within the app. The component updates state in response to this event. Those state changes then update the rendered UI. That's the complete cycle for an interaction.
On the InboxScreen, the user can click on the star icon to pin a task. Or click on the checkbox to archive it. Visual tests ensure that the component looks right in all those states. We also need to ensure that the UI is responding to those interactions correctly.
How does component testing in Storybook work?
Testing interactions is a widespread pattern for verifying user behavior. You provide mock data to set up a test scenario, simulate user interactions using Testing Library, and check the resultant DOM structure.
In Storybook, this familiar workflow happens in your browser. That makes it easier to debug failures because you're running tests in the same environment as you develop components—the browser.
We'll start by writing a story to set up the component's initial state. Then simulate user behavior such as clicks and form entries using the play function. Finally, use the Storybook test runner to check whether the UI and component state update correctly.
Setup the test runner
Run the following command to install it:
yarn add --dev @storybook/test-runner
Then add a test task to your project’s package.json:
{
  "scripts": {
    "test-storybook": "test-storybook"
  }
}
Lastly, start up your Storybook (the test runner will run against your local Storybook instance):
yarn storybook
Reuse stories as component test cases
In the previous chapter, we catalogued all the use cases of the InboxScreen component in the InboxScreen.stories.jsx file. That allowed us to spot-check appearance during development and catch regressions via visual tests. These stories will now also power our component tests.
import { http, HttpResponse } from 'msw';

import InboxScreen from './InboxScreen';

import { Default as TaskListDefault } from './components/TaskList.stories';

export default {
  component: InboxScreen,
  title: 'InboxScreen',
};

export const Default = {
  parameters: {
    msw: {
      handlers: [
        http.get('/tasks', () => {
          return HttpResponse.json(TaskListDefault.args);
        }),
      ],
    },
  },
};

export const Error = {
  args: {
    error: 'Something',
  },
  parameters: {
    msw: {
      handlers: [
        http.get('/tasks', () => {
          return HttpResponse.json([]);
        }),
      ],
    },
  },
};
Write a component test using the play function
Testing Library offers a convenient API for simulating user interactions—click, drag, tap, type, etc. Whereas Vitest provides assertion utilities. We'll use Storybook-instrumented versions of these two tools to write the test. Therefore, you get a familiar developer-friendly syntax to interact with the DOM, but with extra telemetry to help with debugging.
The test itself will be housed inside a play function. This snippet of code gets attached to a story and runs after the story is rendered.
Let's add in our first component test to verify that the user can pin a task:
import { http, HttpResponse } from 'msw';

import InboxScreen from './InboxScreen';

import { Default as TaskListDefault } from './components/TaskList.stories';

import { expect, userEvent, findByRole, within } from '@storybook/test';

// ... code omitted for brevity ...

export const PinTask = {
  parameters: {
    ...Default.parameters,
  },
  play: async ({ canvasElement }) => {
    const canvas = within(canvasElement);
    const getTask = (id) => canvas.findByRole('listitem', { name: id });

    const itemToPin = await getTask('task-4');
    // Find the pin button
    const pinButton = await findByRole(itemToPin, 'button', { name: 'pin' });
    // Click the pin button
    await userEvent.click(pinButton);
    // Check that the pin button is now a unpin button
    const unpinButton = within(itemToPin).getByRole('button', {
      name: 'unpin',
    });
    await expect(unpinButton).toBeInTheDocument();
  },
};
💡 The @storybook/test package replaces the @storybook/jest and @storybook/testing-library testing packages, offering a smaller bundle size and a more straightforward API based on the Vitest package.
Each play function receives the Canvas element—the top-level container of the story. You can scope your queries to just within this element, making it easier to find DOM nodes.
We're looking for the "Export logo" task in our case. Then find the pin button within it and click it. Finally, we check to see if the button has updated to the unpinned state.
When Storybook finishes rendering the story, it executes the steps defined within the play function, interacting with the component and pinning a task—similar to how a user would do it. If you check your interactions panel, you'll see the step-by-step flow. It also offers a handy set of UI controls to pause, resume, rewind, and step through each interaction.
Execute tests with test runner
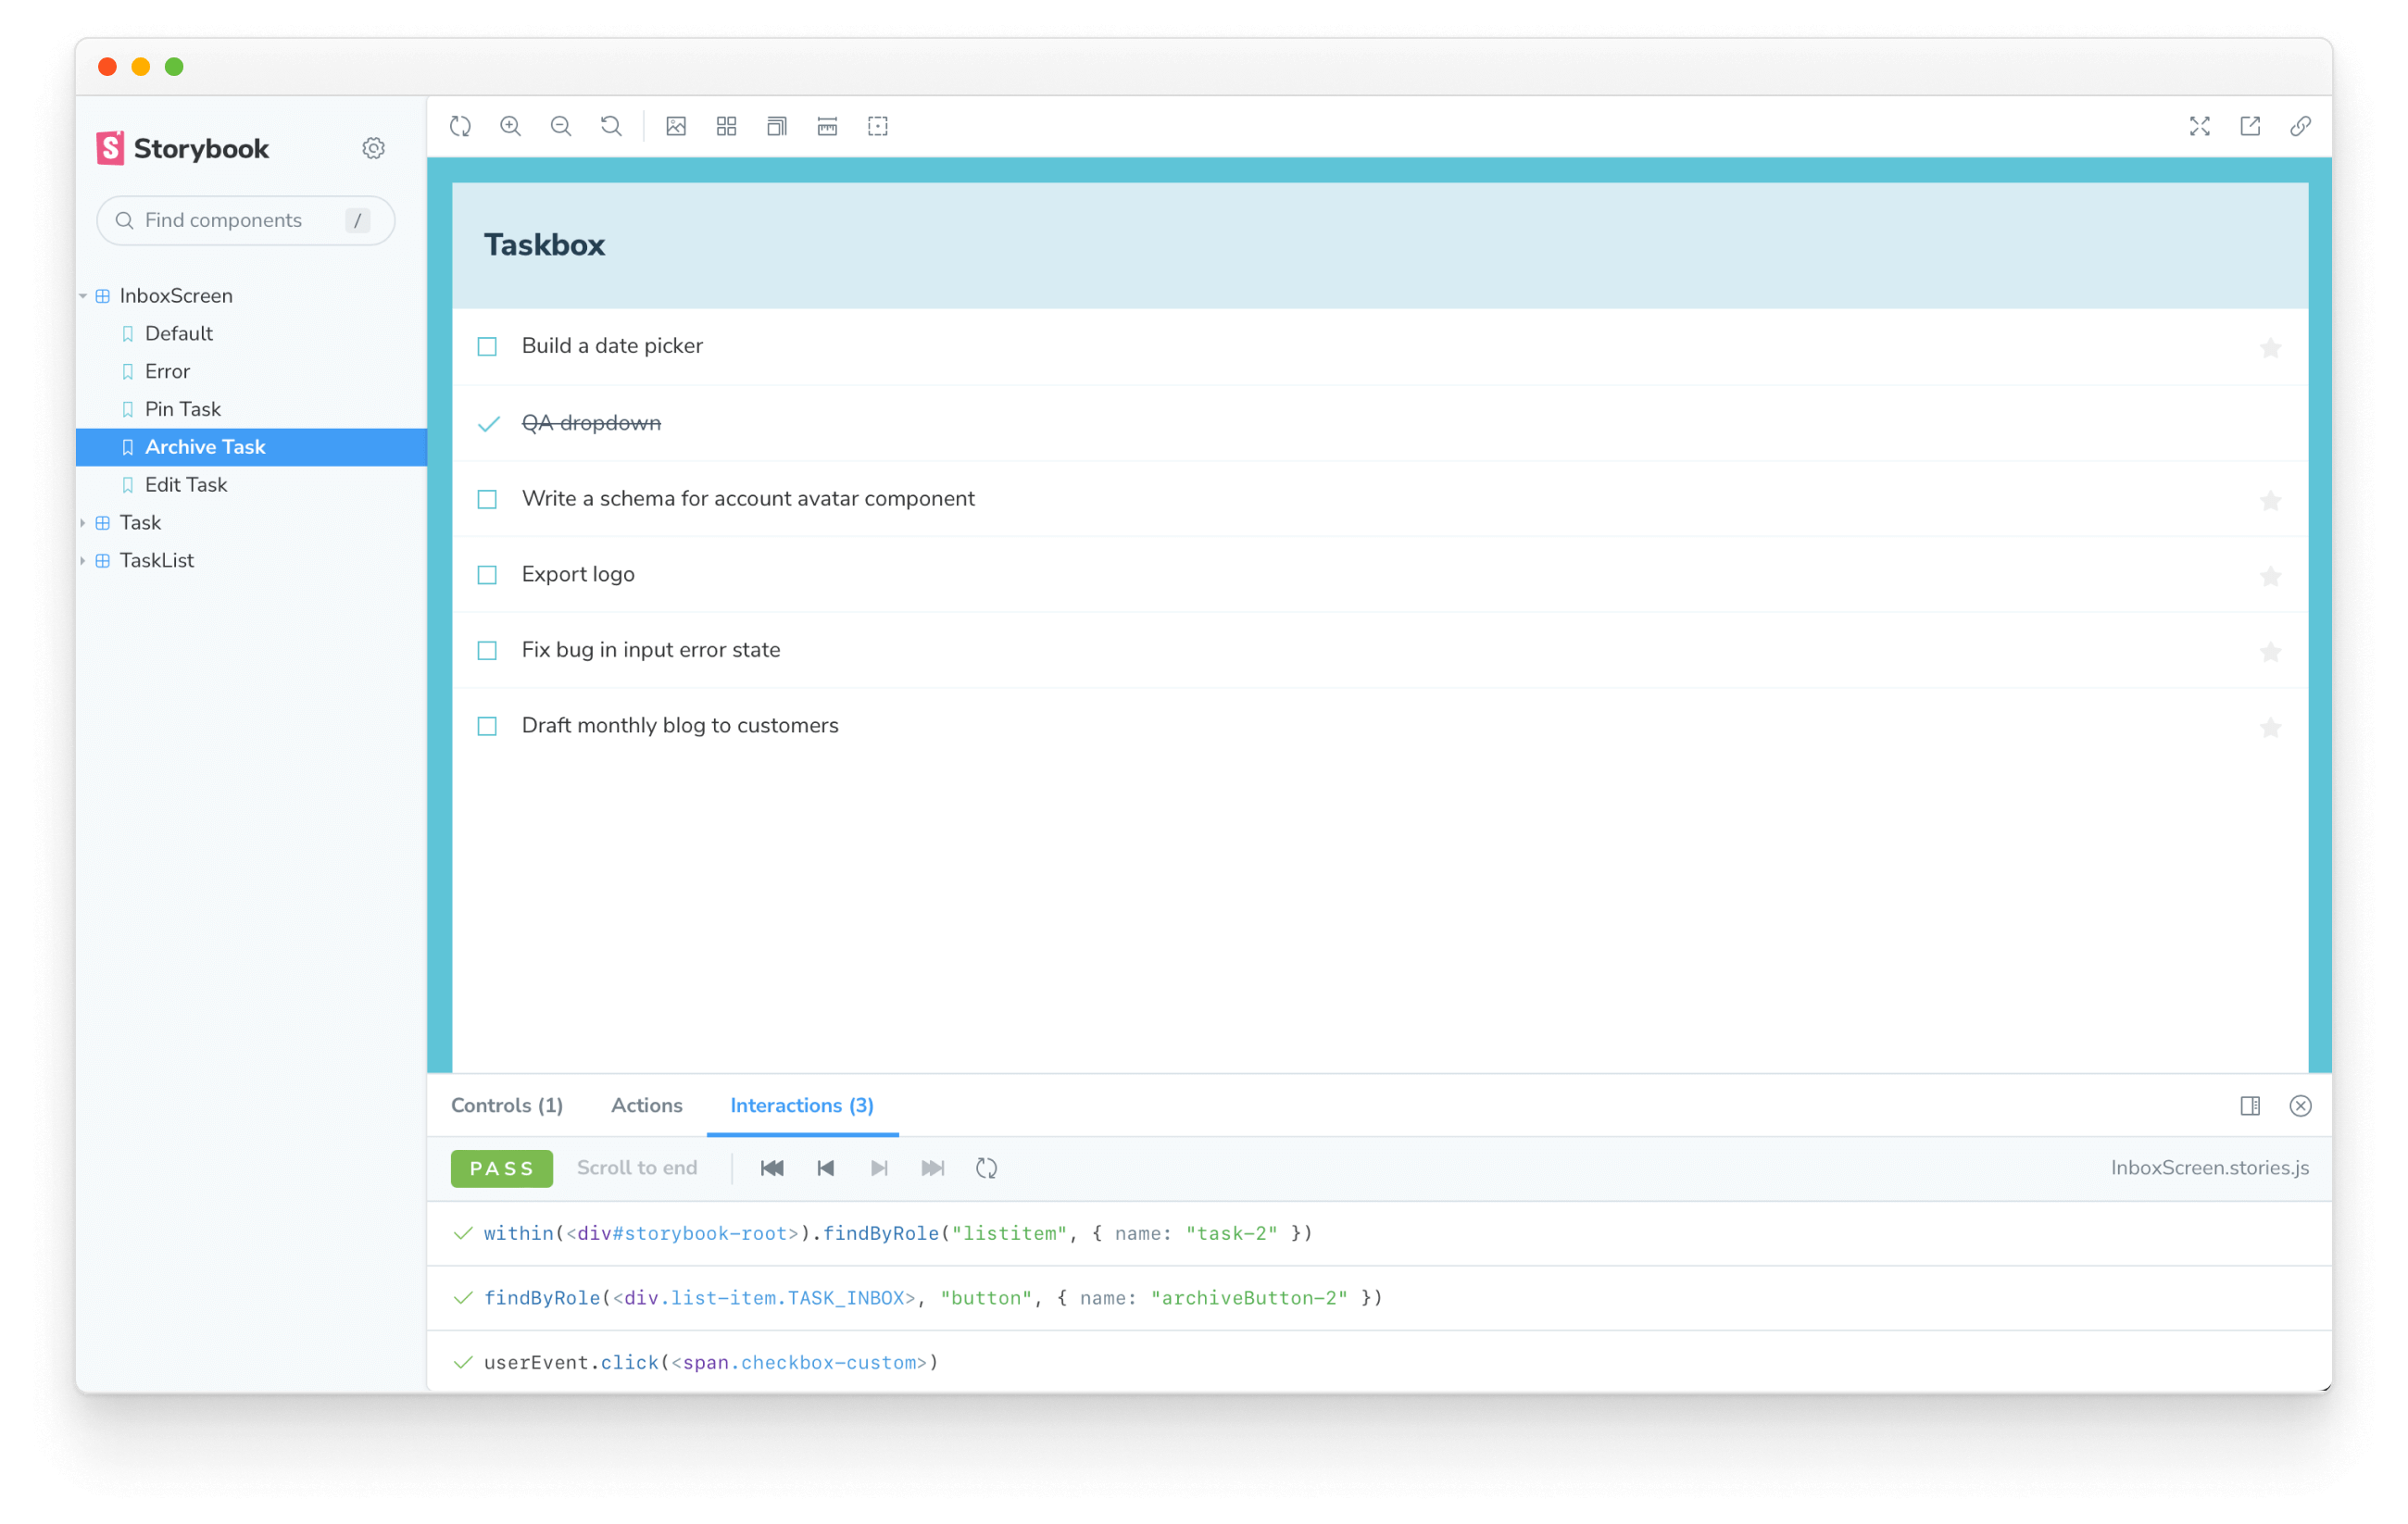
Now that we have our first test down, let's go ahead and add tests for the archive and edit task functionalities.
// ... code omitted for brevity ...

export const ArchiveTask = {
  parameters: {
    ...Default.parameters,
  },
  play: async ({ canvasElement }) => {
    const canvas = within(canvasElement);
    const getTask = (id) => canvas.findByRole('listitem', { name: id });

    const itemToArchive = await getTask('task-2');
    const archiveButton = await findByRole(itemToArchive, 'button', {
      name: 'archiveButton-2',
    });
    await userEvent.click(archiveButton);
  },
};

export const EditTask = {
  parameters: {
    ...Default.parameters,
  },
  play: async ({ canvasElement }) => {
    const canvas = within(canvasElement);
    const getTask = (id) => canvas.findByRole('listitem', { name: id });

    const itemToEdit = await getTask('task-5');
    const taskInput = await findByRole(itemToEdit, 'textbox');
    await userEvent.type(taskInput, ' and disabled state');
    await expect(taskInput.value).toBe(
      'Fix bug in input error state and disabled state'
    );
  },
};
You should now see stories for these scenarios. Storybook only runs the component test when you’re viewing a story. Therefore, you'd have to review each story to run all your checks.
It's unrealistic to manually review the entire Storybook whenever you make a change. Storybook test runner automates that process. It's a standalone utility—powered by Playwright—that runs all your tests and catches broken stories.
Start the test runner (in a separate terminal window):
yarn test-storybook --watch
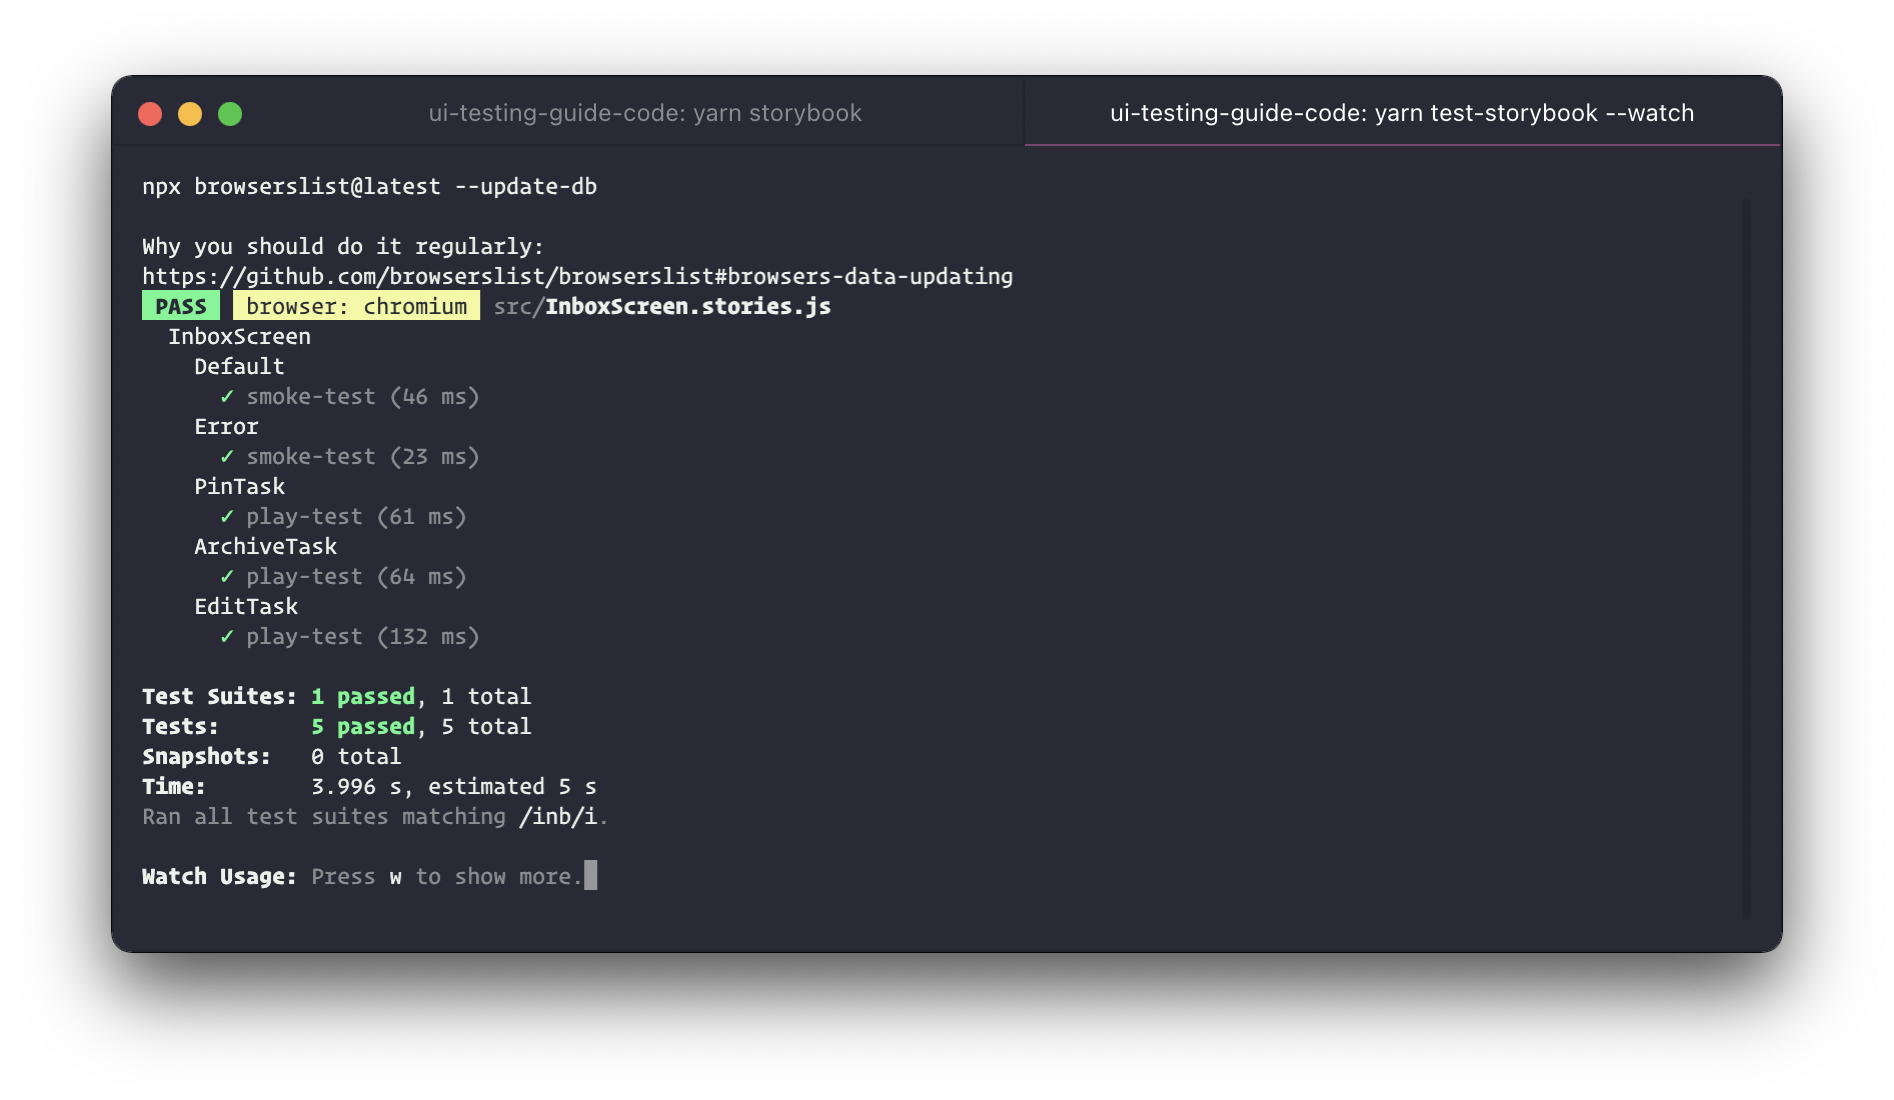
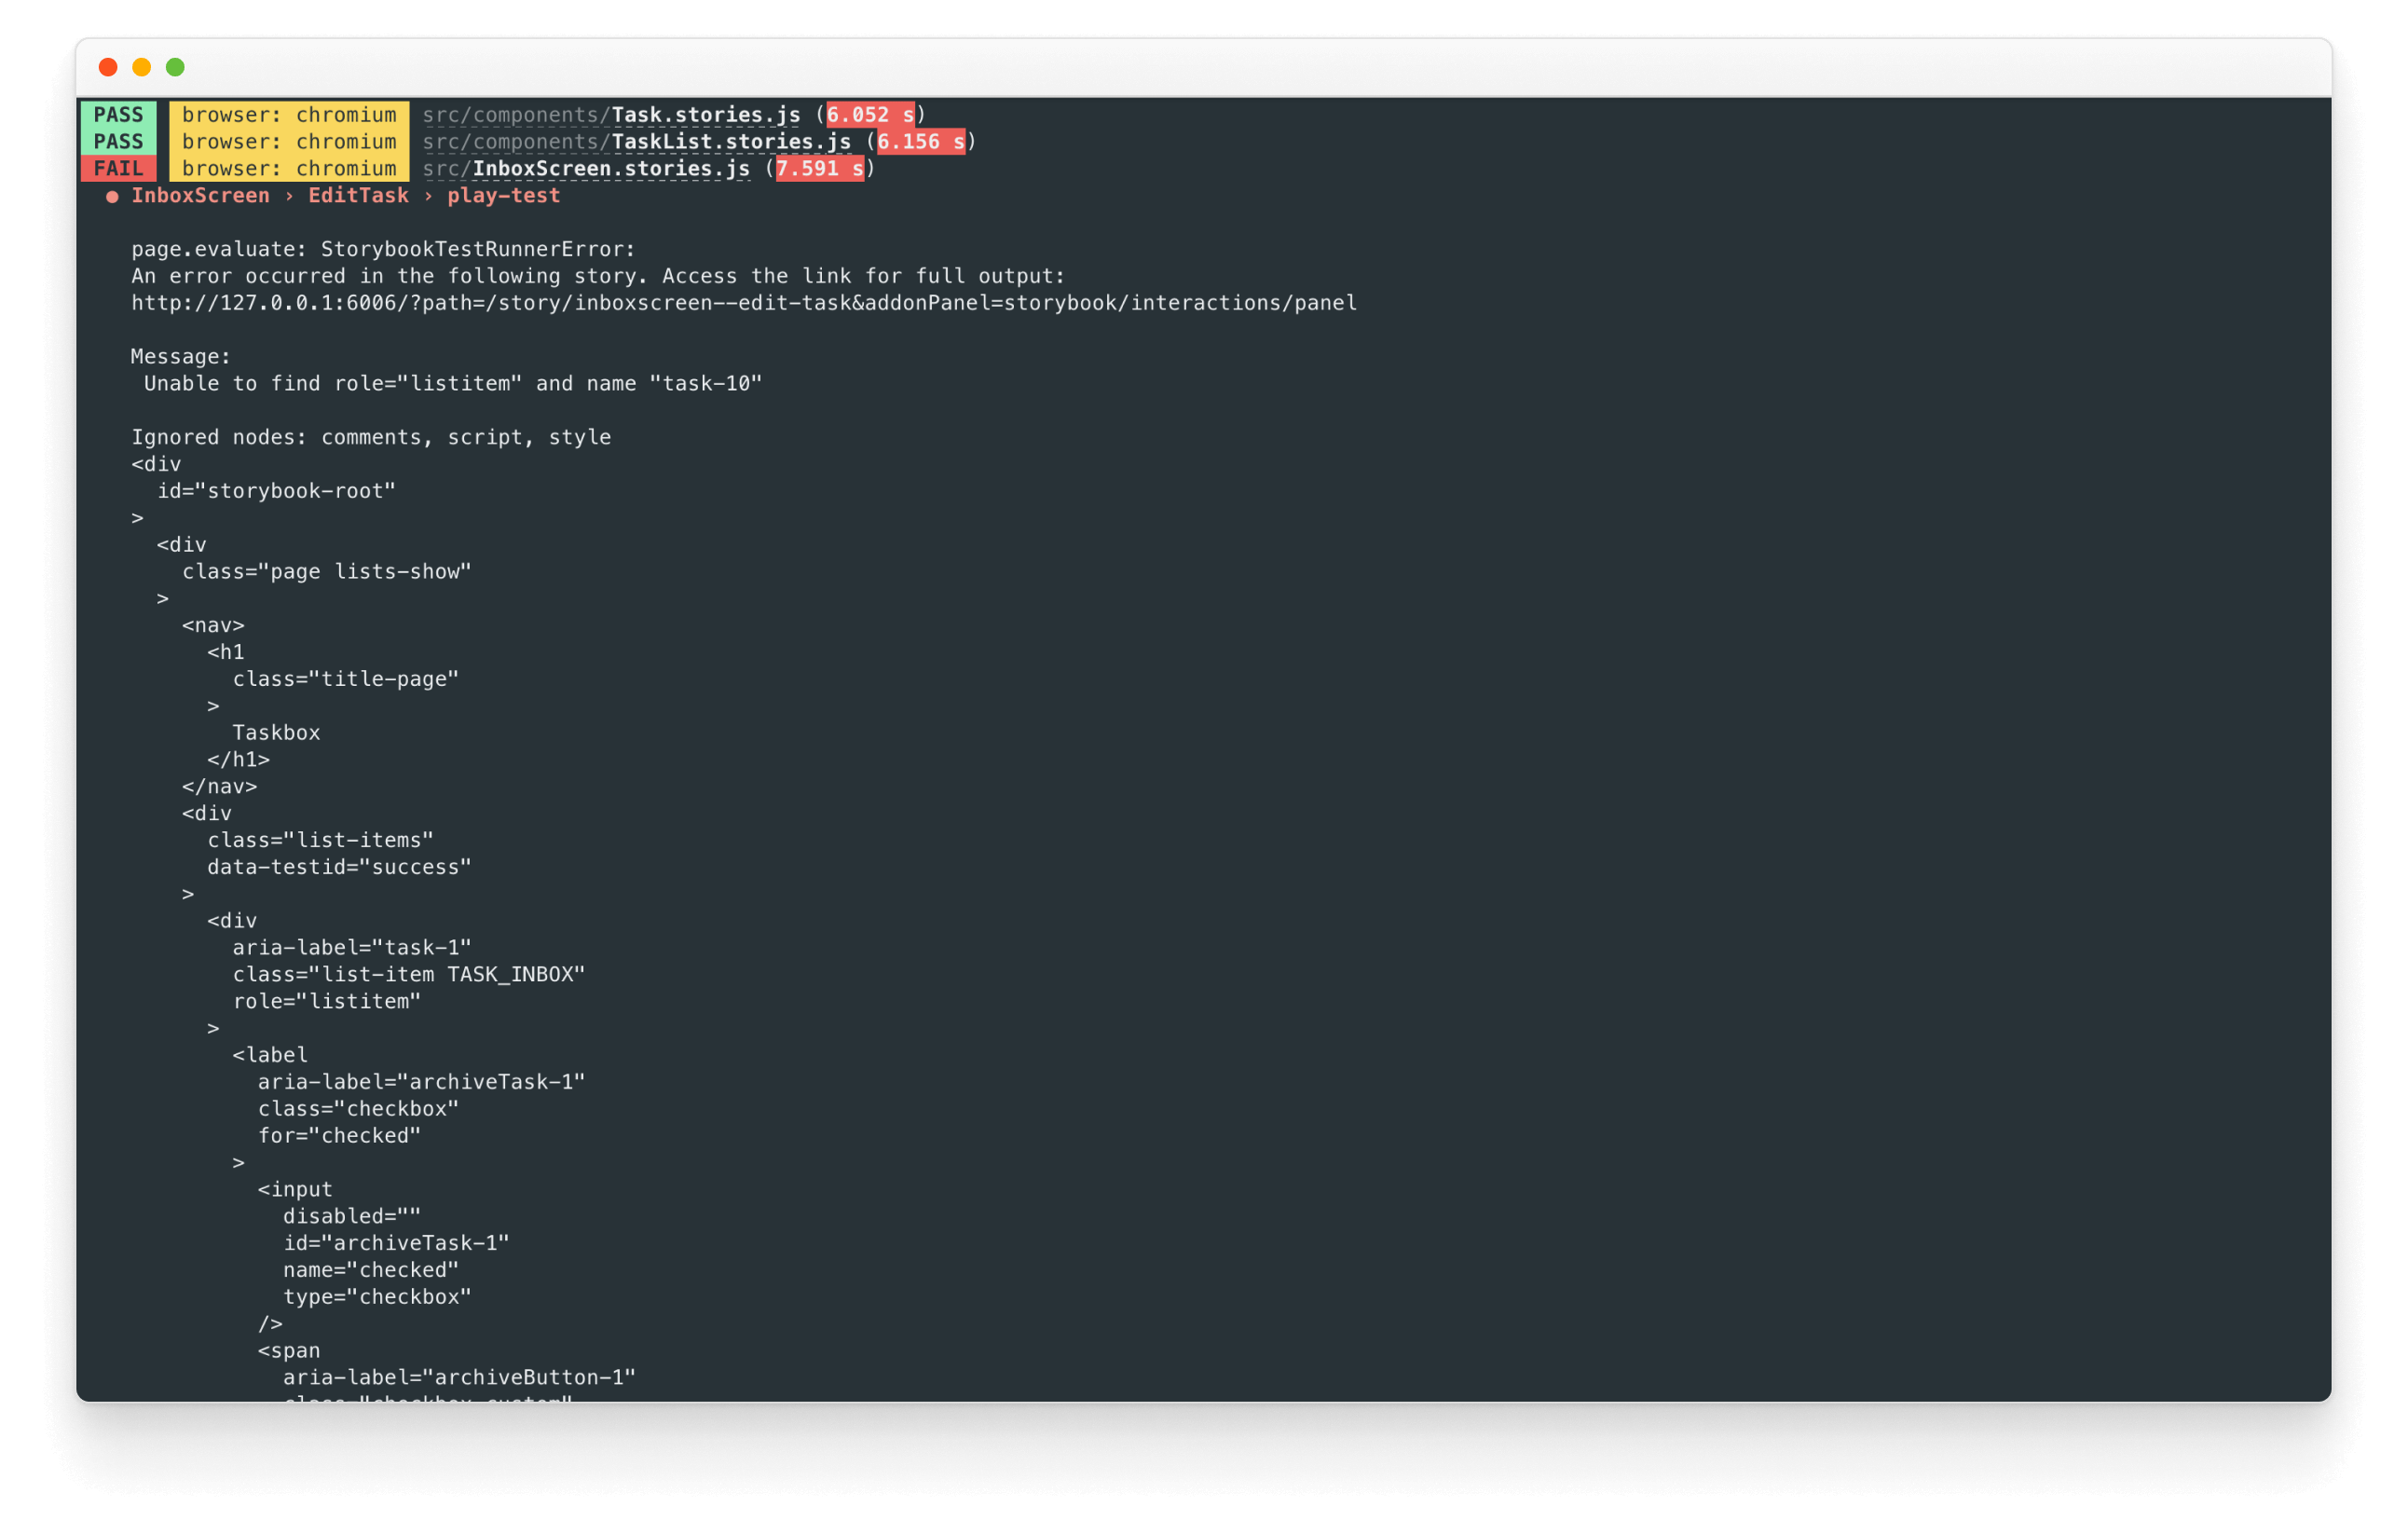
It'll verify whether all stories rendered without any errors and that all assertions are passed. If a test fails, you get a link that opens up the failing story in the browser.
In summary, the setup code and test are both located in the stories file. Using a play function, we interacted with the UI as a user would. Storybook component tests combine the intuitive debugging environment of a live browser with the performance and scriptability of headless browsers.
Catching usability issues
When you ensure your UI is usable to every user, you impact the business financials and satisfy legal requirements. It’s a win-win. The next chapter demonstrates how you can leverage the portability of stories to simplify accessibility testing.